
The world based on the 1997 film Hercules makes a reappearance in Kingdom Hearts III, though in a form different from its predecessors; Sora, Donald, and Goofy do not begin their journey through the world at the Coliseum, but on Mount Olympus. Some nearby vases can be broken for a decent amount of munny before proceeding toward the world's first battle.
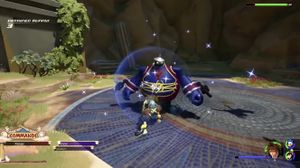
Four types of Heartless appear before the party: Shadows, Soldiers, Air Soldiers, and a Large Body. If you have some experience with the franchise, these Heartless should look familiar. As instructed, use this opportunity to practice casting some magic, an ability that should prove useful in later battles (though only Fire and Water magic are available for now). Shadows and Soldiers will charge at Sora if they aren't kept at bay, and Air Soldiers will swipe from the sky. Deal with them before taking on the Large Body, whose attacks consist of stomping on the ground to create a shockwave and sliding around on its belly. Cast magic to deal considerable damage to it from the front or behind, though it can also be struck from both angles with hits from the Keyblade (in a departure from previous entries in the series, in which attacks from the front would simply rebound off of the Large Body's belly).
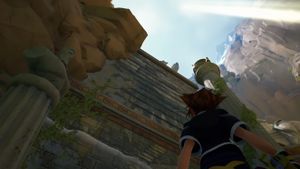
Following the defeat of the Heartless, you are given access to the game's menu, where you can prepare your party for future battles. For now, equip Sora with any available items and set magic/items to shortcuts for easy access mid-battle. Now approach the painted brick wall to the left for some information on free running, a new ability available to Sora that allows him to scale walls or cross ledges that are faintly glowing with a simple movement of the analog stick. Run up this wall to find yourself on a cliff. To the left, overlooking the rest of the area, sits a treasure chest containing an AP Boost.
Drop back down and run up the wall to the right. Here, you should come face to face with a giant statue. Run up the stone wall to the right of it, and then another stone wall at the end of the path. Walk toward the trees to trigger a scene which sends Sora, Donald, and Goofy to a new location.
Thebes[edit]
Save at the save point and proceed forward for another scene. What follows is another battle against a new type of Heartless: the Flame Cores, fiery monsters that toss fireballs and, if driven to a corner, race through the air while engulfed in flames. Use flowmotion to dodge attacks and Water magic to douse the Flame Cores, weakening them even as they perform their desperation move. If in need of health, smash open some pots and vases near the walls. After the battle is another scene, and another new location.
Overlook[edit]
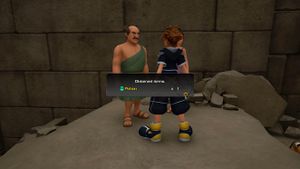
Open the chest ahead for Map: Thebes and proceed down the stairs. After defeating another group of Flame Cores (by the right wall of this area is an ingredient which you can make use of in the next world), a scene introduces you to team attacks. Use Trinity Sled to slide across the fire, making a slight left turn when a rock formation crumbles in your path. After crossing the fire, make your way to the back wall, straight ahead. Against this wall is a chest containing a Potion. Proceeding forward, slide across the rooftops to land on a platform, then slide across some more rooftops to land in an alcove. Here, open the chest for an AP Boost and defeat the Popcat Heartless posing as regular pots. Drop down to the ground below to be confronted with more Heartless: Soldiers and Air Soldiers. Defeat them and approach the couple cowering up on some rocks for a Potion.
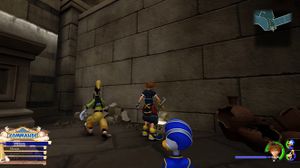
Before proceeding down the stairs, turn back the other way, up some stairs. By the wall at the end of the path is a chest containing an Ether. Return to the rescued couple and proceed down the stairs, toward another fire. Again, use Trinity Sled to cross the fire, though there's a split in the path this time; take the left path and follow the stairs upward to find a chest containing a Shield Belt, which you can equip to Sora, Donald, or Goofy for some extra defense. Free run across some obstacles to return to the start of the fire, and take the right path this time to find yourself in a different part of the city.
Gardens[edit]
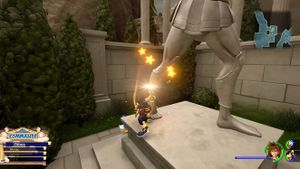
After dropping down a ledge, make a sharp left into a building where a man is cowering before some Heartless. Defeat them and speak to him for a Hi-Potion. You can also hit some bowls here for some ingredients. Exit the building and proceed down the narrow path to find a save point, a chest containing a Potion beneath a gazebo, and some ingredients that can be picked behind it. Proceed past a fountain and down some stairs for a short scene, after which the party must do battle with some Flame Cores. Use Water and flowmotion to defeat them and rescue the civilian. Instead of continuing forward, take a path off to the right to find a statue. Attack its heel to reveal a chest containing a Magic Ring. Continue forward, sliding down the incline and picking some ingredients along the way.
The Big Olive[edit]
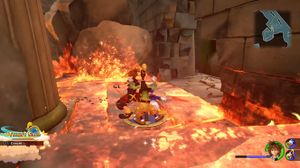
Run along a wall to cross the fiery gap, as well as find an alcove where some Popcat Heartless and a chest containing a Mega-Potion can be found. Back on the ground, defeat some Heartless harassing a woman and child and speak to them for a Potion. Ahead is another fire that you can use Trinity Sled to cross, but make a right turn to save some more citizens first (they will reward you with an Ether). Back at the fire, take the left path while sledding to find a grassy area where many ingredients as well as a chest containing an Ether can be found. Return to the start and sled down the other path to land in a new area with some new enemies.
The Bizarre Archer Heartless fire their arrows at the party upon their entrance. Block their fire and return the offense to continue past them.
Alleyway[edit]
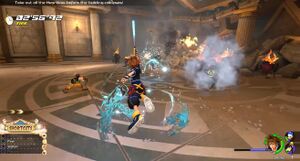
After the scene, you are tasked with defeating all Heartless that spawn within the time limit. Start by using as many Water spells as you can to weaken the Flame Cores. This constant use of Water should unlock the Grand Magic spell Watera, which you should use as soon as it becomes available. Team attacks and Formchanges should also prove helpful (though only Second Form is available for now). Defeat them all to stop the clock and trigger a scene.
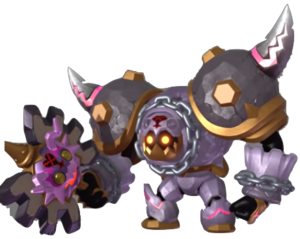
Scale a glowing wall ahead and jump across to a grassy ledge to find a chest containing an AP Boost, hidden behind some tall grass near the edge. Head through a hole in the wall and open a chest inside for a Potion. Hit the door nearby for an exit, after which the party is faced with a mini-boss. The use of an attraction (in this case, the Pirate Ship) should greatly assist in the defeat of the Rock Troll. If the ship is too far from the Rock Troll to hit it with its swings, shoot water in its direction. Afterward, target its head, maintaining air combos in order to avoid the shockwaves it creates when it slams its weapon down. When you see it hop onto its weapon, dodge away, as it will rapidly spin to mimic a harmful whirlwind.
After the battle, look for a building with stairs on either side of it. Ascend either staircase to end up behind the building, where a chest containing Fluorite can be found. Then, look for the save point and proceed past it to exit the town.
Mount Olympus[edit]
Ravine[edit]
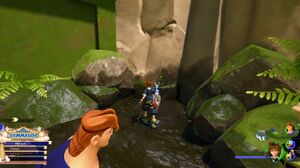
Walk along the river to encounter some Air Soldiers. Defeat them and free-run across the rocks to get to the other side of the river, then free-run up a wall and continue walking along the river to encounter Water Cores for the first time. Like Flame Cores, these Heartless can become the very element they use to attack when driven to a corner, giving them a window of invincibility. This can be combated with Fire magic, so make sure to have all magic saved up for this battle. On Critical, you may even require some Ethers, as the Water Cores can deal considerable damage once they have you surrounded. Once they're defeated, the river becomes far more manageable. Backtrack along it to find a chest containing a Water Cufflink. Right by this chest is a statue of a foot. Use the rocks nearby to climb up onto it, where a chest containing a Power Ring sits.
Cliff Ascent[edit]
Back up the river, cross to the left and take the rock ramp up the mountain. Run up the glowing wall and open the chest under the tree for Map: Mount Olympus. Turn to the other side of the area and you should see another glowing wall. Approaching it will cause numerous Soldiers to spawn. They should provide no trouble at this point, so simply climb up the walls after defeating them. At the top, jump across the gap and make a left turn and run up another couple of walls. At the top, make a right turn and drop off the cliff, where you will be confronted by many Shadows. Once they're defeated, enter the cave and exit through the other side to find a chest overlooking a cliff. Inside is a Potion.
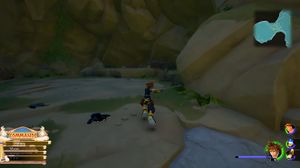
Drop off the cliff and walk up the grassy path to come upon a clearing where Water Cores attack. Defeat them to weaken the waterfall, allowing you to run up the wall behind it. Continue along the path, running up another wall atop which Air Soldiers spawn. Use magic to avoid being knocked off the ledge by them, then turn on the spot to see a ledge that you can jump to. Run up the wall right in front of you, then walk past the tall wall and run up the short one. You should find yourself in a cave with Shadows. Defeat them and open the three chests along the walls for a Potion, an Ability Ring, and Panacea. Drop down the short ledges you used to reach the cave, and run up the tall wall that you passed by earlier to find another cave. Hit a column to knock it into other columns, which will themselves knock out part of the cliff. This should make it easier to ascend on subsequent climbs.
Walk past the rockslide, through the sunny opening in the cave. Defeat the Soldiers in the clearing and drop down at the end of the path to be introduced to Earth Cores, including one in the form of a sand monster. This worm-like sand formation can be defeated instantly with Goofy Bombardier, as Goofy will enter through its mouth after Sora launches him and destroy it from the inside. As for the rest of the Earth Cores, avoid hitting their spiked backs, as this will do no damage to them; target their faces or use magic to attack it from any angle. Return to the cave by climbing up the walls and take the other path there for a scene. Continue along the path for another scene, this time leading into a boss fight.
Boss: Rock Titan[edit]
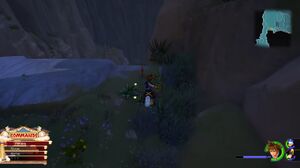
Before you can begin to do any damage to the Rock Titan, you'll have to reach it. Run up the walls, dodging the boulders thrown by the Rock Titan in the process, to reach the top. The sky will darken upon doing so. Before proceeding forward, drop off at the leftmost edge of the cliff. You can turn your camera downward before doing so to find your target: a chest on a low ledge that sticks out of the cliffside. Inside is an AP Boost. Run back upward and follow the path to continue your pursuit of the Rock Titan.
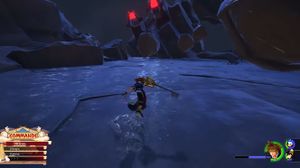
Inside the cave, run up a wall to the left and jump across to another ledge to find a chest containing a Hi-Ether. Outside the cave, fight off some Shadows and Air Soldiers. Past them, run up one last wall to finally reach the Rock Titan. Start by attacking its feet, dodging away when it raises its foot as an indication of a coming attack. This may take some time due to the amount of health that both legs have, but patience is key, especially on Critical. Once the health of both legs have been depleted, run toward the sparkling footholds that allow Sora to reach the Rock Titan's heads. Attack them to chip away at the Rock Titan's actual health. Eventually, an attraction prompt for the Mountain Coaster should pop up.
The Mountain Coaster allows you to shoot at the Rock Titan's heads from a distance, doing damage much more easily. At times, when the coaster nears the Rock Titan, Goofy will warn Sora of the monster's fist swinging in the coaster's direction. Shoot at it before the circle that surrounds the fist disappears completely to fend it off, allowing the coaster to continue its offense. When the attraction begins to run low on time, make sure to use its finisher for a firework explosion. Afterward, the health of the Rock Titan's legs will have been restored, requiring you to repeat the process. Fully deplete the health of its heads to defeat it.
Continue along the summit, taking the left path at the split to find a chest containing Fluorite. Eventually, you should come across some rocks blocking the path. Hit them for access to a save point and a new area.
Realm of the Gods[edit]
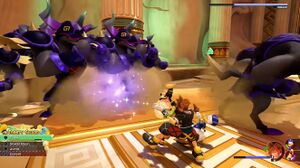
Your time in this unearthly realm begins with a mini-boss battle. The Satyrs charge toward Sora, Donald, and Goofy at a quick pace, launching them into the air and dealing considerable damage. Dodge them as best as you can, casting magic once they've regrouped and striking if possible, until the Trinity Guard prompt pops up. This team attack allows the party to not only block the attacks of the Satyrs, but charge through them themselves. Continue until the armor gauge is depleted, after which point they'll be split up and significantly weakened. Clean up the crowd to conclude the battle.
Courtyard, Corridors, and Cloud Ridge[edit]
You can now begin exploring the Realm of the Gods. On either side of this initial area are chests, the one between pink crystals containing a Potion and the other containing a Refocuser. Proceed up the stairs to find another set of stairs, but before continuing upward, head through the passage beneath the staircase to find a chest containing Fluorite. Now follow the path up the many stairs until you come upon another sand worm, Soldiers, and Shadows. Defeat them before continuing up to a platform, where you can save and open a chest containing Map: Realm of the Gods.
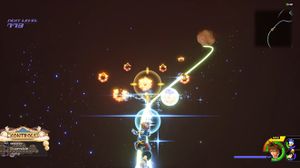
Ignore the narrow set of stairs to the right now and continue forward, toward a rail of light. After being introduced to the relatively simple controls, get on the rail to begin the simple mini-game. Continuously shoot orbs of light at the weak Heartless to destroy them before they can deal any damage to Sora. Prepare your aim after entering the cloud tunnel, as the fire Heartless in particular are capable of dealing decent damage, especially in large groups. Dodge the fireballs with a jump if necessary, but focus first and foremost on shooting down all Heartless in sight.
Upon surviving the rail shooter, open the nearby chest for another Refocuser. Through the passageway is a Heartless ambush, consisting of Air Soldiers and Bizarre Archers. Use magic to stun them from afar and finish them off with Keyblade strikes. Up another set of stairs, walk up a narrow ramp past some columns. Jump off from here and land on the clouds below to end up back at the Corridors. Follow the path right, and then right again into a narrow hallway. Sora can glide along the stream here to find himself in a large room containing numerous Soldiers and Air Soldiers. From here, proceed down a ramp toward another stream of water. Make a left turn after gliding along it to find some stairs. Past them is a chest containing a Mythril Shard.
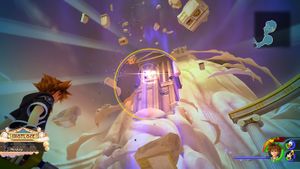
Past the chest is another stream of water. Glide along it to come across a waterfall, which you can follow to the Secluded Forge. At the center of the area, the party can use the Mad Tea Cups to line up the two cauldrons with the sole stationary cauldron. Doing so will allow you to obtain Knight's Shield+ for Goofy. Use the rail ahead to exit the area. Defeat the Satyr, Bizarre Archer, and Air Soldier Heartless that appear. Past them is an introduction to airstepping, a new ability that Sora now has access to. Aim as you would for a Shotlock attack and use the button prompted once the target is locked onto the sparkling point up high. Sora will navigate the rubble without any other effort on your part in order to reach the point that has been targeted.
After airstepping for the first time, you should notice a giant red box that cannot be broken into with normal strikes. Ignore it for now and turn around to spot another sparkling point up high. Airstep to it and turn back to the box; jumping down toward it from here should give you the option to strike it in midair with a powerful diving attack. This should be enough to break open the box, allowing Sora to open the chest for an Elixir within. Airstep back up to the highest point to find another chest nearby, containing a Potion. From here, follow the ramp up to airstep one last time, to the Apex where Zeus is struggling against Hades' forces. Approach the massive gates to begin the final boss fight.
Bosses: Ice Titan, Lava Titan, and Tornado Titan[edit]
Phase 1[edit]
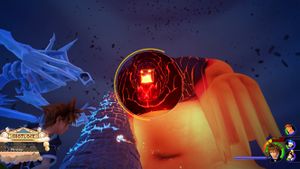
This final boss fight may appear daunting due to the sheer size and quantity of powerful foes, but both the Ice Titan and Lava Titan should be defeated easily as long as you dodge their attacks from time to time. Start by airstepping to the top of the mound in order to reach either Titan's head, as their bodies cannot be targeted for attack. You can also airstep directly to the Titan that you wish to attack first, be it Ice or Lava. If you remain on the ground long enough, the Titans will shoot beams of their respective elements in Sora's direction, which can be evaded with a well-timed airstep or a dodge roll.
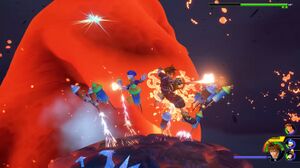
Use simple Keyblade strikes once in close proximity to either Titan's head in order to deal considerable damage. You can also use Water magic against the Lava Titan or Fire magic against the Ice Titan if attacking from a distance, though take caution in attacking either with the right element, as Water does no damage to the Ice Titan, nor does Fire damage the Lava Titan. Otherwise, maintain an air combo by continuously attacking the Titan's head before Sora can fall back down to the ground. You'll have to dodge some beams of lava or ice occasionally, but the attacks are infrequent enough so as to not greatly disrupt your assault even if Sora does take a hit. Additionally, if you do fall down to the ground, Donald's Flare Force will not only place you back on the mound near the Titans' weak points, but deal a large amount of damage to both. Make sure to make use of any formchanges or team attacks that become available to you.
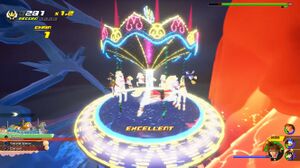
Lastly, there is the Magic Carousel. This attraction requires some synchronization on your part, as a well-timed button press will do considerably more damage than one that is not. Simply press the button prompted as soon as the inner ring overlaps with the outer ring. This will cause the carousel to increase in speed and consequently, attack power. Make sure to use the finish before the Magic Carousel reaches its time limit for a magical explosion.
Occasionally, the Tornado Titan will make an appearance in order to push the party away from the Ice and Lava Titans using its powerful winds. Simply airstep back into position in that case, before either Titan can shoot beams of ice or lava at you. Take note that, when attacking one Titan, the other will pay you no mind; only the Titan being attacked will react with some defensive offense of its own. Therefore, you should focus on one Titan at a time, diminishing its health before turning your attention to the other. Defeat both Titans to gain access to the final elusive Titan.
Phase 2[edit]
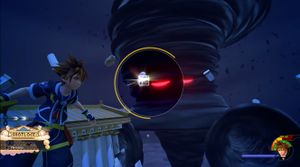
The Tornado Titan will start by shooting debris at you. Dodge between it and run toward the Tornado Titan's bottom as soon as you get the opportunity, as this is the only part of it that you can target. You should be able to get a few hits in before it expands, pushing Sora away and dealing some damage in the process. You can also use Shotlock here, though the limited Focus gauge ensures that Shotlock cannot be relied on too often.
When the Tornado Titan sucks Sora in, it will spit him back up into the air and throw lava and ice (acquired from their respective Titans) in his direction. This must be dodged in addition to the debris, though this segment of the battle ultimately presents an advantage, as falling close enough to the Titan allows Sora to land a powerful strike on it (as long as you make sure to press the button prompted). This segment is followed by one in which Sora continues to float in midair, but instead faces the Tornado Titan horizontally. The Titan can now be targeted near its eyes. Airstep to some debris near the Tornado Titan to reach it more quickly, allowing you more opportunity to attack before it can counter. Now would also be a good time to use Shotlock attacks.
The Tornado Titan can also shoot debris, lava, and ice in midair, in which case a midair dodge should be sufficient (which acts similar to the dodge roll). Eventually, you will find yourself back on the clouds, and the Tornado Titan's attacks cycle. Defeat it to earn an increase in Sora's maximum HP and clear the world.
Dark World[edit]
After some scenes, the perspective switches to Riku and King Mickey, who are currently searching for Aqua in the Dark World. They encounter a familiar enemy, the Demon Tower, previously fought by Aqua in 0.2 Birth by Sleep. As Riku, you must now fight it off once again. Riku wields Way to the Dawn in this battle, and his shortcuts are preset (to Thundaga, Curaga, Hi-Potion, and Ether). He also possesses helpful abilities such as Doubleflight and Aerial Recovery, and a powerful ally in Mickey. Together, this should be more than enough to fight off the Demon Tower, though this doesn't mean you shouldn't be wary of its attacks. Use Thundaga to strike the Demon Tower from a distance and a Hi-Potion if in need of health recovery. Block its charges, as these can do considerable damage, and when it breaks up into numerous Shadows, step back before it can reform, as it will launch Riku into the air with a powerful strike of its own as it does so.
Defeating the Demon Tower triggers some more scenes, after which Sora will finally gain access to the Gummi Ship. There's much to explore in the Oceans Between, but for now, familiarize yourself with the controls as you venture to Twilight Town.