Level 3-1[edit]
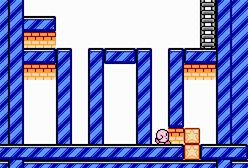
The first screen is very simple, but on the right you can inhale a Bomber to acquire the Crash ability. Then enter the tower. You'll enter a room where you simply need to detonate a bomb to reach the door above. You will now have to face Mr Tick Tock. If you still have the Crash ability you will eliminate him in no time. Upon his death, you can acquire the Mike skill. On the next screen you will already see the exit door, but you can't reach it, just go right and kill the enemies. You will enter a blue-walled room. On the right is a Pep Drink. The two small gaps in the floor are not fatal, however. Enter the one on the right to discover a hidden door. Enter it. Remove the Star Block and detonate the bomb to reach the upper door. Enter it, to find the first switch of the game. When pressed, an Arena will appear on the world map. Then enter the door that appeared behind the switch. At this point, proceed to the left until you reach the exit door.
Level 3-2[edit]
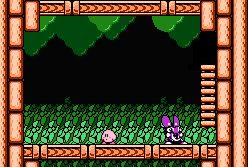
You start the level with a short climbing screen. Kill the enemy above for a Maxim Tomato and enter the door. On the next screen, you'll have to go around the tower, defeating the enemies you come across. You will often have to do this in this world. With powers like Wheel or Fireball you will take very little time. When you get close to the right edge of the screen, a door will appear, enter it. You will then have to overcome another climbing section, watch out for enemies falling from above. On the next screen, hit the bomb block above you to clear the path (if you don't have the proper skill, you can acquire Sword from an enemy on the right) and enter the door on the left. You will have to face Grand Wheelie. After defeating him, acquire his ability before switching back. Thanks to the Wheel ability, you will pass the rest of the screen with great ease. You will then arrive in a room where, by detonating two bomb blocks, to the left and to the right, you can obtain a Maxim Tomato and a 1-Up respectively. You'll have to be quick though, because all the bricks under them will be destroyed, so grab them quickly and be careful not to fall into the void. Then enter the door to face a new miniboss. This is Bugzzy, a being similar to a fly. Stay away and when he releases two bugs, suck them up by throwing them at him. After beating him, the exit door will appear and you can acquire his Back Drop ability.
Level 3-3[edit]
On the first screen, just follow the path. Perhaps, acquire the Hi-Jump ability from the appropriate enemy, to overcome the last part, climbing, without being hit by enemies. You will then have to go around the tower until the door appears, like you did in the previous level. You will enter a kind of small maze of doors, between two mirrored screens. First, go to the third door from the bottom, the one above you, and enter it. By detonating a bomb you can get 1-Up (watch out for the spikes on the sides). Then exit through the door opposite the one you entered. Go up the step to the left, detonate the bomb to destroy the wall and enter the back door. You will find a Maxim Tomato. Go back and enter the door as high as you can reach, the one after the star blocks. You will arrive right next to the exit door.
A museum will appear on the world map where you can acquire the Hi-Jump skill, as well as the next level.
Level 3-4[edit]
At the beginning you will find a Warp Star, which will take you much higher up the tower. Enter the door. You will now have to face Meta Knight's minions, as you have done previously. After defeating them, enter the door. On the next screen, just make your way to the door above. You will now find yourself in a narrow vertical passage, with a strong current of air that will push you upwards. If Kirby inflates, you will ascend rapidly, while in normal state he will descend slowly. You'll have to climb higher and higher, avoiding the Shotzos and the Gordos. Along the way you will also find a Maxim Tomato, a Pep Drink and a 1-Up. At the top you will find the exit door.
A Quick Draw minigame access will appear on the world map, as well as the next level.
Level 3-5[edit]
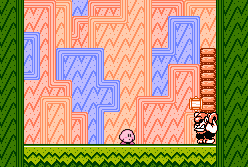
On the first screen you can grab a Candy and become temporarily invincible. Quickly enter the door. You will now have to go around the tower. Thanks to the temporary invincibility, everything should be very simple. Enter the door that appears at the end. The next screen is simple and straightforward. You will then have to face a new mini-boss: Bonkers. Nothing complicated. Just watch out for his hammer blows and fly away when he charges at you. When he hits with the hammer, a star will appear which you can inhale and shoot at him. Every now and then Bonkers will scratch himself, throwing a coconut at you. This too can be used to attack him. After defeating Bonkers, remember to acquire his hammer, one of the most powerful skills. In fact, on the next screen, after making your way through the star blocks, hit the stake on the right with the hammer, to destroy the wall and get a Maxim Tomato and a 1-Up. Then go to the exit door.
Level 3-6[edit]
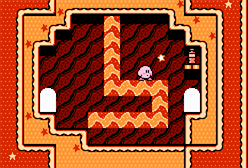
Acquire the Laser skill from the enemy in the center of the first screen. In fact, it will be very useful in the next area to eliminate the Bombers you encounter before they explode. On the third screen, climb upwards collecting the Maxim Tomato along the way. You will then have to go around the tower again, by now you are almost at the top. On the following screen, fly up while avoiding enemies. At one point, on the right, you will notice four star blocks. Remove them, to reveal a hidden door. Enter it. Fly and hit the bomb block above with an air pellet to destroy the wall, but then move very quickly to the right. In fact, another wall will quickly appear in the middle of the room and you will have to make sure you are to the right of it when it is complete, so that you can reach the other door. Go inside and hit the switch. An Egg Catcher minigame will appear on the world map. Then enter the door to go back outside. Enter the upper door. You will now have to go through a dark area. Halfway through however, you will meet an enemy from which you can acquire the Light skill, to illuminate it. Reach the door on the right to face the last section of the level. Here you should acquire the Hi-Jump ability from the first enemy you meet, to climb quickly, while eliminating enemies. At the top is the exit door.
After completing the level, you will be able to face the boss of this world and the Warp Star Room will also appear on the world map.
Boss – Mr Shine & Mr Bright[edit]

A very particular battle. In fact, you will have to face two bosses, who will take turns attacking you. While one attacks you on the ground, the other will float into the sky, alternating day and night. Each of the two bosses has half the life energy of a normal boss and can only be damaged while on the ground. The two bosses attack quite similarly. Mr Shine (the moon), attacks you by throwing a kind of boomerang and charging you. Either way, jump or fly to avoid it. While he's in the sky, he'll drop shooting stars, which you need to avoid. Instead, you must inhale the stars and shoot them at his mate. Mr Bright (the sun) attacks mainly by charging you like a Fireball or, more rarely, by launching a ranged attack. While he's in the sky, he releases a concentrated amount of sunlight, which hits the ground vertically. On either side of this burst of energy, stars will appear twice, which you can inhale and shoot at Mr Shine. When you have defeated one of the two bosses, it will definitely rise to the sky and continue to attack you in the usual way, until you have also defeated the other one, who remained on the ground. Defeat them both to get the third piece of the Star Rod.