Level 4-1[edit]
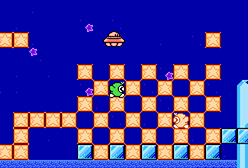
The level starts with a very linear screen, in the clouds. Just be careful not to fall to the bottom. A short climbing section follows. If you want, you can acquire the Needle skill to protect yourself from enemies higher up. The following area is one of the few in the game where you can acquire the UFO ability. It is certainly advisable to do so. On the next screen, you'll have to proceed through some enemies and several star blocks. Thanks to the spaceship, you should destroy them very easily. You will come to a point where the star blocks form a kind of chessboard, through which you will have to fight your way. However, you will easily notice that this board has a flaw, with an extra star block. Remove the block there and press ![]() , as if to enter a door. You will then enter a secret room with a switch. Press it to make a Crane Fever minigame appear on the world map. Go back and enter the door on the right. The last section of the level is short and easy, and you'll soon reach the exit door.
, as if to enter a door. You will then enter a secret room with a switch. Press it to make a Crane Fever minigame appear on the world map. Go back and enter the door on the right. The last section of the level is short and easy, and you'll soon reach the exit door.
Level 4-2[edit]
Go right. You can't go directly to the entrance - you'll have to go around it and detonate a bomb on the left to clear the way. Go inside. Climb the ladder and reach the door. The next screen may seem labyrinthine, but there is only one path to follow. Behind the star blocks at the bottom right is a hidden doorway, which leads to a room where you'll find a Maxim Tomato. Go back and go to the door above. The following area is very linear. You can choose whether to follow the path up or down. The top one is more dangerous, as there are more spikes to avoid, but you'll find a Pep Drink halfway. You will then arrive at the final room, where you will have to face two Poppy Bros Sr. together. When you have defeated one, you can acquire its Crash ability to eliminate the other in an instant and acquire this ability again. After you defeat both of them, the exit door will appear.
The entrance to the next level and a Quick Draw minigame will appear on the world map.
Level 4-3[edit]
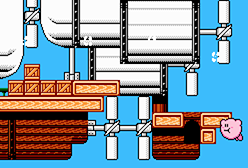
At the beginning of the level you have the possibility to acquire the Fire skill: do it. Using your skill, light the fuse just ahead and quickly jump into the cannon to the right before it fires. The cannon will catapult you to a cloud, where you can collect a 1-Up. Then enter the door to go back and reach the next area. Here you will find yourself in the sky, flying between a group of airships. A strong wind will constantly push you to the right, so it's not easy to move in the desired direction. Move to the bottom of the screen. After some distance, on the right, you will find a door. Entering it, you will access a room where you can inhale a Maxim Tomato. Go back out and continue to the right. Ignore the next door and go to the lower right corner of this area. Here you will find another door. Enter and push the switch, to make a Museum appear on the world map. Then go back and enter the door you skipped earlier. The area is very linear, but even here the wind will not give you a break. Along the way you will find a bomber from which you can acquire the Crash skill and a Pep Drink. Jump onto the Warp Star at the bottom. After a short climb you will come to the exit door.
Level 4-4[edit]
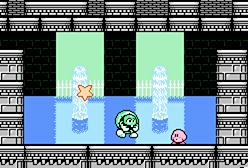
The first two areas of this level are very simple and straightforward. You shouldn't encounter any problems. In the third screen however, if you want to earn an extra life, you will have to overcome a challenge. In the beginning, you have the opportunity to acquire the Wheel ability: do it. Then start going down. Just after the start, you will find a bomb block. Hitting it will trigger a spark that will rapidly descend downwards. The goal is precisely to reach the bottom of this area before the spark. To do this, you'll have to use your Wheel skill, always changing direction at the right time, to optimize your time. It's not so easy. If you make it to the bottom left corner before the spark, you'll earn 1-Up and can enter the door nearby. If you fail, this path will be closed and you will have to take the conventional door. Both doors however lead to the same point. In the next area you can choose between Fire and Spark, then you will have to face a mini-boss, Shelatoss. The miniboss will attack you by jumping and charging, try to stay away. Use your skill against him while he's standing still or inhale the animals he throws at you and shoot them at him. In the last area you simply have to fight your way through the star blocks and reach the exit door.
The entrance to the next level and an Arena will appear on the world map.
Level 4-5[edit]
You will be able to pass the first screen very quickly, in fact at the beginning Meta Knight throws you a candy that makes you invulnerable. Just remember to acquire the Stone skill when you can, because it could be useful for you. Enter the first door you come across. Proceed right. You will find a Pep Drink. Then go down to the lower level, flying and avoiding the spikes. Remove the two star blocks to reveal a door. With the Stone ability it will be easier. Enter to find a 1-Up. Then go back and exit outside. Go to the next door, to the right. After a short and simple screen, you have to face Meta Knight's crew. The next area is very linear, but remember to acquire the Fireball skill, because it will be very useful in the last screen. Here, in fact, there are many Gordos who move above spikes. Flying past them without getting hit is difficult, so it is advisable to use Fireball, which will allow you to overcome them quickly. At the bottom you will find the exit door.
Level 4-6[edit]
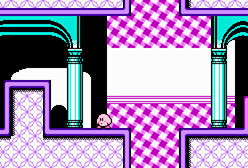
In the first area follow the path, detonating the bomb blocks to progressively clear the way. Watch out for the Scarfy at the beginning. At the bottom right is a Pep Drink. You can't reach the top door yet, so ignore it and enter the lower one. You have then to fight against Mr Tick Tock, take the opportunity to acquire the Mike skill from him. The next area is dark. After a while you will meet an enemy that will allow you to light up the room. At this point, however, go back to discover a door that was not visible before. Upon entering, you will find a switch. Press it to make the Warp Star Room appear on the world map. Go back and this time go through the dark area to the end. You'll come back to the first screen, near the door you couldn't reach before. Enter it. You will find yourself in a room where you can acquire the Stone skill. Do so and use it to crush the pole into the floor. At this point, part of the floor will disappear and two more poles will be accessible. If you want to get the 1-Up, you will have to press first the lower right one and then the other one '. Then enter the door. After a short climb you will come to the exit door. There is also a Pep Drink, on the left.
Boss – Kracko[edit]
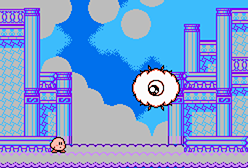
This time, before fighting the boss you will have to face a climb. In the beginning, you have the opportunity to acquire the Hi-Jump skill from an enemy. It is strongly recommended to do so. In fact, during the climb Kracko will chase you and this ability allows you to climb very quickly, jumping from one cloud to another, keeping the boss at a distance. If you ascend using your normal flying ability, you will instead be more esposed to attacks from it. As you go up however, you will encounter more enemies from which you can acquire the Hi-Jump skill. Note: in this first phase the boss is invulnerable and attacking it is useless.
Eventually you'll come to a sort of balcony and the real battle will begin. Kracko will attack you by flying across the screen (so move accordingly) and sometimes by moving horizontally, releasing lightning bolts under it. In these cases, you'll need to fly above it to avoid its attack. To damage it, the Hi-Jump skill works well. Use it when the boss is above you to attack it. In case you get hit and lose your skill, every now and then Kracko releases an enemy from which you can acquire it again. Alternatively, in case you don't feel comfortable with Hi-Jump, you can use the traditional strategy, inhaling these enemies and shooting them at the boss. Defeat it to get the fourth piece of the Star Rod.