< MapleStory | Monsters
Jump to navigation
Jump to search
| Name | Monster Info | Notes |
|---|---|---|
Ultra Gray
|
|
A stronger Gray. When provoked, it glows red and emits a red electric shock to any players in its range. Its range is a bit small, however. Found in Corridor 103 of the UFO near Omega Sector.
|
Blaze
|
|
Appears in the Hallowed Ground of Blaze. It drops the Blaze Stone which is needed to make a Dream Key to enter Cygnus's Garden.
|
Kaede Ashigaru
|
|
A samurai found in Zipangu's Ninja Castle. It wields a spear that it jabs at you.
|
Kaede Chunin
|
|
A mid ranked ninja found in Zipangu's Ninja Castle. It can spit poison out of its dart.
|
| Official Knight C |
|
A corrupted Thunder Breaker. Found at Knight District 2. It can use Somersault Kick and Flash Fist which hits 2 times so be careful when hunting these.
|
Gray Commuter Saucer
|
|
A Barnard Gray cramped into a little saucer, which it uses to move around. When provoked, it creates a fist from the bottom of the saucer and punches the ground. Found in Corridor 203 and 204 of the UFO near Omega Sector.
|
Wind
|
|
Appears in the Hallowed Ground of Wind. It drops the Wind Stone which is needed to make a Dream Key to enter Cygnus's Garden.
|
Kaede Kunoichi
|
|
A female ninja found in Zipangu's Ninja Castle. Wields two knives which she uses to assault you when engaged in battle.
|
Kaede Jonin
|
|
A high ranked ninja found in Zipangu's Ninja Castle. Wields an enormous shuriken and fights like an assassin.
|
| Official Knight D |
|
A corrupted Wind Archer. Found at Knight District 3. It can use Storm Break and Double Shot, which hits 2 times, so be careful when hunting these.
|
Gray Luxury Saucer
|
|
A Ultra Gray cramped into an upgraded saucer, which it uses to move around. When provoked, it creates a fist from the bottom of the saucer and punches the ground. Found in Corridor 202 and 203 of the UFO near Omega Sector.
|
Night
|
|
Appears in the Hallowed Ground of Night. It drops the Night Stone which is needed to make a Dream Key to enter Cygnus's Garden.
|
Kaede Ninto
|
|
The highest ranked ninja found in Zipangu's Ninja Castle. He has two flame-based attacks: a close range and a long range attack.
|
Healing Onmyouji
|
|
Appears during the boss battle with Madman Mori Ranmaru. It can heal itself and any monster nearby for 90 million health every 7 seconds.
|
Restrained Onmyouji
|
|
Appears during the boss battle with Madman Mori Ranmaru. It can stun players for 5 seconds, every 17 seconds.
|
Inferno Onmyouji
|
|
Appears during the boss battle with Madman Mori Ranmaru. It can summon Fire, which can kill anyone that comes in contact with it.
|
| The Boss File:MS Monster The Boss.png |
Boss
|
The Boss (大親分 Ōoyabun?) - the one in charge of all the Yakuza around Showa Town. It is summoned as soon as Bodyguard B falls. A powerful boss located at the end of Showa Hideout. It has 2 deadly attacks which can 1/1 and seal you so be sure to bring all cures and potions when facing this boss.
|
Mecateon
|
|
A medium speed member of the "-ateon", walking around in its mech walker. Shoots a red pulse similar to Ultra Gray's. Found in Air Vent D-2 and D-3 of the UFO near Omega Sector.
|
Watchman
|
|
Must be killed at the Secret Garden in order to talk to Neinheart of the future.
|
Official Knight E
|
|
A corrupted Dawn Warrior. Appears at Knight District 4. It can use Brandish, and raise its weapon attack by 20% by using Rage.
|
MT-09
|
|
The highest ranking member of the "-ateon" aliens, given a massive mech walker. It can fire a missile at you when provoked. Found in Air Vent D-3 and D-4 of the UFO near Omega Sector.
|
Thunder
|
|
Appears in the Hallowed Ground of Thunder. It drops the Thunder Stone which is needed to make a Dream Key to enter Cygnus's Garden.
|
| Advanced Knight A |
|
A corrupted Night Walker. Appears at Knights' Chamber 1 and Hall of Honor. It can use Vampire and Avenger which hits 6 times with fairly low damage.
|
White Robosaucer
|
|
A white drone-like saucer that can fire a laser at you when provoked. Found in Control Room 2 and 3 of the UFO near Omega Sector.
|
(*) Gray Commuter Saucer
|
Auto-aggressive
|
A Barnard Gray cramped into a little saucer, which it uses to move around. This is the Star Force version, found in Corridor H01 and H02 of the UFO near Omega Sector, maps which require 140 Star Force to deal full damage.
|
Kacchuu Musha
|
Undead
|
A powerful samurai found in Zipangu's Ninja Castle. Fights with powerful sword sweeps and an electrical attack. It is actually just a suit of armor controlled by two little demon-like people. It moves at the speed of a Blue/Red Snail, but it can jump. This boss is also one of the few weak to heal.
|
Black Robosaucer
|
|
A black drone-like saucer that can fire a laser at you when provoked. Found in Control Room 1 and 2 of the UFO near Omega Sector.
|
Advanced Knight B
|
|
A corrupted Blaze Wizard. Appears at Knights' Chamber 2 and Hall of Honor. It can summon Ifrit and use Flame Gear which can cause a slow debuff on your character.
|
Wipe-O-Matic
|
|
A wiper machine summoned by OMNI-CLN. A few seconds after these spawn, a wiper will pop out and rotate (similar to Lotus's laser, but only 1 instead of 4), dealing 10% of your HP as damage if you come into contact with it. Luckily, it's easy to defeat.
|
(*) Gray Luxury Saucer
|
Auto-aggressive
|
An Ultra Gray cramped into a little saucer, which it uses to move around. This is the Star Force version, found in Corridor H02 and H03 of the UFO near Omega Sector, maps which require 140 Star Force to deal full damage.
|
Ifrit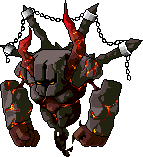
|
|
Summoned by Advanced Knight B. Based on the old sprite of Ifrit.
|
Advanced Knight C
|
|
A corrupted Thunder Breaker. Appears at Knights' Chamber 3 and Hall of Honor. It can use Sharkwave and Corkscrew Blow which hits 2 times so be careful when hunting these.
|
Elite Blazing Imp
|
|
A monster found at the entrances to the Chaos versions of Von Bon, Pierre, and the Crimson Queen.
|
Elite Blazing Imp 2
|
Mini-Boss
|
Found in the Neglected Garden of Root Abyss, a map unlocked after you defeat all the bosses in Root Abyss.
|
False Daimyo
|
Boss
|
The first form of the false Daimyo, found in Zipangu's Ninja Castle. When defeated, it transforms into the toad. He has two attacks, a physical based ranged attack where a ninja pops in front of him with a table of candy, which he flips and causes candy to drop on you, and a magic based range attack where he summons Ninja Archers which execute a full screen Lightning-based Arrow Rain skill.
|
Emperor Toad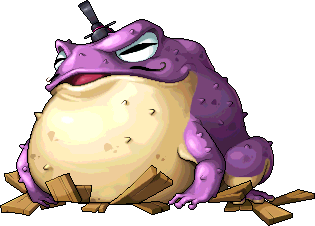
|
Boss
|
The second form of the false Daimyo, now in its true form. He has new attacks which do about the same damage as the first form and the defense is now beefed up to about The Boss's defense. Summons Kaede Toads to fight alongside it.
|
Chaos Zakum Arm 1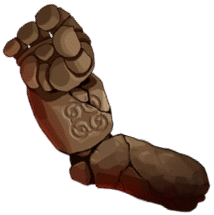
|
Auto-aggressive
|
This arm is found on the top left during the battle with Chaos Zakum. Like all the other arms, it can fly to a spot on the ground, indicated by a flashing signal, and capable of killing the player in one hit. During the platform phase, it can clap with Arm 5, firing out a laser (indicated by the ground flashing on the adjacent platforms) that also kills the player in one hit. When defeated, it respawns after a while, unless all the other arms are taken out before this occurs.
|
Chaos Zakum Arm 2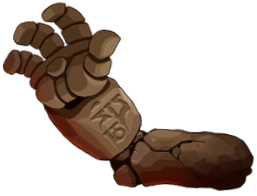
|
Auto-aggressive
|
This arm is second from the top left during the battle with Chaos Zakum. Like all the other arms, it can fly to a spot on the ground, indicated by a flashing signal, and capable of killing the player in one hit. During the platform phase, it can clap with Arm 6, firing out a laser (indicated by the ground flashing on the adjacent platforms) that also kills the player in one hit. When defeated, it respawns after a while, unless all the other arms are taken out before this occurs.
|
Chaos Zakum Arm 3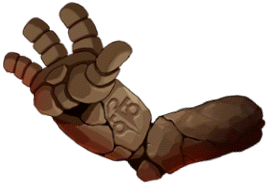
|
Auto-aggressive
|
This arm is third from the top left during the battle with Chaos Zakum. Like all the other arms, it can fly to a spot on the ground, indicated by a flashing signal, and capable of killing the player in one hit. During the platform phase, it can clap with Arm 7, firing out a laser (indicated by the ground flashing on the adjacent platforms) that also kills the player in one hit. When defeated, it respawns after a while, unless all the other arms are taken out before this occurs.
|
Chaos Zakum Arm 4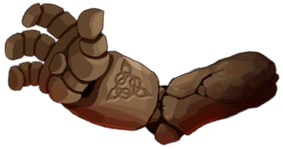
|
Auto-aggressive
|
This arm is found on the bottom left during the battle with Chaos Zakum. Like all the other arms, it can fly to a spot on the ground, indicated by a flashing signal, and capable of killing the player in one hit. During the platform phase, it remains inactive, along with Arm 8, while the other arms fight back. When defeated, it respawns after a while, unless all the other arms are taken out before this occurs.
|
Chaos Zakum Arm 5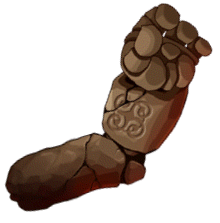
|
Auto-aggressive
|
This arm is found on the top right during the battle with Chaos Zakum. Like all the other arms, it can fly to a spot on the ground, indicated by a flashing signal, and capable of killing the player in one hit. During the platform phase, it can clap with Arm 1, firing out a laser (indicated by the ground flashing on the adjacent platforms) that also kills the player in one hit. When defeated, it respawns after a while, unless all the other arms are taken out before this occurs.
|
Chaos Zakum Arm 6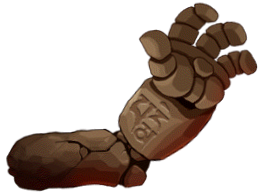
|
Auto-aggressive
|
This arm is second from the top right during the battle with Chaos Zakum. Like all the other arms, it can fly to a spot on the ground, indicated by a flashing signal, and capable of killing the player in one hit. During the platform phase, it can clap with Arm 2, firing out a laser (indicated by the ground flashing on the adjacent platforms) that also kills the player in one hit. When defeated, it respawns after a while, unless all the other arms are taken out before this occurs.
|
Chaos Zakum Arm 7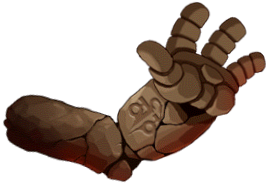
|
Auto-aggressive
|
This arm is third from the top right during the battle with Chaos Zakum. Like all the other arms, it can fly to a spot on the ground, indicated by a flashing signal, and capable of killing the player in one hit. During the platform phase, it can clap with Arm 3, firing out a laser (indicated by the ground flashing on the adjacent platforms) that also kills the player in one hit. When defeated, it respawns after a while, unless all the other arms are taken out before this occurs.
|
Chaos Zakum Arm 8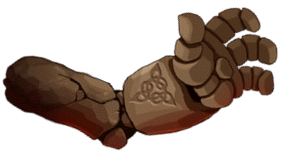
|
Auto-aggressive
|
This arm is found on the bottom right during the battle with Chaos Zakum. Like all the other arms, it can fly to a spot on the ground, indicated by a flashing signal, and capable of killing the player in one hit. During the platform phase, it remains inactive, along with Arm 8, while the other arms fight back. When defeated, it respawns after a while, unless all the other arms are taken out before this occurs.
|
Chaos Zakum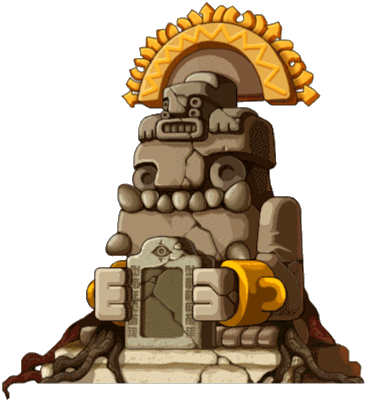
|
Auto-aggressive
|
The main body of Chaos Zakum. It is key to attack the body, as attacking the arms will not directly damage the body. However, it will make certain phases easier. While the arms are alive, the body will not directly attack, unless all the arms have been defeated quickly enough. In this case, Zakum will be able to charge up an attack, remaining stagnant for a few seconds, and unleash an explosion that does 99% of your health as damage. Zakum will also be able to summon 2 of each minion during this phase, as well as cast Weapon Cancel. In the last phase of the battle, during the last 20% of Zakum's health, Zakum will gain new abilities. It will be able to burrow into the ground and reappear on top of you, as well as cast Magic Cancel, and cause rocks to fall from the ceiling, which can slow you down and prevent you from using special movement skills, such as Flash Jump. Its main attack during this phase involves a green cube appearing, and the players must hide under the cube to avoid getting instantly killed by its main attack, where it leaps into the air and slams into the ground.
|
Solomon the Wise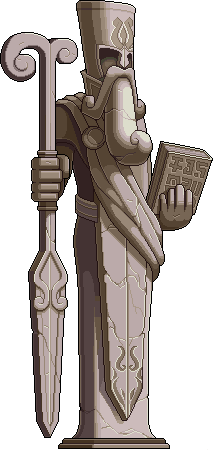
|
Auto-aggressive
|
This is a statue found at the top of Temple of Time. It fights along side Pink Bean in Phases 1-4, where it has 60% Defense Rate. In Phase 5, it reappears, but is slightly stronger, and has 25% Defense Rate. It has three attacks: lightning with seal, 1/1 with stun, and a physical attack with slow. Its 1/1-stun attack requires either an autopotter or VERY quick hands to survive.
|
Rex the Wise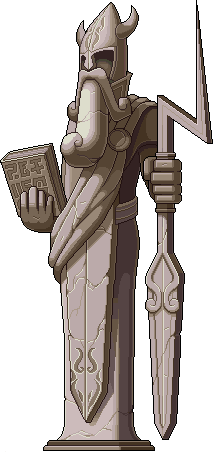
|
Auto-aggressive
|
This is a statue found at the top of Temple of Time. It fights along side Pink Bean in Phases 2-4, where it has 60% Defense Rate. In Phase 5, it reappears, but is slightly stronger, and has 25% PDR/MDR. In Phase 5, it reappears, but is slightly stronger, and has 25% Defense Rate. It has three attacks: lightning with darkness, 1/1 with Zombify, and a physical attack with poison. It can use Reverse Key and Dispel.
|
Hugin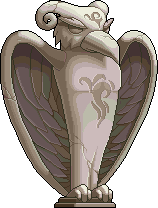
|
Auto-aggressive
|
This is a statue found at the top of Temple of Time. The symbol on its chest reveals it to be fire based, making it strong to fire, but with a weakness to Ice. It fights along side Pink Bean in Phases 3-4, where it has 60% Defense Rate. In Phase 5, it reappears, but is slightly stronger, and has 25% Defense Rate. It has two attacks: fire with slow, and physical with stun (markers). It can also use Seal, Weakness, Magic Reflect, Physical Reflect, and All Damage Reflect.
In Norse mythology, Hugin is one of Odin's two ravens who act as messengers.
|
Munin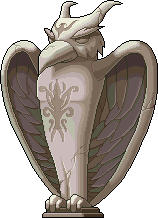
|
Auto-aggressive
|
This is a statue found at the top of Temple of Time. The symbol on its chest reveals it to be Ice based, making it strong to ice, but with a weakness to Fire. It fights along side Pink Bean when activated in Phase 4, where it has 60% Defense Rate. In Phase 5, it reappears, but is slightly stronger, and has 25% Defense Rate. It has two attacks: ice with darkness, and physical with crazy skull. It has three skills: Weaken, Banish, and Seduce (left, jump left, jump right).
In Norse mythology, Munin is one of Odin's two ravens who act as messengers.
|
Ariel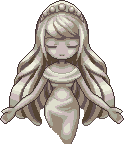
|
Auto-aggressive
|
This is a statue found at the top of Temple of Time, perched precariously over a mirror in front of which the Pink Bean sits. Based on the Goddess herself, it's the strongest of the statues. It can regenerate HP and MP, Dispel, use Weapon and Magic Cancel, cast poison fog, and can use the debuff 'Zombify', which causes the heal skill to deal damage instead of healing. As one might expect from the statue of the Goddess, it's immune to Holy, and strong to Fire, Ice, Dark, and Lightning, making Poison the only possible element that can harm it. It fights along side Pink Bean when activated in form 5 of the battle.
|
Pink Bean
|
Auto-aggressive
|
The boss of the Temple of Time. Pink Bean is a being from another world who was accidentally summoned through the Goddess' mirror by an unidentified man known as Kirstun, who was actually trying to bring back the Black Mage. Don't let its awfully adorable appearance fool you, it can be a tough boss to fight. It can summon Mini Beans, and sports a resistance to Physical, Holy, Fire, Dark, and Ice. This boss has 4 different attacks. The first attack is similar to a Bishop's Genesis, except that the skill fires holy rays upwards and stuns the target. The second attack is a mid ranged big bang like attack that knocks you back a good distance. This boss can also summon a megaphone in which treble clef notes will rain down upon Maplers indicated by a small quaver note on the ground which Seduces. Finally, it can also thump his tail on the ground sending miniature forms of himself leaping up in the air which is a 1/1+seal attack. Can also use Damage Reflect when its HP reaches 90% or below, and also inherits the Zombify skill which causes your party to be hurt instead of healed if healed by a bishop, as well as reduces the effect of healing potions by half. On defeat, Pink Bean cries before hopping through a very dark portal, glaring at the players before it leaves.
|
OMNI-CLN
|
Auto-aggressive
|
The ultimate cleaning machine, as designed by Dr. Zindelblarp, who has recently set a base near Omega Sector. |
