Crash Man's stage is a climb to the top, much like Elec Man's stage in the first game. The stage is set in a large tower, where Mega Man starts at the bottom and must ascend all the way to the top. The stage does not have any pits but falling from the stages many ladders can result in big set backs. A stretch of the stage includes platforms that ride along increasingly complex rails which Mega Man must ride, and avoid enemies that fly towards him the entire time.
Stage[edit]

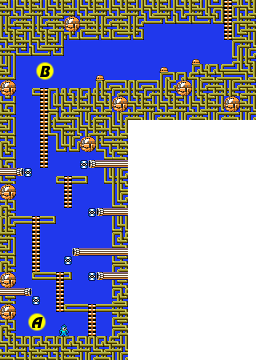
- A: For the first two screens, you must climb a series of ladders while small floating enemies known as Tellies pop out of pipes. Up to three of them can occupy the screen at any given time. Shoot down the ones closest to you, and clear a path to the next ladder you must climb. If you're having trouble clearing any above you, utilize the Metal Blade if you have one.
- B: Three Neo-Metalls stand between you and the next vertical section. They are only vulnerable when they lift their helmets to see outside. But when they do, they shoot three bullets in a spread pattern that is difficult to dodge. Fortunately, they don't do too much damage, so take the hit in order to remove the Metalls from the path.

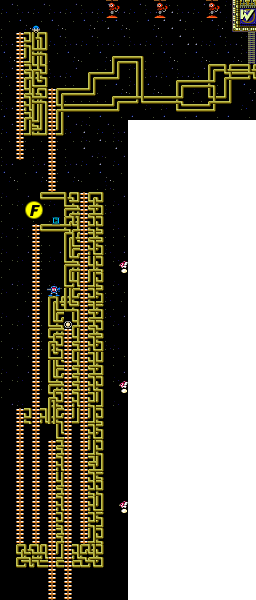
- F: Regardless of which ladder you took to reach the spot at the top, consider your next move carefully. If you wish to collect the E-Tank and you have Item 1, you can easily slip down to the platform with the tank, and use Item 1 to not only return to the platform above, but to go even higher to the ladder hanging down from the left side of the screen. (If you only have Item 2, you can use two of them to accomplish the same thing.) The ladder on the left leads to an Extra Life if you follow it up to the top of the next screen. From here, you have three Fly Boys to deal with on the way to Crash Man's lair.
Crash Man[edit]


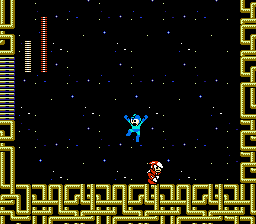
As a condition of constantly being around deadly explosive weapons, Crash Man is a little jumpy. Normally content to run back and forth in his lair, he will leap into the air every time Mega Man fires. He will also leap in the air after running around for a while. Whenever he does, he fires his Crash Bomb weapon diagonally at the floor. You can take advantage of the fact that he jumps whenever you fire by timing your shots at him when you're mid-jump. He will usually jump into the fire. However, you still have to do your best to avoid his powerful weapon. They take approximately three seconds to explode if they don't hit you directly, so steer clear of them once they connect with the ground or a wall. When you defeat Crash Man, you'll get his weapon: the Crash Bomber
Crash Man is far and away the most sensitive of all the Robot Masters to the Air Shooter. If you hop into the air before firing them in Crash Man's direction, he will inevitably jump into the air and get hit by them. It takes a mere four shots with the Air Shooter to destroy Crash Man, but you may destroy him with fewer shots if you strike him with multiple tornadoes at once

