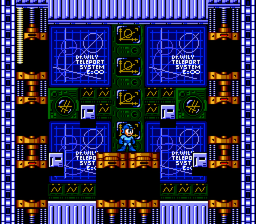
In the first Mega Man, you eventually had to fight all six robot masters before facing Dr. Wily, but not all on the same stage, and not in any order that you chose. For the first time in what will become a signature feature of the series, you arrive in a room with teleporters that take you to eight different rooms occupied by one of the eight Robot Masters that you previously faced. You are rewarded with a bit of health energy at the end of each battle, so choosing your next opponent strategically is important. Once you defeat all eight Robot Masters, you take the fight directly to Dr. Wily himself... but that won't be the end of this story.
Stage

|
|||
| Heat Man | Flash Man | ||
| Air Man | Metal Man | ||
| Wood Man | Crash Man | ||
| Bubble Man | Quick Man | ||
Choosing which Robot Master to fight and when is an important aspect of surviving the back-to-back nature of these battles. When your health is high, you should choose a Robot Master who is more difficult to defeat, and when your health is low, you should choose a Robot Master who is easy to defeat so that you can quickly collect a health capsule for defeating them. (Note that if you are standing on the teleporter when you defeat a boss, you will be immediately whisked out of the room without the opportunity to collect the health capsule left behind, so avoid standing on the teleporters at the end of the battle.)
The following chart contains spoilers about which Robot Masters are considered more difficult, and notes about what weapons to use when taking them on. Robot Masters whose names are listed in Green are relatively easy. Those whose names are listed in Yellow are medium difficulty. And the bosses whose names are listed in Red are quite aggressive.
| Robot Master | Notes |
|---|---|
| Heat Man | Heat Man's pause and charge response to getting attacked makes him very easy to manipulate, and thus a good candidate for a net health increase. Use the Bubble Lead to remove him quickly, but use it sparingly. The Bubble Lead is absolutely essential for finishing the game. |
| Air Man | While Air Man is fairly predictable, the locations of the tornadoes he produces are not. You are likely to sustain a fair bit of damage in this fight if you're unlucky. Use the Leaf Shield and time your shots carefully in order to keep the battle short. |
| Wood Man | Wood Man's attack is also predictable, but it can be difficult to dodge without a lot of practice, and it does a lot of damage. You may be inclined to want to use Atomic Fire against him, but you're actually better off saving that weapon for later. Instead, you may opt to destroy him very quickly by firing the Air Shooter at him at point blank range. |
| Bubble Man | Bubble Man's multiple attacks can be difficult to avoid, but you can remove him quite quickly, and potentially heal more damage than you lose if you're efficient. Fire the Metal Blades at him as fast as you can and move on to the next fight. |
| Quick Man | Not even the flat surface of the floor can reduce Quick Man's aggression, but as with Flash Man, it does give you a small advantage compared to the original battle. Once again, you may wish to save Atomic Fire for later, but you should still activate the Time Stopper once you whittle Quick Man's health below 50% with the Mega Buster. Quick Man is also vulnerable to the Air Shooter. |
| Crash Man | Crash Man remains one of the more predictable Robot Masters, and you can force him to jump in the air every time by attacking. Stick with the strategy of using the Air Shooter against him for a quick victory. |
| Metal Man | Although the Quick Boomerang is supposed to be the weapon of choice against Metal Man, you now have an opportunity to use a weapon against him that was impossible the first time around: his own Metal Blade. Try it out, and you'll be amazed at how surprisingly effective it is. |
| Flash Man | Flash Man remains a difficult foe. However, one thing working in your favor is that Flash Man loses the benefit of his multi-layered floor. The flatter surface puts him at a disadvantage since he can't get away from the shots you fire so easily. While he's technically weak to the Crash Bomber, you're likely to be out of them, and Metal Blades are still the better choice. |
Boss: Wily Machine 2

- Phase 1
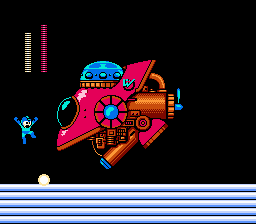
It doesn't appear that Dr. Wily's approach to fighting Mega Man directly has changed all that much from the first game. Once more, Dr. Wily emerges in a giant ship, and once more, this ship will have two phases. In the first phase, the ship floats horizontally back and forth while shooting an orb from the lower gun. This orb initially travels to the ground, but then arcs back up to the top of the screen. In this sense, its trajectory is very similar to the flames released by the giant wolf Frienders in Wood Man's stage. You can usually remain in one place and jump over the orbs as they arc beneath you.
If you managed to save up your Atomic Fire weapon until this moment, this is the best time to use it. Two fully charged Atomic Fire blasts to the cockpit will destroy the first phase of Dr. Wily's ship. If you didn't save Atomic Fire, you will have to resort to firing the Mega Buster straight at the ship. Metal Blades will also work in this situation, but since you are forced to jump over each orb, you can destroy the first phase of the ship just as easily without a special weapon by shooting the Mega Buster at the height of each jump.

- Phase 2
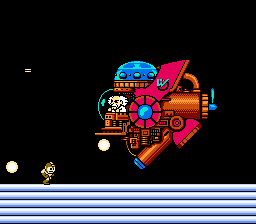
Once you deplete the energy meter of the ship, the outer shell of Wily's ship is destroyed, revealing Dr. Wily at the controls. The energy meter will refill and the second phase begins. The ship continues to move horizontally back and forth. What changes, however, is the pattern of the orb weapon. Now the orbs bounce along the floor, very similar to how the Bubble Lead behaves when Bubble Man fires them. Your ability to survive this phase depends on your ability to determine where Mega Man must stand so that the orbs bounce cleanly over his head. Suffice it to say, use an E-Tank whenever you appear close to death.
In order to destroy this phase, you have a couple of options. The Mega Buster and the Quick Boomerang require you to jump in the air in order to attack the cockpit, which can leave you vulnerable to the orbs. Even the Air Shooter will work against Wily's ship, but it's not very effective. The most effective weapon is actually the Crash Bomb, but seeing as how you are unlikely to have a full supply of Crash Bombs after stage 4 unless you continued, they won't be an option for you. One well placed Crash Bomb on the rear of the ship can destroy the entire machine, but it's extremely difficult to do. In the end, the ability to fire the Metal Blade in any direction will be the most strategic choice against this phase. Fire them at the cockpit as rapidly as you can to reduce the amount of time you are forced to avoid the bouncing orbs.
Once defeated, the ship will explode... but so will the floor. It appears your battle with Dr. Wily isn't over just yet.
