Before entering this stage
If you are following the Normal Walkthrough, this should be the third stage you visit. Make sure that no X-Hunter is in it. If anyone is, you can reshuffle their location by entering and re-exiting any previously completed stage.
If you are following the Speed Walkthrough, this should be the second stage you visit. There is nothing to do before it.
Stage walkthrough
This stage takes place on a tank moving through a city. It is not too hard, but the screen will constantly shake which could be annoying.
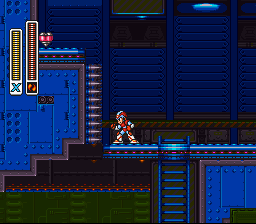
First thing youwill see is a little door in the ground that spits out bird enemies. Jump over the birds and focus your shots on the door to destroy it. Continue on into the tank, destroying the rolling enemies and heading down the ladders.
Arms upgrade


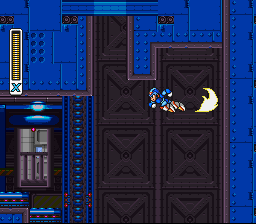
After the ladders, do not fall down the hole in front of you. Instead, jump up the right wall: you will see a little nub blocking you from entering a hole in the ceiling. If you have the Legs upgrade (air dash), slide down the nub and air dash left. If you timed it right, you will hit the wall and you can jump on the wall up the hole.
You can make this jump without the legs upgrade by dash-jumping off the right wall and using the W. Sponge's Strike Chain to pull you towards the wall of the hole, but it requires a pixel-perfect jump.
Either way, you'll find the Arms Upgrade at the top of the hole. This allows you to charge your gun to a new level, which stores two charge shots, and charge your special weapons. Fall down the hole and continue.
Ride armor

Keep trucking and you will find yourself some ride armor. These things can hover in mid air, punch, dash, the whole 9 yards. Sweet. Jump in and punch the block to continue.
You will now be on the bottom of the tank. There is an enticing ramp to the left, but nothing awaits you beyond it but death. Continue right and out-punch the enemy ride armors. You'll need to get out of the armor to climb the ladder, so do so by pressing up and jump.
Heart tank

You'll see a Heart tank blocked by a wall of spikes. You can get it a few ways, but it's tricky no matter what.
- First method (normal walkthrough): needs the legs upgrade (air dash), arms upgrade, and Speed Burner weapon. Find the raised platform to the right and fully charge (pink glow) your Speed Burner. Jump as high as possible to the left, air dash, then fire your charged Speed Burner (effectively another air dash). If you did it correctly, you should hit the top bit of the wall without any spikes and you can jump from the wall to grab the heart.
- Second method: The exact same as the first method, but you don't need the legs upgrade. Find the raised platform to the right and fully charge (pink glow) your Speed Burner. Dash jump off the platform to the left and fire your speed burner at the peak of your jump. This is more precise than above, but doable.
- Third method (speed walkthrough): Requires nothing! Bait the nearest robot to the right to shoot you, and use the invincibility frames to wall jump up the spikes. This choice is less recommended because it is precise and risky.
X-Hunter room

Once you are done with that, continue up the elevator to the right. These shield baddies will be disabled by charge shots, so use that to your advantage as you rise. More floating platforms to come, this time with birds and shield guys in your way. One more elevator to go. This time, the path branches: you can head left or stay on the elevator going up. If you go up, you will find a spare body (1-up) and the optional boss door. If there is an X-Hunter boss occupying this stage, you might want to head through that door. Click here for more information. If you go left, continue on.
Last portion

One more outside bit before you take on the gator himself. Tons of birds and rollers out here before a drop. Try to just power through it. Continue back into the tank left when you can. From there, it's just a cannon enemy keeping you from the Gator himself.
Maverick: Wheel Gator

- Weakness: Strike Chain
You will notice that there is no floor to this room. Instead, it is oil. Wheel Gator hides in this and occasionally pops out to try to snag you.
Its first attack is signaled by the oil moving in waves. Jump up on the wall and keep on it. A spike wheel will emerge and circle the whole room. Avoid it and the oil settles. Be careful because this is when Wheel Gator will jump up to snag you. If it gets you, it will bite you for three damage. If it does not, it will stay out for a few seconds.
Its second attack is when it jumps out and charges up the two wheels for his shoulders. It will shoot them above and unto the wall where they will circle up and back. Avoid the wheels and punish it for trying to get you.
Its third attack is a spinning attack. Wheel Gator spins and dashes towards you. Jump over to avoid. Be careful: this attack breaks the walls. If you touch the walls where it attacked, it will hurt you.
If you have the Strike Chain, use it. That is its weakness. This boss takes a while to beat, so be prepared.
Special weapon
Wheel gator will give you the Spin Wheel, which goes along the floor and deals multiple damages to any robot it hits. This weapon can also break walls. The charged-up form shoots eight projectiles in eight directions, still effective against walls.
The Spin Wheel is very effective against Bubble Crab only.
Breakable walls can be found in two stages: Desert Base (legs upgrade) and Robot Junkyard (body upgrade).