Part 1
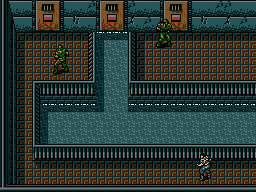
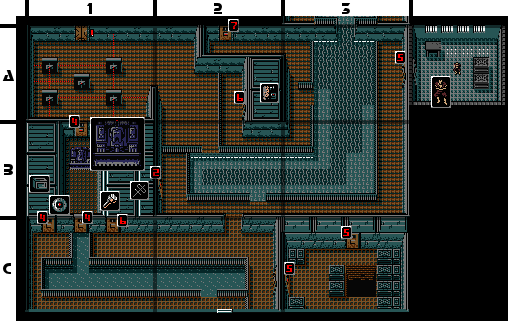
C2: When you arrive, you will be cut off from most of the room. Your only two choices are to wade into the shallow water, or take the lower path to the left. It's a good idea to take the lower path first for no other reason than to stock up on ammo and mines. Then you will return to this room and hop in the water and proceed to room C1.
C1: If you arrive via the lower path, you will have access to the left door. Use card 4 to access it, and inside, you will find ammo and mines. Don't worry if either of the two guards notice you, they will not summon back up. Stock up on ammo until you are full for your class, then return to C2. If you arrived via the shallow water, all you can do is wade over to the middle door. This too opens with card 4 and leads to B1. For now, you will be unable to access the door on the right, even if you approach the door from the upper path.
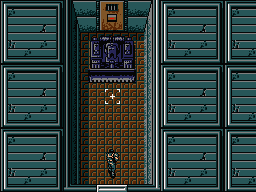
B1: When you arrive in this narrow hallway, you will be greeted by a heavily armored bulldozer whose width matches the hallway's.
Once it is defeated, proceed through the door with card 4 to A1.
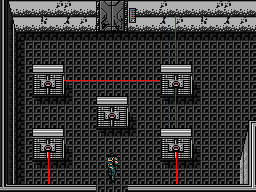
A1: You should recognize these objects as components of the infra-red laser beam security system. Just like before, you can see the beams if you wear the IR goggles. Unlike before, these beams are not static; they alternate a couple of times each second. The pattern repeats every five cycles. To maneuver safely through this room, you must time your passage through the openings created when a beam disappears. Do not choose paths where the beam disappears for only one cycle. Choose paths where the beam disappears for at least two cycles in a row, like the beam just above the door you arrived through. An elevator to other floors is on the opposite side of the room, but for now exit through the right to A2.
A2: This is another split room. For now, you can only access the left side. Deactivate your IR goggles, and it's not a bad idea to activate the body armor if you happen to possess it. Head down through the opening to room B2.
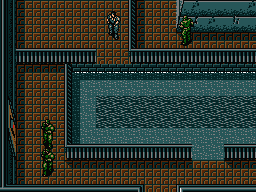
B2: This room is broken up into several parts as well, with a pool of water in the middle. You can safely traverse the shallow parts (indicated by the light color), but if you wade into the deep parts (indicated by the darker color), you will begin to lose health while you remain there without an oxygen tank. Since you don't have one, it's advisable that you stay out of that region. If the guards see you, they will react, but they will not summon backup. Your goal here is to cross the water and approach the door on the left with card 2. Enter the room and knock out the guard inside, and you will find an antenna on the desk. Upon collecting the antenna, you will suddenly be able to make and receive calls through your transceiver again. This item works automatically, you do not have to activate it. Big Boss will contact you to let you know that your signal had been jammed, but the problem is gone, presumably thanks to the antenna.
At this point, you can explore the remainder of the first floor, but you do not possess any access cards that will let you examine any rooms. When you're ready, return to A1, watch out for the laser beams, and head for the elevator. The elevator that you reach has an interesting quirk: it will only go up. Therefore, you cannot visit the basement, and once you pass a floor, you can never return to it. For the time being, go all the way up to the rooftop.
Part 2
At this time, you should have located the real Dr. Pettrovich, and obtained card 7 from the Arnold Brothers on Floor 2. With the knowledge that Dr. Pettrovich won't talk until his daughter has been rescued from the basement of building 1, it's time to escape the building. However, there's an important item that you can collect along the way.
C3: The room you arrive in has two guards. They will attack you without going into high alert mode, so fight back or avoid them, and head through the south door. You will arrive in what looks like an empty screen. However, if you are too curious and explore the room, you will trigger a pitfall along the right side of the room. If you fall in, it's not too bad, since you will be reset to the previous elevator sequence when you continue. Exit the room through the west door with card 5 to room C2.
C2: Your goal is to reach the exit below, but you'll have to work your way back around. First, head west to C1 to examine a door that you couldn't open before.
C1: Deal with the guard in front of the right door, and open it using card 6. Inside, you will find a flashlight sitting on the desk. This will come in handy soon. Exit the room, and return east to C2, then head north to B2, and immediately travel east to take the low path to B3.
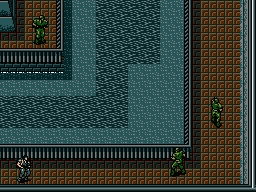
B3: Watch out for the guards, and follow the path east then north to room A3.
A3: You can open the east door with card 5. Inside, you'll find a prisoner who will inform you that the water channel leads to building 3. However, without an oxygen tank, you can't take advantage of that fact. Return outside, and make your way back to B2.
At this point, you must reach the entrance to building 2 by passing through the infra-red laser room (A1) and the bulldozer hallway (B1), until you can wade through the shallow water (C1) to reach the front door (C2). Run south through the outdoor territory, and return to the basement of building 1 to continue your mission.
Part 3
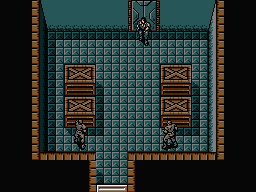
You will be returning here after having rescued Dr. Pettrovich's daughter and getting him to tell you the secret behind stopping Metal Gear. You should also have card 7 before you continue.
C3: Pass the two guards as you exit the elevator, and pass through the south door. Remember to watch out for the pitfall that lies waiting on the right side of the room. Prepare card 5 and exit through the west door to room C2, then go to room B2.
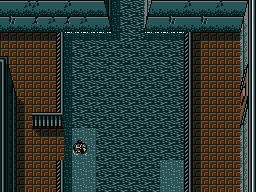
B2: Hop in the water, and be sure to remain in the shallow sections. Wade along the top portion of the water to the east to room B3 again, and follow the water up to A3.
A3: Exit the water through the exit on the left. If you are in need of plastic explosives, you can pick some up by following the south path down and around to the door in room A2, which opens with card 6. Otherwise, take the north path are prepare newly acquired card 7 for use and open the door to reach Building 3.
