Getting out of the hangar[edit]
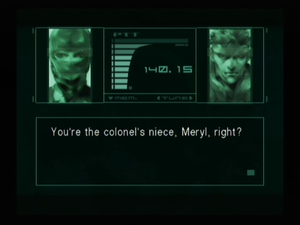
Back in the Armoury, enemy soldiers have now been posted here, so run into the nearest room (which should be the Grenade Room, to the bottom-left). Inside, press ![]() to take out the Codec, and use
to take out the Codec, and use ![]() to tune it to Meryl's frequency, 140.15. She'll explain the truth about Shadow Moses Island, and go to unlock the Level 5 cargo door in the tank hangar. Since you now have a Level 2 ID card, you can now access the bottom-right room in the Armoury while you wait for Meryl to unlock the cargo door. In here, you can find a FA-MAS assault rifle and some bullets. Don't run straight for them, though - this room contains infrared laser wires, which will alert the enemies if tripped. Use the thermal goggles to make the wires visible (if you didn't get the thermal goggles, cigarette smoke can be used as well, but use the cigarettes sparingly, as smoking is hazardous to your health). The wires can be dodged easily by crawling underneath them, grabbing the FA-MAS and bullets while remaining on all fours, and crawling back out. The FA-MAS is an assault rifle, so you can hold
to tune it to Meryl's frequency, 140.15. She'll explain the truth about Shadow Moses Island, and go to unlock the Level 5 cargo door in the tank hangar. Since you now have a Level 2 ID card, you can now access the bottom-right room in the Armoury while you wait for Meryl to unlock the cargo door. In here, you can find a FA-MAS assault rifle and some bullets. Don't run straight for them, though - this room contains infrared laser wires, which will alert the enemies if tripped. Use the thermal goggles to make the wires visible (if you didn't get the thermal goggles, cigarette smoke can be used as well, but use the cigarettes sparingly, as smoking is hazardous to your health). The wires can be dodged easily by crawling underneath them, grabbing the FA-MAS and bullets while remaining on all fours, and crawling back out. The FA-MAS is an assault rifle, so you can hold ![]() for autofire (this eats up ammo pretty quickly, but is useful if you need to dispatch a large group of enemies quicker than the SOCOM allows). Avoid the guards, and take the elevator to the first floor.
for autofire (this eats up ammo pretty quickly, but is useful if you need to dispatch a large group of enemies quicker than the SOCOM allows). Avoid the guards, and take the elevator to the first floor.
When you arrive, Meryl will call and inform you that she's unlocked the cargo door for you. She'll also warn you that the cargo passageway contains several infrared sensors, that, if they detect you, will seal off the room and flood it with toxic gas. The cargo door is immediately to the right of the elevator. Before going, enter the Level 1 door to the right of the cargo door. Inside is a soldier with his back to you. As soon as you enter the room, take out the guard with the SOCOM. Near where he was standing, you'll find a suppressor for the SOCOM, which silences its shots, allowing you to take on enemies without fear of other soldiers hearing your gunfire. Leave and head for the upper level of this area. Inside the Level 1 room underneath the surveillance camera, you'll find the Cardboard Box A and three chaff grenades. Go right around to the opposite side of the floor. Underneath the camera in the top-right corner is a Level 2 room; enter for a mine detector and ration. Now, go down to the cargo door, and equip the thermal goggles or cigarettes. Inside, Meryl will warn you about the infrared sensors again. To avoid them, stand behind the line on the ground, wait for the sensor in front to rise above your head, then move forward and wait for the next sensor. Crawling is no good here, since the beams go continuously the ceiling to the floor. Rinse and repeat for each one. If you trip one of the beams, the doors will lock down, trapping you with no hope of escape, and the room will fill with poison gas, killing you slowly. At the end, re-equip the Level 2 ID card to open the door.
Boss: M1 Abrams tank[edit]
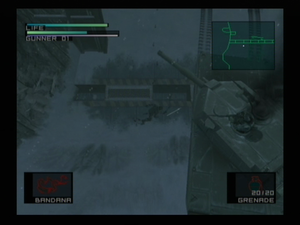
When you leave the tank hangar and start moving forward, a mystery caller by the name of "Deepthroat" will warn you of Claymore mines set in the area in front of you, and of a tank waiting ahead to ambush you. To avoid the claymores, equip the mine detector to reveal their locations on the radar (if you cannot avoid them, crawl over them to cross safely). This will reveal that the path to the right of the cargo door is clear of mines. Take that route. Once you reach the clearing, an M1 Abrams tank piloted by Vulcan Raven and two Genome Soldiers will attack. From your starting point, toss out a chaff grenade, and don't move until it explodes. This will jam the tank's electronics, disabling its cannon. Once it's in effect, start moving towards the tank, avoiding its gunfire along the way (you may also need another chaff grenade to keep its electronics down). When you're close enough (but not too close, or the tank will crush you underneath it), take out a normal grenade and throw it at the gunman outside the tank. If your aim is good enough, you'll take him in one hit; otherwise, he'll lose only a little health, and you'll need to go again. Do this for both gunmen that appear to destroy the tank. With the tank defeated, you'll receive the Level 3 ID card. When the cutscene ends, you'll be inside the nuclear warhead storage building. Before proceeding, return to the armoury, since you can now enter the top-right room. Inside is a Nikita missile launcher, and some missiles, which you'll need later. Return to the nuke storage building.
Nuclear warhead storage building[edit]
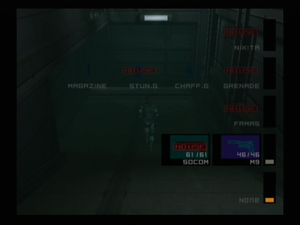
Head down the raised walkway to the left for a ration, then return and go down the main right corridor. You'll need to crawl to enter the next room. Once inside, Campbell and Naomi will call, telling you you aren't allowed to use weapons in here, due to the fact that this room is used to store dismantled nuclear warheads, and gunfire may cause them to leak. Campbell will also give you the Codec frequency of Nastasha Romanenko, an expert on nuclear weaponry, who will explain the full dangers of causing the dismantled warheads to leak. Her frequency is 141.52.
Inside, go to the left side of the room, and up the stairs to the elevator. Make sure you don't get caught; since you can't use any weapons here, your only methods of attack are punching, throwing, and choking, which simply don't do the job quickly enough to be effective during the Alert Phase. The exit will also be sealed off, so your only option is to disable the enemies long enough to find a good hiding spot. Take the elevator to floor B2, and head down once you land. Once you enter the room, it will fill with poison gas. Deepthroat will call, warning you not to go any further, since the floor is electrified. To shut this off, use a Nikita remote-controlled missile to destroy the switchboard on the north-west wall. To use the Nikita missile launcher, equip it to ![]() , and press
, and press ![]() to launch the missile. Use
to launch the missile. Use ![]() to guide the missile down, left, and up through the corridors to the switchboard. Keep an eye on your oxygen meter as well; if it gets too low, crash the missile and escape for air. When the missile reaches the computer area, gun cameras will start trying to shoot it down. If the missile is travelling at speed, it'll be too quick for the cameras to keep up; if not, you'll need to manoeuvre the missile out of harm's way. At the top of the computer room, the path starts to get complicated; just keep your cool and guide the missile slowly to its destination.
to guide the missile down, left, and up through the corridors to the switchboard. Keep an eye on your oxygen meter as well; if it gets too low, crash the missile and escape for air. When the missile reaches the computer area, gun cameras will start trying to shoot it down. If the missile is travelling at speed, it'll be too quick for the cameras to keep up; if not, you'll need to manoeuvre the missile out of harm's way. At the top of the computer room, the path starts to get complicated; just keep your cool and guide the missile slowly to its destination.
Once the switchboard is destroyed, get out for air, before continuing. Along the formerly-electrified corridor, there are three doors on the right side - the first contains a ration, the second requires a level 4 ID card, and the third contains a gun camera and gas mask, which, when equipped, slows down the speed at which your oxygen meter depletes in poison gas-filled rooms. Equip it as soon as you leave this room. At the fork in the corridor, you can follow the route your missile took to the left, though there's little to be gained in doing so at the moment. Instead, head right. Avoid the gun camera at the end, and use the Level 3 ID to open the door. Once inside, the poison gas will be purged, to the sound of general massacre in the next room. Investigate. In the next area, the corridor is littered with the bodies of dead Genome Soldiers, their blood coating the walls. As you head up the corridor, a dying soldier will stumble around the corner, claiming that a "ghost" is the cause of the carnage. Around the corner, you'll find the true cause: the mysterious ninja from the battle with Revolver Ocelot. Follow him into the next room.
Boss: Cyborg Ninja[edit]
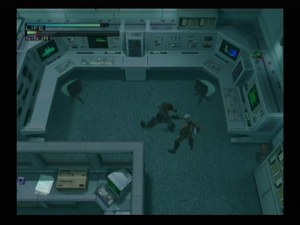
Inside, the Cyborg Ninja will claim to have been waiting for you, and challenges you to a battle to the death. As the Ninja will tell you if you try shooting him, "you can't defeat him with a weapon like that". Your only choice is to engage him in hand-to-hand combat. Use ![]() at close range to throw punches and kicks at him. Watch for his attacks, though; particularly his jump kick, which can be deadly at such range. If he back-flips over you, run, or he'll perform a Mario-like high-damage stomp on you. After the first few attacks, he'll teleport to the top of the room, and put away his sword. Give chase and attack, running when you see him preparing an attack. His attacks are swift and deadly, many capable of halving your health in one hit, so don't get hold back with the rations. Once you've reduced his health to about half, he'll turn on his stealth camouflage and teleport away. Equip the thermal goggles to find him, and resume attacking. After each round of punches, he'll teleport again. Continue hunting him and attacking until his health is down to about one third. At this point, he'll remove the stealth camo, but gain a new attack: when you approach him to attack, he'll teleport behind you and throw a punch at you. When you approach, run past him instead of attacking. Wait for him to punch, then attack when he's defenceless. After a few attacks, he'll begin teleporting twice before attacking. To avoid this, just keep moving until he punches, then come back and throw some punches of your own. Once his health is fully depleted, his exoskeleton will begin to malfunction. This leaves him vulnerable to your guns. Find and shoot him three times to finish him. Don't get too close, though, or you'll get electrocuted.
at close range to throw punches and kicks at him. Watch for his attacks, though; particularly his jump kick, which can be deadly at such range. If he back-flips over you, run, or he'll perform a Mario-like high-damage stomp on you. After the first few attacks, he'll teleport to the top of the room, and put away his sword. Give chase and attack, running when you see him preparing an attack. His attacks are swift and deadly, many capable of halving your health in one hit, so don't get hold back with the rations. Once you've reduced his health to about half, he'll turn on his stealth camouflage and teleport away. Equip the thermal goggles to find him, and resume attacking. After each round of punches, he'll teleport again. Continue hunting him and attacking until his health is down to about one third. At this point, he'll remove the stealth camo, but gain a new attack: when you approach him to attack, he'll teleport behind you and throw a punch at you. When you approach, run past him instead of attacking. Wait for him to punch, then attack when he's defenceless. After a few attacks, he'll begin teleporting twice before attacking. To avoid this, just keep moving until he punches, then come back and throw some punches of your own. Once his health is fully depleted, his exoskeleton will begin to malfunction. This leaves him vulnerable to your guns. Find and shoot him three times to finish him. Don't get too close, though, or you'll get electrocuted.
After the battle, the Cyborg Ninja will flee. After a Codec conversation with Campbell and Naomi, Hal Emmerich (better known as "Otacon"), the chief engineer on the Metal Gear project, will decide to come out of the locker he hid in before the battle. It turns out he was unaware of the true purpose of Metal Gear REX as a nuclear warhead launcher, and decides to help you prevent the terrorists from using Metal Gear to launch a nuke. He'll give you a level 4 ID card, and his Codec frequency, 141.12. You'll need to contact him a number of times throughout the game whenever you encounter technological problems such as broken machinery, or need to know where to go next (since Meryl's Codec is now broken, he essentially replaces her for the remainder of the game). Return to the gas-filled corridor, and take the left route (where you sent the Nikita missile earlier). Head up through the computer room (disabling the gun cameras with chaff grenades) and enter the level 4 room near the end to get the night-vision goggles. Return to the elevator, and go up to floor B1.
Enter the level 3 door just ahead of you. Inside, the "Genome Soldier" will recognise you and run away. Chase her into the women's bathroom. Inside, Meryl will give up her disguise, and give you a level 5 ID card. After the cutscene, follow her out of the bathroom, and head up the corridor to the left of the elevator. When you enter the commander's room, the door will lock behind you.
Boss: Psycho Mantis[edit]
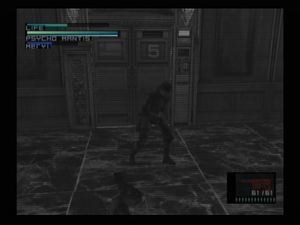
Inside, Meryl will become brainwashed by Psycho Mantis. Campbell will call, telling you to try to knock her out, and not to use your weapon on her. Knock her out by throwing her (when pressing ![]() to grab her, quickly push the direction opposite to that in which Snake is facing on
to grab her, quickly push the direction opposite to that in which Snake is facing on ![]() ) a few times. Once she's out, Psycho Mantis will reveal himself and show off his "power" by commenting on how well you've been doing in the game so far, naming certain games for which he can find save data on your memory card, and moving your controller with the vibration feature. When the battle begins, he'll attempt to trick you by blacking out your screen, leaving only the word "HIDEO" in the top-right corner. While you wait for the game to resume, switch your controller to controller port 2. This prevents Psycho Mantis from "reading your mind" and evading your attacks. Equip the thermal goggles to find Mantis. Note that during this battle, pressing
) a few times. Once she's out, Psycho Mantis will reveal himself and show off his "power" by commenting on how well you've been doing in the game so far, naming certain games for which he can find save data on your memory card, and moving your controller with the vibration feature. When the battle begins, he'll attempt to trick you by blacking out your screen, leaving only the word "HIDEO" in the top-right corner. While you wait for the game to resume, switch your controller to controller port 2. This prevents Psycho Mantis from "reading your mind" and evading your attacks. Equip the thermal goggles to find Mantis. Note that during this battle, pressing ![]() will show you Snake from Mantis' viewpoint, instead of the normal first-person view. Mantis attacks by taking objects from the room, and either throwing them at you, surrounding himself with them and making them rotate around him, or making them roll around the floor. Most attacks can be easily avoided by crawling, though they can get in the way of your shots sometimes. Often, it can prove easier to just walk up to him and punch him instead of attempting to shoot, though bullets will cause more damage.
will show you Snake from Mantis' viewpoint, instead of the normal first-person view. Mantis attacks by taking objects from the room, and either throwing them at you, surrounding himself with them and making them rotate around him, or making them roll around the floor. Most attacks can be easily avoided by crawling, though they can get in the way of your shots sometimes. Often, it can prove easier to just walk up to him and punch him instead of attempting to shoot, though bullets will cause more damage.
When his health is down to half, he'll awaken Meryl and force her to hold you at gunpoint again. Knock her out again, while avoiding Mantis' continuing attacks. Once she's knocked out, Mantis will re-awaken her and try to make her commit suicide. If you don't knock her out quickly enough, it's game over. After she goes down, Mantis will give up on her and start using several of his attacks at once, making it highly difficult to land an attack on him. Get down and wait for his barrage to end before going in for a hit. Keep attacking and dodging Mantis' attacks until he's defeated, freeing Meryl from his control. Before he dies, he'll unlock the door to the next area. Before continuing, plug the controller back into controller port 1. Head through the door Mantis unlocked. Look to the right of the stairs for a ration and some ammo, then head through the level 5 door to the next area.
