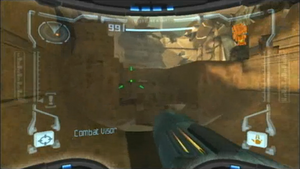
Welcome to Tallon IV, where the remainder of the game is set.
Tallon Overworld
This area is lush, green, and very wet. It's not an overworld in the usual sense in that the other level connect to each other as much to this level. But it is where you start the main part of the game and your ship is here.
Landing Site
Your ship has landed in a valley with a waterfall on the far side. You might as well start by turning around and scanning the ship. This will be a kind of home base for the rest of the game; you can return here to replenish your energy and ammunition, as well as save your progress.

If you check the map you will notice there are actually five doors here, but at the moment you do not have the necessary equipment to reach two of them, and with two others you are unable to get through the next room. The only path where are can make progress is through the door at the top of some ledges to the right of the ship. If you have the hint system on then the game will eventually point you in this direction.
Canyon Cavern
This is a small cave with a sandy floor. Beetles come up out of the ground when you go in but they are easily defeated by you Power Beam weapon. Get the scan first if you're collecting though. The entrance and exit look very similar so if you get turned around just remember to keep the mushrooms on your left.
Tallon Canyon
There is a variety of wildlife in this canyon so get your scan button ready. First get the the bright orange pod on you left, a Sap Sac. It's harmless unless you attack it at short range. Follow the stream to some platforms and notice the mushrooms below them. These are Blastcaps; if you touch them they will explode and if you shoot them from a distance they leave a poisonous gas behind. There are Zoomers on top of the platforms; they are easy to defeat but harmless unless you touch them. On the ledge to the right you can find a single Geemer which is similar, but with tough armor so you can't actually do anything to hurt it now.

You could follow the platforms and ledges to a door, but you won't be able to get much further until later in the game, so just go through the U-shaped passage to the right of the platforms, watching out for the Beetles that live there. The door to the next room is at the far end.
Transport Tunnel A
There are Zoomers and Sap Sacs here.
Transport to Chozo Ruins West
These transports are used to move between the areas of the game. Scan the control panel to activate it and step into the hologram ride as in the frigate elevators. These go much faster though and the distance is great enough that you get a little cut scene showing your trip.
Chozo Ruins
In contrast to the Tallon Overworld, this area is sandy and desert-like. Any water that exists here is poisoned.
Transport to Tallon Overworld North
This is where the transport from Tallon Overworld takes you. If you have the hint system turned on then the game will point you to your next destination sometime after reaching this point.
Ruins Entrance
This is the entrance to what was once the Chozo citadel, now abandoned. Beetles attack when you exit the tunnel from the transport.

After dealing with the beetles, look around and find the inscription above the door to the next room. Scan it to get your first bit of Chozo Lore. These inscriptions are common in this area but you can also find them in other areas as well. They have backstory information on the Chozo civilization and what happened to it.
Main Plaza
This is the main section of the level and you get a quick overview the first time you enter. As soon as you step off the ledge at the entrance you are attacked by a large swarm of Beetles, but they don't all attack at once and some of them may retreat back underground before you've defeated the first few. If you're just passing through this section in the future then it's faster to just hop over them, but it's better to get them out of the way if you want to explore.
Start by scanning the door on the left; you will need your missiles, which you lost in the escape from the frigate, to open it.

Go through the U-shaped passage ahead and up the ledges to a higher section. A series of ledges starts at the far end and continues back on the left to a bridge, but you won't be able to get far in that direction now. Instead, go through the door under the ledges.
Nursery Access
Follow the tunnel until you see a swarm of Scarabs. These don't attack but will station themselves in your path like tiny living landmines. While touching a single one will only inflict minor damage, walking through the entire swarm will be dangerous for you current levels of energy. Just fire at them from a distance to clear the path.
Eyon Tunnel
This passage is guarded by Eyons which sweep painful green lasers up and down. You can either time your way past the lasers, or shoot the Eyons with the Power Beam to stun them for a moment. You don't have the firepower to do any permanent harm to them now.
Ruined Nursery
When you enter this room the hint system, assuming it's on, points out a save station in a room connected to this one. There are some enemies to deal with before you can reach it though.
When you step into the room a couple of Beetles attack. There are ledges on the right and when you climb them some new enemies, War Wasps, attack. They move quickly so target them before firing. Get a scan of the last one before shooting it. Now look around the ceiling and find the War Wasp Hive for another scan. Once you get your missiles back you'll be able to preemptively destroy the hives before the wasps come out, but for now you just have to deal with the wasps.

Once you've cleared the enemies from the room, look to the right of the tree and scan the inscription on the wall for another Chozo Lore entry. Go through the door near the ledge above it.
Save Station 1
This is a tiny room whose only purpose is to house a Save Station. It's a very good idea to save at this point. Go back and go through the other exit in the previous room.
North Atrium
This is a sunlit passage where Scarabs appear at the far end. The green flies buzzing around are just flavor.
Ruined Gallery
A swarm of War Wasps attacks when you enter the room so defeat them as quickly as possible. You start on a ledge and much of the floor below is covered in poisonous water. (Watch your danger meter go up as you get near it. It's a good idea to keep an eye on it to warn you about hazards in the environment.) There are Blastcaps on a small island in the water, and at the edge is some new creatures, Tangle Weeds. It's not entirely clear whether these are animal for vegetable, but the only harm they do is to slow you down a bit. Shoot them to make them retract if they get annoying. Check the door under the ledge to the left if you missed the Missile Door Lock scan earlier. There is a platform to give you a boost back up to the ledges. Follow the ledges around to the right to get to the far side door.
Totem Access
The firefly-like creatures meandering around here are Plazmites. They're not aggressive and the light they produce can be helpful at times, but you do take damage it you touch one and they're hard to avoid here so it's better to take them out.

The passage where you enter leads to a small room with Tangle Weed and poisonous water. Shoot the box here to get a Large Energy, but scan it before picking it up since this is probably the first time you've come across one. Hop over the toxic water to the far passage and follow it to the end.
Hive Totem
This is a large room and most of the floor is covered with, you guessed it, toxic water. Once you step off the ledge at the entrance you won't be able to get back until later.
Hop up to the central platform in the room and start across the bridge there. Before you get far more toxic water pours in from openings in the walls, covering the rest of the floor with it. The bridge lowers so you're stuck on the platform. A mechanical device at the far side of the room becomes active and a battle begins.

When you've defeated the machine, the water level lowers and you can cross the bridge to claim what it was guarding, the Missile Launcher. When you get the upgrade some debris falls from the ceiling creating some steps to get back up to the ledge where you came in. (Very fortunate indeed since otherwise you would be trapped in this room forever.)
Before going back though, put the missile launcher to good use by firing one at the door behind the platform. Once you've removed the blast shield with the missile it becomes an ordinary door. Scan the door first if you haven't gotten the Missile Door Lock entry yet.
Expansions (Chozo Ruins)
Most equipment upgrades in the game allow you to collect expansions that were unreachable before. We'll cover these items in followup sections, excluding those to be picked up en route to the next upgrade.
Transport Access North

Go through the door behind the platform where you picked up the missile launcher. You enter a small room with some Tangle Weed. First get the glowing blue canister in the middle; this is your first energy tank which will increase your energy capacity by 100 units and completely heal you in the process. Since you only started with 100, this doubles you health.
Shooting the boxes here will often release a Missile Ammo pickup. Get the scan before you collect the item. There is another way out of this room but you'll have to come back later to explore it.
Ruined Gallery

Backtrack to the Ruined Gallery; remember that you can use a missile to destroy the wasp nest before the wasps appear.
Look for the cracked wall behind the poison water on the lower level, and shoot it will a missile to reveal your first Missile Expansion. The small island in the water can be used as a stepping stone to reach it, but first you should clear the Blast Caps and wait for the toxic gas to disperse.
There is another Missile Lock Door under a ledge. Shoot it with a missile to clear the shield and go in.
Map Station
This is a small room which only contains the Map Station for this area. Scan it first if you missed this entry in the frigate, then download the map.
At this point you may want to continue back to the save station to save your progress.
Expansions (Tallon Overworld)
This section covers expansions you can now reach in the Tallon Overworld. This will take you out of your way so you may want to get these items later in the game, but on the other hand you can't have too much missile capacity. Some sections have been included more for understanding the plot than for being useful in gameplay.
Root Tunnel
Go back to Tallon Canyon and this time scale the ledges near the stream. Hop across the canyon to the ledge with the Geemer; now that you have missiles you can take it out first. Follow the ledge to a bridge, cross, then go through a waterfall to a door which leads to the Root Tunnel.
There are Sap Sac and Tangle Weed here, as well as a Bloodflower, a new enemy. Wait until it shoots one of its poisonous spores at you, the shoot the spore to create a cloud of gas that destroys the flower.
Use a missile to clear the blast shield from the opposite door, the follow the root on the left and go through.
Root Cave
This is a tall, round room and you start at mid-level. You can't go further up now, so just drop down the ledges clearing the creatures that might get your way. At the bottom a swarm of Beetles attacks; there are a large number of them but you can stand on a ledge to shoot them while they won't be able to reach you. Go through the door at the bottom level.
Transport Tunnel B
There is a stone bridge to carry you over some scary looking mist on the ground, but the mist is actually harmless. So drop over the side of the bridge and look underneath to find a Missile Expansion.
There are no more expansions in this direction at this point in the game, but we'll cover the next room or two to avoid leaving holes in the map.
Transport to Magmoor Caverns East
You can take this lift to Magmoor Caverns, another area in the game. You don't have the equipment needed to actually do any exploring there yet though. There is another transport to Magmoor Caverns in the Chozo Ruins as well, but this one serves as a shortcut when you want to go directly between the caverns and Tallon Overworld.
Since you can't go much farther, start backtracking.
Temple Hall
Go back to the Landing Site and scale the ledges to the left of the waterfall. Go through the tunnel behind the waterfall and follow the ledge to a door that leads to Temple Hall.
There is Tangle Weed on the floor here and there are Seedlings on the ceiling. Seedlings shoot spines at you so you need to take them out quickly, but get a scan of the last one.
Temple Security Station
As you enter you get an overview of the Impact Crater, a vast hole in the ground. You're in a transparent tube connecting the side of the hole with a huge rock floating in the middle.
Scan the hologram halfway through for a Pirate Data entry. Then use a missile to get through the door at the far end.
Temple Lobby
This is just a tunnel through the giant floating rock.
Artifact Temple
Check the ends of the long window to get the only two Chozo Lore entries in this area. Follow the ramp on the left down to a ledge outside. This has a group of statues which have something to do with the seal the Chozo placed on what the Space Pirates called the "energy source" contained in the crater. This changes your primary goal from finding Ridley to stopping the Pirates from getting whatever is sealed in the crater.
The first Artifact you need to do this is at the center of the group of statues, but since you can't do anything with it until you get all twelve Artifacts, you don't really need to pick it up until much later in the game.
