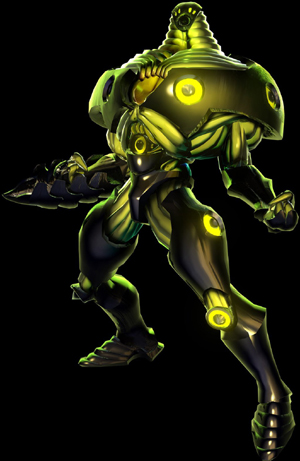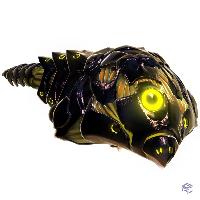
His Affinity Weapon is the Volt Driver and his Alt-Form is the Stinglarva. The Volt Driver is a very quick weapon when not charged. The charged version homes in on the opposing player and, if hits him/her, scrambles the picture on the screen so that they cannot see for a short period of time. This may seem like a giant vantage point, but the charged Volt Driver shot is the slowest out of all the affinity weapons. The Stinglarva is semi-fast and controls really well. The bombs home in on enemies if they get too close and explode. The problem is that, though small, the Stinglarva takes up a lot of surface area, so it is easy to hit. Kanden is a good choice for those who are starting to get comfortable with Hunters.
Strategy[edit]
- The main strategy for Kanden is to switch into Stinglarva and slide around the arena after foes, dropping Larva Bombs, that will lock onto the foe. Another strategy is to weaken a foe with rapid fire Volt Driver shots and switch into Sting Larva to deliver the killing blow, or just finish them off.
- Kanden's specialty, the Volt Driver, is your best friend while playing Kanden. You can steadily hack away at opponent's energy with rapid-fire shots, or scramble their vision with charge shots. Charge shots can be especially lethal when you are equipped with a Double Damage.
- Kanden's best friends are narrow passageways. Don't make yourself known until your foe is about halfway through the tunnel, then fire a charged Volt Driver.
- An example is in Combat Hall, where there's the long commonly used tunnel.
- Kanden is amazing at ambushing. Wait in an area where people often come, and fire shots at them. A good example is the Alt-Form tunnel in Combat hall, where you can rack up several kills in an intense battle.
- Try sniping - up close - like this: take a shot, squirm to them drop a bomb, which propels you up, change back, snipe, rinse lather repeat.
- Those holographic doors that obscure your vision? Charge a Volt Driver shot, and stay behind the door. They won't see you until it's too late. Alternatively, just headshot them.
Stinglarva[edit]

The segmented Stinglarva is one of the easiest alt-forms to maneuver. One of it's greatest advantages is that it lays low to the ground, as a result, if perched on a high platform, other hunters will have a difficult time firing at the Stinglarva. However, that means from above, a hunter will have an easy time firing the Stinglarva because of the surface area it takes up. Larva bombs break off from the Stinglarva's tail and lock onto the nearest hunter within range. This is also one of the three alt-forms that can bomb jump, although it doesn't do much, since the most you can get is one jump from it. Remember that the Stinglarva always slides down slopes, even if frozen, so don't remain stationary on a slope. Also, the Stinglarva always goes in the direction of where the head is pointing, so it cannot turn around constantly without slowing down.
Strategy[edit]
- The Stinglarva can maneuver around Alts easily and it's homing bombs will deal 20 points of damage for each bomb. It's a useful counter against Morph Balls & Triskelions. The Stinglarva is useful against Dialanches, because the homing bombs can outrange the Dialanches's blades.
- In low gravity arenas the Stinglarva's bombs will propel it miles. This can be abused to get to good sniping spots in Weapons Complex.
- The Stinglarva is good for offense, driving a bomb or into your foe, then reverting back to Biped form to pelt your foe with the Volt Driver.
- For escapes, the Stinglarva bombs can discourage opponent's from chasing you.
