Scene 17[edit]

| Clear condition | Enemy revival | Enemy appearance |
|---|---|---|
| Exit | Always | Bat, Spider, Giant Skeleton Demon |
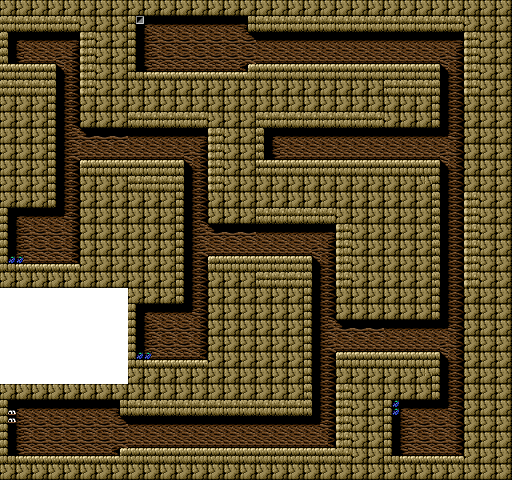
Compared to the long twisting scene that you just completed, this scene presents you with a simple corridor that you must walk from one end to the other. You start off encountering spiders. After a while, they are replaced with bats. Once you have defeated a few bats, many more will approach you from both sides. Be sure to stop and turn around to defeat all of the bats before they reach you.
Shortly after, you should hear a sound effect that indicates that a Giant Skeleton Demon is ahead. Do not advance too quickly, it is very likely that the skeleton will rush up and kill you with his sword. Wait for it to back off and then switch to fireballs. While you're up on the ledge, the good news is that you can remain a safe distance from the skeleton. The bad news is that his sword will protect him from most attacks. To use the fireballs most efficiently, you'll have to find the right timing to drop off the ledge and to the ground below, and then shoot the fireballs as fast as possible to destroy the skeleton before it has a chance to bring its sword down.
Even after you defeat the skeleton, the challenge is not over. The exit is positioned high up in the corner such that you cannot wall bounce to reach it. You'll have to jump onto the wall and climb your way up to the exit. All the while, bats will continue to stream into the room from the left. While hanging on the wall, you will be defenseless against them. Time your approach to the exit so that few bats are high up in the air, and climb the wall as rapidly as possible.
Scene 18[edit]

| Clear condition | Enemy revival | Enemy appearance |
|---|---|---|
| Bonus | n/a | none |
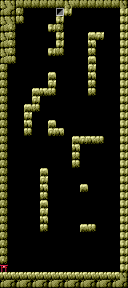
This is another bonus scene. There are no enemies, but reaching the exit is particularly difficult. You can largely ignore the right side of the screen, and focus on wall bouncing along the left side of the screen. When you reach the column situated below the exit, the only way to bounce up to the exit is to stand on the highest block of the column, and wall bounce to the right so that you end up grabbing onto the ledge just below the exit. If you don't hit it right, you will bounce off and half to try again. Once you grab onto the ledge, climb up and hop into the exit.
Scene 19[edit]

| Clear condition | Enemy revival | Enemy appearance |
|---|---|---|
| Exit | Always | Eyeballs, Bats, Spiders, Skeletons, Skeleton Necks, Mini Dragon, Giant Skeleton Demon |
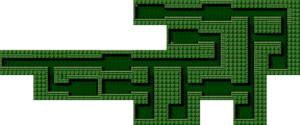
From the start, fall down the shaft. You'll pass an opening and land in a room with many eyeballs and two bonus items. Clear away the eyeballs, collect the items, and then wall bounce up to the opening that you passed. You will encounter a spider in this corridor, so be prepared to bomb him. Fall down the next shaft. If you drop to the bottom, you will land in a room with skeletons, and they may kill you with their knives while you are stunned, so it's better to avoid that room. Get into the next corridor and bomb the spiders.
Dropping down the next shaft safely can present a bit of a challenge. Bats will start to appear from the corridors, and they can hit you on your way down, or while you're stunned if you don't land properly. Along the bottom corridor is a dead-end with a Giant Skeleton Demon and some bonus items that are best avoided entirely. The middle corridor contains more bats and some spiders. It ends with a split that leads up and down. Below is a small room with a few more bats, a Mini Dragon, and some bonus items. Only go for them you don't mind risking hitting the bats on the way down.
Wall bounce your way up the shaft. You'll pass one dead-end corridor along the way which can be ignore as you make your way up to the very top. Be prepared to bomb any bats that are flying your way as you land in the corridor. Then make your way to the left towards the exit as Skeleton Necks begin to fly down the hall. One more spider will appear before you reach the final room. A Giant Skeleton Demon occupies the room. Naturally, if you have fireballs at all, you are highly advised to use them. Otherwise, you will have to rely on bombs in order to clear it out. Once the demon is gone, watch out for more Skeleton Necks that fly into the room, jump up to the left wall and climb up to the exit.
Scene 20[edit]

| Clear condition | Enemy revival | Enemy appearance |
|---|---|---|
| Exit | Always | Bat, Skeleton Neck, Half Catfish, Mini Dragon Giant Daruma Doll, Giant Skeleton Demon, Armored Guard |
From the start, you must run to the right. Hop over the first shaft, as it only leads to a dead-end, and watch out for bats and Skeleton Necks flying through the area. You'll begin to feel the ground shaking effect of a Giant Daruma Doll. When you reach a room, you may or may not encounter the doll, but be prepared to remove the Half Catfish waiting for you on the floor.
Beyond the room, you can once again ignore and jump over the shaft that you encounter, as it only leads to dead-ends. Proceed to the second shaft. (If you wish to collect some bonus items, you might jump over the second shaft, and wall bounce up the shaft that follows to reach a room with items and a few Skeleton Necks.) Drop down the second shaft. If you drop to the bottom, you'll end up in a room with a Mini Dragon and some bats. Clear away the bats and climb back up to the corridor you passed.
Just beyond this short corridor is a room containing a Giant Skeleton Demon. Once again, ready your fireballs if you have them, or use bombs to clear the skeleton away. Once the skeleton is gone, cross the room to the next shaft. Wall bounce up the shaft (the bottom is a dead-end), and you will reach a new corridor. From here, you can walk to the right and wall bounce up the far right shaft, or you can try to continue wall bouncing up the current shaft. The only difference is how many Half Catfish you'll have to deal with at one time.
Once you're safely at the top, walk to the left and clear away any Skeleton Necks that come flying your way. When you reach the final room, you'll meet a new enemy. A gigantic armored guard will be pacing the room and swinging a long sword in a similar manner to the Giant Demon Skeletons that you've faced in the past. In fact, the strategy against this giant armored guard is the same: Use fireballs if you have them, or simply bomb him until he explodes. It's slightly easier to bomb the guard then the skeleton since his sword is a little higher off the ground.
Once the guard is defeated, watch out for any incoming Skeleton Necks. When the coast is clear, jump up to the left wall and climb up to the exit above.
Scene 21[edit]

| Clear condition | Enemy revival | Enemy appearance |
|---|---|---|
| Bonus | Never | Skeletons, Lightning Boys |
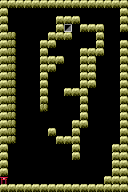
This is the most challenging Bonus scene of all. The reach the exit, you must exploit the way that Ninja-kun bounces off walls in an effort to rebound into a small pocket in the middle of the stage. When you start, a few Lightning Boys will be on the ground and will attack you aggressively. Take them out with bombs, and then use the right wall to wall bounce up to the top.
If you have trouble reach the top because you get caught by the overhang, you'll have to try rebounding off the wall on the left so that you land lower against the right wall. Then wall bounce off the right and again off the left to get above the overhang. Get to the top and then cross over to the left side of the screen. To make your way into the small pocket in the center, you must jump from the top of the structure in the middle to the wall on the right. You should aim for the top block of the left wall. You will rebound off that block, then off the center structure, and you should approach the left wall again. At this time, be prepared to wall bounce off the left wall and toward the small platform that a skeleton is walking on.
Performing this correctly is a matter of timing and judgement. If you don't rebound off the left wall correctly, or rebound too high, you won't be able to hit the platform in the center. In some cases it's a matter of trial and error, but if you take too long, you will get chased by the fire wheel. If this starts to happen, skip the bonus stage and exit through the doorway at the bottom.
Scene 22[edit]

| Clear condition | Enemy revival | Enemy appearance |
|---|---|---|
| Defeat Enemies | Never | Kabukis |
This scene is nearly identical to scene 2-B, except that it is filled entirely with Kabukis. Since you start at the bottom, using bombs to clear out any enemies above should make this scene a simple task. Collect the fireballs and fall down with your defeated enemies for extra points.
Scene 23[edit]
| Clear condition | Enemy revival | Enemy appearance |
|---|---|---|
| Defeat Enemies | Never | Armor |
After warming up in the previous scene, you will find yourself right back in it again, only this time, all of the enemies are the dreaded Armor enemies. You will be forced to deal with stunning all of them before you can defeat them. The easiest way to stun them consistently is not by dropping down on them from above, but by jumping up to them from below. You will find that it is easier to predict the right timing, and stun them more frequently than if you try to hit them from above. Once they are stunned, may removing them with any weapon your immediate priority before they get back up again. Make sure that no Armor is shooting his bow before jumping up or falling down to any Armor's level.
Scene 24[edit]

| Clear condition | Enemy revival | Enemy appearance |
|---|---|---|
| Bonus | Never | Armor, Half Catfish |
Scene 24 is a bonus stage that is arranged similarly to Scene 15, complete with the Half Catfish in the middle of the upper platform. However, the eyeballs are now replaced with Armors. The good news is that you don't have to defeat all of them in order to complete the stage, but you will have to deal with them if you get stuck at the bottom of one of the gaps. Be sure to use Fireballs to clear away the Half Catfish before you arrive at the top platform. Once you're up there, you may have to worry about Armors shooting arrows at you. Use bombs to defend yourself while you approach the exit on the left.