Waiting Hall
The chapter begins with Professor Layton, who explains who exactly the "Great Witch Bezella" is. It is believed by the citizens of Labyrinthia that Bezella is the source of all witches, and that if she is killed, there would be no more witches. Maya wants to ask Espella what she knows, but unfortunately no-one is allowed to see her during her questioning. The Professor is curious about something Barnham said at the end of the trial, and decides that he must speak to Barnham's superior. Move to the Inquisitors' Hall.
Inquisitors' Hall
Inside, Barnham is talking to the "High Inquisitor", Darklaw. After he leaves, talk to Darklaw:
- Espella: Darklaw says that just because you defended Espella in the last trial, that doesn't mean you will get to defend her in her next trial. Since Espella is charged with the gravest offence known in Labyrinthia, her defenders would endanger themselves should Espella be found guilty - and Espella, being Espella, would probably not want to put you in danger for her sake.
- The Great Witch Bezella: Bezella's existence is accepted as fact by all of Labyrinthia. If Bezella were to return, it is feared she would burn the town again, as seen in the mural the Professor found earlier.
- Why Espella is a suspect: Darklaw tells you that you must investigate for yourselves the reason why the townsfolk believe Espella is the Great Witch. She tells you to come back tomorrow if you want to see Espella.
Afterwards, the Professor suggests to return to the Bakery. High Inquisitor Darklaw is added to your Mysteries. You now move automatically to the Court Entrance.
Court Entrance
Outside, you are greeted by a small dog, who takes to Maya quickly - and takes to Phoenix quite literally, before running off towards the Inquisitors' Hall. Luke mentions that "what he was saying wasn't cute at all". Apparently the dog sounded very similar to Inquisitor Barnham, making it likely that he is Barnham's dog. Move to the Road to the Court for an optional puzzle; otherwise, move back to the E. Shopping Area.
Road to the Court
Search the top of the right-most tree to find Muffet again. She has another puzzle for you.
30
Rearrange the flower petals so that each petal sits beside another petal of either the same colour or shape. Rotate the flower clockwise with ![]() , and counter-clockwise with
, and counter-clockwise with ![]() . Pluck petals with
. Pluck petals with ![]() . When you insert a petal into a spot which already contains one, you will swap petals. Note that there are only one of the purple and red petals, so they must be surrounded by petals of the same shape.
. When you insert a petal into a spot which already contains one, you will swap petals. Note that there are only one of the purple and red petals, so they must be surrounded by petals of the same shape.
Muffet seems happy now. Move to the E. Shopping Area.
E. Shopping Area
Patty is waiting for you outside the bakery. She was really impressed with your performance at the trial. Enter the Bakery, where everyone heads to bed for the night.
Later that night, Maya and Luke are still awake, unable to stop worrying about Espella. Maya still doesn't know how she and Phoenix ended up in Labyrinthia, or where their fake memories of having lived there for five years came from. Luke manages to cheer her up, but they then notice someone talking outside. Patty seems to be searching for Eve, Espella's pet cat, who has gone missing. Luke decides that he and Maya should find Eve for her. She isn't anywhere around here, so move to North Parade Avenue.
North Parade Avenue
Mailer is standing in the middle of the road. Talk to her. She thinks she saw Eve, but will only tell you if you help solve her puzzle.
40
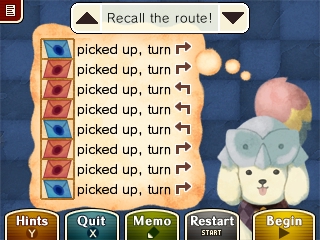
Nick's new best friend, Constantine, is supposed to go around town collecting letters, but he's forgotten the route he needs to take. Use ![]() to rearrange the order of the letters on the Touch Screen such that Constantine picks up every letter in a single circuit of the town. The directions in which Constantine will turn after collecting each letter are already filled in, so use this information to decide when he should turn in those directions. Touch "Begin" to start, and touch "Stop" to restart if you make a mistake.
to rearrange the order of the letters on the Touch Screen such that Constantine picks up every letter in a single circuit of the town. The directions in which Constantine will turn after collecting each letter are already filled in, so use this information to decide when he should turn in those directions. Touch "Begin" to start, and touch "Stop" to restart if you make a mistake.
Mailer is satisifed, and tells you that she didn't actually see the cat, but just heard Bardly singing about it in the Town Centre. But before you go there, move to W. Shopping Area to see if you can't get any more details.
W. Shopping Area
Talk to Price, who is standing outside his shop. He might be able to remember where he saw Eve if you can take this puzzle off his mind.
30
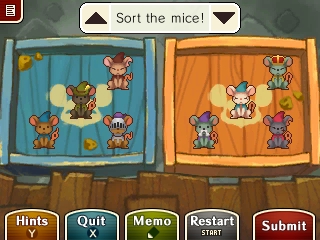
Separate the mice into the good group, who go in the blue box, and the bad mice, who go in the orange box. Use ![]() to drag the mice into the boxes, and touch "Submit" when you're done. The good mice have one thing in common with each other, and the bad mice have a similar common feature. Look closely at the mice, and compare them carefully to each other, and the example on the top screen (which uses different mice).
to drag the mice into the boxes, and touch "Submit" when you're done. The good mice have one thing in common with each other, and the bad mice have a similar common feature. Look closely at the mice, and compare them carefully to each other, and the example on the top screen (which uses different mice).
Zvarri! Price is happy to be over his mousy problem, and also tells you to speak to the bard by the fountain. Move to the Town Centre.
Town Centre
Talk to Bardly. He's worried about a rival bard who has recently arrived on the scene, and wants you to help bring some colour into his life.
30
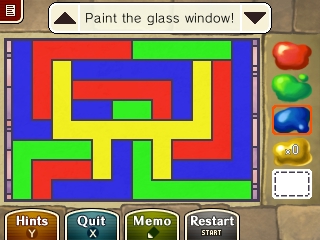
Use ![]() to colour in the stained glass window on the Touch Screen. You have infinite red, green, and blue paint, but only one section can be painted yellow. No two neighbouring sections can be the same colour. Touch the colours on the pallete to the right to change colours, and touch the blank white square to erase colours. If you touch a section that is already filled in, you will repaint it in the colour you're currently using. Since you only have one yellow, try to put it somewhere where it will touch several other sections.
to colour in the stained glass window on the Touch Screen. You have infinite red, green, and blue paint, but only one section can be painted yellow. No two neighbouring sections can be the same colour. Touch the colours on the pallete to the right to change colours, and touch the blank white square to erase colours. If you touch a section that is already filled in, you will repaint it in the colour you're currently using. Since you only have one yellow, try to put it somewhere where it will touch several other sections.
That's certainly cheered up Bardly. Now you can ask him about Eve. He sings about a black cat who was chased to the main street by three knights.
Move to the Main Street.
Main Street
Three knights are standing in the middle of the street. Sound familiar? Talk to them. They're deliberating whether or not to continue searching for Eve. Unfortunately, they don't particularly want to help you, and give you some less-than-useful clues. Looks like you'll need to put the information together yourself.
20
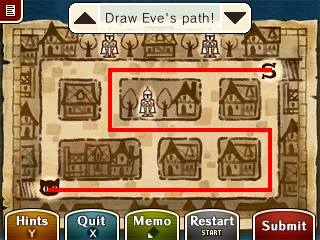
Use ![]() to trace Eve's path through the streets, starting at the "S", and ending at the cat icon. The knights give you three clues:
to trace Eve's path through the streets, starting at the "S", and ending at the cat icon. The knights give you three clues:
- Eve turned left at a statue.
- Eve went straight through a crossroads.
- Eve went straight past another statue.
Your path cannot overlap at any point. Start by trying to figure out which statue Eve took a left turn at, and work from there.
It seems Eve ran off toward the town square. Move to the Town Square.
Town Square
What is Darklaw doing here? Talk to her. She's investigating an incident involving the bell tower. Three months ago, an alchemist living nearby was murdered. Does the bell tower have some connection to this incident? Either way, Darklaw hasn't seen Eve, but while she talks to Maya, Luke manages to find her. The Mystery of High Inquisitor Darklaw is marked as solved. You can now move to the E. Shopping Area, or to the Great Archive Entrance for an optional puzzle.
Great Archive Entrance
Talk to Constantine, who seems none too pleased to see Eve. Luke manages to calm them down with a puzzle.
25
Maya and Luke, with the help of Eve and Constantine, must move a pair of carts to the opposite sides of the town. Use ![]() to drag the character icons across the grid on the Touch Screen. Start by moving Luke out of his area, and clearing a path for Maya to drag her cart across the town. You can do this without having to move Maya's cart.
to drag the character icons across the grid on the Touch Screen. Start by moving Luke out of his area, and clearing a path for Maya to drag her cart across the town. You can do this without having to move Maya's cart.
The shortest solution is:
- Move Luke right twice
- Move Luke down
- Move Luke left
- Move Luke down
- Move Luke right twice
Constantine seems to have warmed up to Eve a little. Now, move to the E. Shopping Area.
E. Shopping Area (2)
Inside the bakery, everyone is already awake, and worried sick about where Maya and Luke are. They calm down when they hear that Maya and Luke were looking for Eve. After breakfast, it's time to go and visit Espella. But first, speak to Mary, who is standing outside the bakery with a puzzle for you.
50
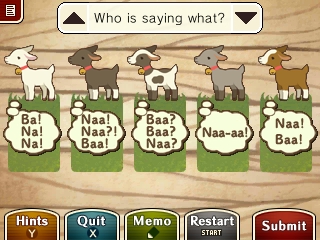
Mary has five goats, who were put out to pasture. They love to talk, but unfortunately all five started talking over each other, and you have to figure out which goat is saying what. Use ![]() to move the correct sets of "words" to the correct goats. Pay attention to which goat is in which picture in the top screen, and try to work out which phrases only appear when a certain goat is included.
to move the correct sets of "words" to the correct goats. Pay attention to which goat is in which picture in the top screen, and try to work out which phrases only appear when a certain goat is included.
Move to the Court Entrance.
Court Entrance
Outside, a knight arrives, and says that "Dark Hat" has been summoned by none other than the Storyteller himself. The Professor doesn't have any choice in the matter, leaving you and Maya to speak to Espella without him and Luke.
Waiting Hall (2)
Not much to do here, so move straight to Deathknell Dungeon.
Deathknell Dungeon
Talk to Espella. She says she's fine, but asks if you're sure you really want to help her. Since she's accused of being the Great Witch, anyone helping her will probably be seen as suspicious as well... but you reassure her that you'll defend her to the end. You mention that Darklaw said there's a "reason" why the people of Labyrinthia keep their distance from Espella, but just as she prepares to explain, the action cuts to the Professor and Luke at the Great Archive Entrance.
Great Archive Entrance (2)
There is an optional puzzle available all the way back at the Main Street, so you can go there if you wish. Otherwise, move to the Guarded Gate.
Main Street (2)
Talk to Old Rootie, the lady carrying the basket of turnips. She asks if you want to hear a "rumour", but won't tell you until you solve a puzzle.
30
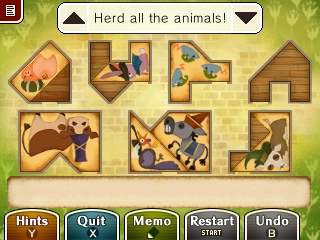
Use ![]() to move the puzzle pieces on the Touch Screen into the marked compartments. You can have more than one piece within a compartment, but they cannot overlap at any point. Touch the edges of the pieces to rotate them. You have seven pieces, and seven compartments, but you don't necessarily have to have one piece to every room.
to move the puzzle pieces on the Touch Screen into the marked compartments. You can have more than one piece within a compartment, but they cannot overlap at any point. Touch the edges of the pieces to rotate them. You have seven pieces, and seven compartments, but you don't necessarily have to have one piece to every room.
It looks like nothing is going to come of that rumour... Move to the Guarded Gate.
Guarded Gate
Talk to the knights at the gate. They've been waiting for you, but can't fathom why the Storyteller wants to meet you, since one does not simply visit the Storyteller. Unfortunately, the gate won't open. One of the knights knows how to fix it, though, and it's up to you to find him.
25
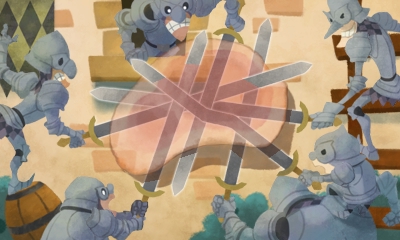
A group of hungry knights have all stuck their blades into a huge chunk of meat at once. One of the knights has a bent sword, though, and he's the one you're looking for. Use the memo function to trace out the shape of each blade, and you'll notice that one of them is bent. Use ![]() to highlight the knight in question, and press
to highlight the knight in question, and press ![]() to select him, then touch "Submit" to check if your answer is correct.
to select him, then touch "Submit" to check if your answer is correct.
The knight fixes the gate straight away, and you're free to continue. Move to the Knights' Garrison.
Knights' Garrison
The knights are all busy training. You're supposed to meet with the Storyteller in the Audience Room, but you have no idea where that is. The Professor does, however, notice a large flight of stairs, with a stately-looking building at the top. This seems like it might be your destination... but there's a bit of a commotion there. Maybe you can lend a hand. Talk to the group of knights arguing with the civilian first. The knight captain is accusing the citizen, Cutter, of theft and assault, but Cutter claims he is innocent. Maybe you can settle the dispute, with the help of a puzzle.
40
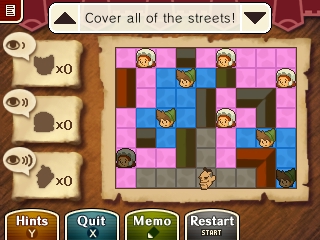
A thief has been reported in the town centre! In response, the townsfolk have formed a neighbourhood watch, and you have to organise them correctly. There are two requirements:
- All of the streets must be covered.
- The citizens' views of the streets cannot overlap.
Use the ![]() to arrange the citizens so they meet both of these conditions. The boys can see up to one tile away in all directions, the women can see two tiles, and Cutter can see three tiles. It's easiest to start by placing Cutter, since there are not many places in which his large viewing range cannot overlap others.
to arrange the citizens so they meet both of these conditions. The boys can see up to one tile away in all directions, the women can see two tiles, and Cutter can see three tiles. It's easiest to start by placing Cutter, since there are not many places in which his large viewing range cannot overlap others.
Your solution satisfies the knights of Cutter's innocence, and he is allowed to go free. The captain tells you that the Audience Room is indeed at the top of the stairs. You can go there now, or take on the two optional puzzles located here.
For the first optional puzzle, talk to the lone knight here. He's been contemplating this puzzle for several days, and still doesn't get it.
20
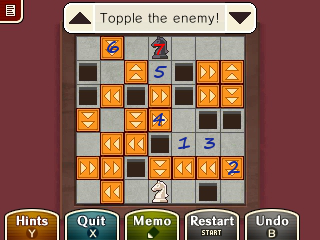
Use the ![]() to select which of the possible squares (marked in red) you want to move your knight to. Since this is a knight chess piece, it can only move in an L-shaped pattern, like real knight chess pieces. Placing the piece on one of the orange squares will move it automatically in the directions marked on those squares. Land on the black knight's square to win. It may be easiest to start from the goal, and work backwards to the start.
to select which of the possible squares (marked in red) you want to move your knight to. Since this is a knight chess piece, it can only move in an L-shaped pattern, like real knight chess pieces. Placing the piece on one of the orange squares will move it automatically in the directions marked on those squares. Land on the black knight's square to win. It may be easiest to start from the goal, and work backwards to the start.
There's one more optional puzzle in this area. Examine the turret to the upper-left. There are some mice hiding here, and, naturally, a puzzle.
25
Four unruly mice have taken over the house, and are eating all of the cheese there. You have to try and trap all of them. Use ![]() to tilt the platform and slide the mice around. The goal is to catch all four mice in the traps (marked with an "X"), without letting them get any of the cheese. Remember that the obvious first move (in this case, up, to trap the left-most mouse) is not always the best first move.
to tilt the platform and slide the mice around. The goal is to catch all four mice in the traps (marked with an "X"), without letting them get any of the cheese. Remember that the obvious first move (in this case, up, to trap the left-most mouse) is not always the best first move.
The quickest solution is:
- Right
- Up
- Right
- Left
- Right
- Down
- Left
- Right
- Up
- Left
- Up
- Right
- Down
When you're done, move to the Audience Rm. Entrance.
Audience Rm. Entrance
The area is totally empty, with not a sound to be heard, save for the wind. This area has one hidden puzzle available; you should complete that first before advancing. Examine the rear-left turret to find it.
40
This is very similar to the first Rotating Room puzzle. Press ![]() and
and ![]() to rotate the room clockwise and counter-clockwise, respectively. If the knight touches a lit candle, it will be extinguished, and vice-versa. Start by quenching the candle that is in the upper-right corner at the start.
to rotate the room clockwise and counter-clockwise, respectively. If the knight touches a lit candle, it will be extinguished, and vice-versa. Start by quenching the candle that is in the upper-right corner at the start.
The quickest solution is:
- Clockwise twice
- Counter-clockwise five times
- Clockwise twice
- Counter-clockwise once
- Clockwise eight times
- Counter-clockwise seven times
Examine the door to the tower. There's a puzzle here that you must solve in order to gain entry.
40
On the Touch Screen are five buttons. Each button changes the numbers on the top screen by the amounts marked on them:
- First button: Second and third numbers up one
- Second button: First and third numbers up one, second and fourth numbers down one
- Third button: First number down two, fourth number up two
- Fourth button: Third number up one, fourth number up three
- Fifth button: First number down four, second number down three, third number down two, fourth number down one
You have four turns in which to press the buttons in a certain order that will make the numbers on the top screen read "3333". Since you only have four turns, there is at least one button that you will never need to use - the quickest solution only uses three buttons.
- Fifth button
- Third button
- Second button
- Second button
The door opens, granting Luke and the Professor access to visit the Storyteller, the creator of Labyrinthia. Inside, the Storyteller finishes writing another page to his story - it seems he's been expecting them to arrive. He asks how Luke and the Professor found their way to Labyrinthia, since they were not written into the Story. He also mentions "another man" who found his way into Labyrinthia unexpectedly, namely Carmine. He's planning the "grand finale" of his Story, in which the identity of Bezella is revealed, and she is tried and killed in the Witches' Court. As Luke and the Professor ask him what Bezella's true identity is, the action skips back to the Deathknell Dungeon.
Deathknell Dungeon (2)
Espella reveals her true identity to Phoenix and Maya - she is really the Storyteller's daughter! She says that when she first moved to the town, the people were friendly towards her, hoping to garner favour with the Storyteller. Then, one day, someone knocked her over, and that person was killed by a witch later that night. Since then, the townsfolk have avoided Espella, fearing that the same fate would befall them.
Talk to Espella:
- The Storyteller: Espella used to live with her father in the Storyteller's Tower. As she grew older, her father became more and more distant towards her, and so she eventually decided to leave the tower.
- Patty Eclaire: Patty knows that Espella is the Storyteller's daughter. She was the only one who didn't abandon Espella. Espella doesn't remember her real mother, who died in an "accident" when Espella was a child.
- The Great Witch Bezella: All incidents involving magic are investigated by the Knights of the Inquisition, so they would have found any clues pointing to Bezella's identity. Espella says that there are no unsolved incidents, but Maya says that Darklaw told her otherwise - there is one outstanding incident from about three months ago.
Just as Espella is about to tell you what she knows about this incident, your visiting time runs out, and you're kicked out of the dungeon. Before you leave, Espella tells you to ask an inquisitor about it, since she doesn't know much about it.
Outside, Maya says that the unsolved incident involved the apparent murder of an alchemist by a witch. Move to the Inquisitors' Hall.
Inquisitors' Hall (2)
Inside, Phoenix is given a "warm" welcome by Barnham's dog, Constantine. Barnham insists that all cases involving magic have been solved, but is shocked to learn that you know different. He agrees to tell you what he knows.
Three months ago, an alchemist was murdered. He was respected by the townspeople, but the people also kept their distance from him. He used his skills as an alchemist to create medicines for the people. He became famous among the townsfolk, who called him "Dr." Belduke. He died three months ago in what Barnham calls irrational circumstances: his body was found in a room locked from inside, and his death was not foretold by the Story. Barnham allows you to investigate, and tells you to ask around the Town Square to find Belduke's house.
There are a few optional puzzles available now. Move to the Great Archive if you want to solve those; otherwise, go to the Town Square.
Great Archive
Here, talk to Dewey, who has a problem with a noisy neighbour. He gives you a puzzle to show you what he's talking about.
40
Use ![]() to move around the room and stomp on the tiles. Every time you stomp on a tile, the tile and those around it will flip over, unless a tile is sectioned off by a divider. You need to stomp on thee tiles in a way that will make all the tiles face upwards, showing a complete pattern on the floor. The tile sectioned off on its own should be the second-last tile you land on - try to complete the tiles above and to the left of it first.
to move around the room and stomp on the tiles. Every time you stomp on a tile, the tile and those around it will flip over, unless a tile is sectioned off by a divider. You need to stomp on thee tiles in a way that will make all the tiles face upwards, showing a complete pattern on the floor. The tile sectioned off on its own should be the second-last tile you land on - try to complete the tiles above and to the left of it first.
The quickest solution is:
- Right
- Down
- Down
- Right
- Right
After solving the puzzle (but failing to find a solution to Dewey's troubles), move to the W. Shopping Area.
W. Shopping Area (2)
Talk to Petal. She's upset about a boy of her , Cecil, who has run off on his own. Move to the Town Square Outskirts to find him.
Town Square Outskirts
Talk to Cecil. He'll only agree to go with you if you can solve a puzzle for him.
40
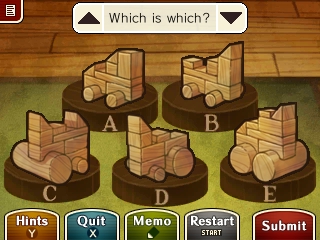
Use ![]() to rearrange the wooden block trains on the Touch Screen. Match the blocks forming each train on the top screen to the fully-assembled ones on the Touch Screen, and move the fully-assembled trains to the corresponding letters. Start by matching up the wheel pieces, which are the most visually distinctive. Touch "Submit" when you're done to check your answer.
to rearrange the wooden block trains on the Touch Screen. Match the blocks forming each train on the top screen to the fully-assembled ones on the Touch Screen, and move the fully-assembled trains to the corresponding letters. Start by matching up the wheel pieces, which are the most visually distinctive. Touch "Submit" when you're done to check your answer.
Now that Cecil and Petal have been reunited, you can get back to solving the mystery of Belduke's death. Move to the Town Square.
Town Square (2)
Maya spots a small street leading away from the square. Maybe Belduke's house is down there? The Alchemist's House is added to the map. You can move there right away, or talk to Petter for an optional puzzle.
50
Use ![]() to move Maya through the maze of clouds. Jump into the holes to go down a level, and jump on clouds to move up a level. Unlike in the first puzzle, you're generally going to want to take routes leading down or right here.
to move Maya through the maze of clouds. Jump into the holes to go down a level, and jump on clouds to move up a level. Unlike in the first puzzle, you're generally going to want to take routes leading down or right here.
Petter doesn't know anything about Belduke's death, but says it was a shame that someone like him was killed. Move to the Alchemist's House.
Alchemist's House
The garden is still well-kept, three months after Belduke's death, so someone is probably still living here. Talk to the person standing by the wall. He's Jean Greyerl, Belduke's former butler. He invites you inside to allow you to continue your investigation. You automatically move to the Butler's Room.
Butler's Room
Belduke was in the room next to this when he was killed. The room has been preserved since the incident, and none are allowed to enter, by order of the Knights of the Inquisition. The Knights also decided to allow Greyerl to stay on and maintain the house. Talk to Greyerl. He says that, a short while before Belduke's murder, he and Belduke were out collecting specimens for research, when a thunderstorm occurred. As they passed the area where the bell tower now stands, a lightning bolt struck, and the bell tower appeared from nowhere. Belduke seemed unsettled, even afraid, by the incident. Belduke apparently became a "different man" after. You ask Greyerl if he will allow you to look around the house. He agrees, but only if he is allowed to accompany you.
The Bell Tower and Alchemist is added to your Mysteries. Maya wonders how Luke and the Professor are getting on with the Storyteller. Back at the Storyteller's Tower, the Storyteller tells Luke and the Professor that his "final chapter" has already begun, and they cannot stop it. He decides to write a story especially for the "outsiders" - one of witches, witchcraft... and death. "A man from afar falls to a golden curse, and a woman from afar cries out in grief"... Is he writing about Phoenix and Maya? "A Friend's Death" is added to your Items.
Outside, the Storyteller's owl comes, and delivers a letter to the Professor. The letter was originally sent to the Storyteller three months ago by Belduke, but it's completely blank. Luke and the Professor figure out that the incident in the Story is lilely to happen in Belduke's house, and rush over as quickly as possible. The Blank Letter is added to your Items.
Back at Belduke's house, Maya points out how one of the walls in Greyerl's room is a different colour to the others. Greyerl says that there was a small fire in the room a while ago, and he painted the wall shortly after. Move to the Alchemist's Study.
Alchemist's Study
Examine the white powder on the floor. It's been here since the incident, and hasn't been touched since. Examine the painting on the wall behind the desk. The wall behind it is painted green. The Wall Behind the Painting is added to your Items. Talk to Greyerl, who asks Maya about the pendant she's wearing. It's a Magatama, which you may recognise from Phoenix's past cases. Maya asks about Greyerl's pendant. It's an amethyst, which is purple in colour. He was asked to wear it by Belduke.
You've investigated everything in this room, but you didn't find any leads on Bezella. You ask Greyerl if there is anywhere else in the house where you could look. He offers to show you the cellar, where Belduke kept his research materials. It's too small for two people, so Maya convinces Phoenix to go down and look by himself.
Basement Study
Examine the solid gold goat. It seems everything in the room is covered in dust, except for the goat. Examine the well. It's still in use. Finally, examine the desk. There's a lot of equipment here, but nothing that seems like it's used for medicinal purposes. The crate here is full of junk, including a doll. That seems to be everything of interest here, so Phoenix decides to go back and check up on Maya.
Outside, Professor Layton and Luke have just arrived. They run in and find Maya alone in the study. She is shocked to learn about what the Story seems to have in store for her and Phoenix. Suddenly, the alchemist's circle glows, and a witch appears from it. Luke is still outside, but rushes inside with a group of onlookers. Inside he finds Professor Layton, who has been transformed into a solid gold statue, and a Talea Magica, which drops to the ground at Maya's feet, as she swears that she isn't responsible... What on earth just happened here? The Story really did come true after all, but not as you expected.
The Golden Layton is added to your Mysteries. It's up to Phoenix to save Maya once again...

