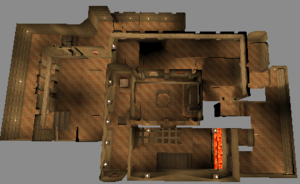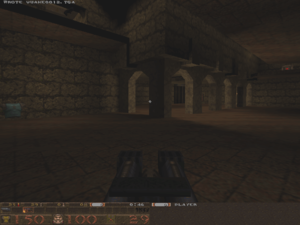
The Place of Many Deaths is a perfect accommodation for a quick deathmatch. It's spiral-like design allows experienced players to obtain a terrain and path advantage, while still providing an arena-like area for those that want to drop in.
Activity will focus on either the center rooms, or on attempts to reach more powerful equipment (e.g. the grenade launcher).
Layout[edit]

The major feature of the map is the large arena in the center. It contains green armor, shells, two health packs, and a button that allows access to a teleporter. This teleporter area has two nail boxes and health packs, and brings you just outside the drop-in point described later on.
To the left of the teleporter is a staircase that leads outside the arena, next to a small lava pit. When you climb up and turn around, you can see yellow armor in a raised alcove. You can jump across the gap to reach it, although you do not want to miss the jump. The intended method to reach the armor is by using the button that's also visible from here, but you may need to circle around the map.
The next corridor has two paths. The far end of the corridor has a teleport destination, and also a doorway to the right leading to the drop down area. You can collect a double-barrel shotgun here, along with some health.
The other doorway leads to the other large room, which contains ammo for the shotgun and grenade launcher, and some health kits. You can't jump to the outer corridor, since the platform is too high. However, you can take the stairs to walk around the area, and collect the nailgun in the corner.
Proceed further, and you'll notice a blood-stained wall on the right. You can shoot it to reach a mega health pack. You may opt to drop down here as well.
Continue down the main corridor, for a view of the arena. Continue along the path, and just after the large shell box, you can make a sharp right turn to get the grenade launcher, or continue onward to the button that extends the bridge to the yellow armor.
Weapons[edit]
- Double barrel shotgun, found in the drop-in area.
- Nailgun is in the corridor, at the corner of the second large room. Another nailgun is near the button that extends a bridge.
- The grenade launcher is just before the button that extends the yellow armor bridge.
Respawn points[edit]
- At the staircase area, with the yellow armor to your left.
- In the alcove under the stairs.
- Overlooks the second large room - the nailgun is to your left.
- Behind the second room, looking directly at the nailgun; the mega health is located past the wall behind you.
- Faces the mega health at a distance. Turn left for the grenade launcher, or take the corridor to reach the health.
- In the corner just before the yellow armor button - two health kits are directly ahead, as is a nailgun. You can also advance and do a hard right turn for a grenade launcher.
- Before the button near the yellow armor. Two health kits are visible, a nailgun is to your left, and the button is directly behind you.