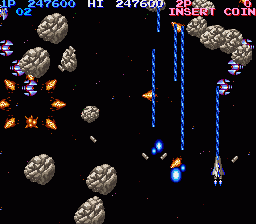
When the stage begins, you will face off with a large squadron of ships that fly only so far down the top of the screen, stop to fire at you, then turn around and retreat. They are known as Amukakemudomiras. If you have a full supply of four Options with Ripple Laser, you can extend the Options across the bottom of the screen, fire up, and destroy a majority of them before they can attack. Before any asteroids start to appear, gold Kepittos will appear. The right set will give you your first opportunity to collect the Laser, which is recommended.
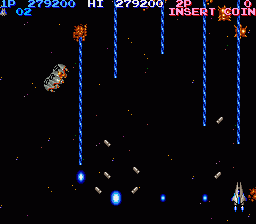
Shortly after, meteors of various sizes will begin to fill the screen, pouring in from the top and slowly drifting to the bottom. Their number makes them more dangerous than their speed. However, using the cover of the meteorites, Fire Geist ships will fly in from the sides. When they are destroyed, they burst into jets of flame which extend in eight directions. It is possible to fill the screen up with too many jets so that the game cannot produce any more when you destroy Fire Geists. Use this to your advantage and get rid of many of them as fast as possible.
When the Fire Geists stop appearing, another enemy will fly in under the cover of the meteorites. A Thunder Myu will make it's appearance, causing the screen to flash various bright colors which makes it easy to get distracted. Destroy it quickly. Two gold Beruberumus will appear to give you power ups, and then a short wave of the Amukakemudomira ships will arrive. It will be much harder to destroy them before they shoot at you with all the meteorites in the way, so be prepared to dodge their bullets. They are followed by a few more Fire Geists.
As the flow of meteors slowly stops, a large squadron of Kepitto fighters will appear. The squad is led off by two sets of gold Kepittos, giving you another power up opportunity. After that, you will encounter nothing but gray Kepittos in very large numbers. Fire continuously and don't hang around in one spot very long. Kepittos aren't incredibly fast, but they will hunt you down continuously until either you or they are destroyed. As you are blasting the last of the Kepittos, you will hear the warning for the boss encounter.
The Tetran shares a feature in common with the Big Core bosses that you fought repeatedly throughout Gradius; they possess a power core protected by three shields. You must remove the shields and blast the core to destroy it. Aside from this similarity, the Tetran is a very different machine. Nearly round, it has four tentacles that rotate around the ship while the ship itself moves in clockwise circles. One touch from its tentacles or a bullet will kill you, and the Tetran moves rather close to the edges and corners of the screen. Your only guaranteed method of staying safe is to move in a clockwise direction as well, occupying the far opposite side of the screen as the Tetran, firing up at the shields and the core when you are below it. If you have Options, it's possible to place them in areas of space that your ship cannot occupy without being destroyed, allowing the Option to hover in place while it directly shoots at the core. However, even if you do establish a place for the Option to fire from, do not sit still for too long, or you will assuredly be hit by a tentacle.