The printable version is no longer supported and may have rendering errors. Please update your browser bookmarks and please use the default browser print function instead.
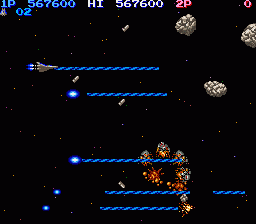
Stage 5 is very much like a horizontal representation of Stage 2. You will only have a handful of gold Beruberumu squadrons to fight, enough to get two Options, one Speed-Up and Missiles, before the stage truly begins. Right off the bat, you will be faced with not one, but two Thunder Myus. Their presence is really to make the encounters with the two Phalanx that follow more difficult by filling the screen with bright flashing light while you fight them. The Thunder Myus aren't too difficult to destroy, but the Phalanx possess very strong armor, and it takes a lot to get rid of them. You are most vulnerable to the missiles they fire when you are directly beneath them, so time your navigation around them carefully. Remember that when they are destroyed, they explode into a eight pieces that spread out.
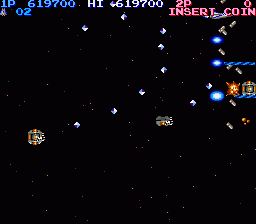
After that, you will get some more opportunities to collect power-ups, including Lasers or Ripples. Other enemies like Fire Geist and Kepittos will enter the mix. After four gold Beruberumu squadrons provide you with a full compliment of Options, one last Phalanx will appear, and many asteroids will begin to float on to the screen. The asteroids are indestructible and must be avoided at all costs. Like the meteorites in Stage 2, enemies will fly among them and use them for cover while they attack you. Focus on the Phalanx until it is destroyed, and then get rid of any other enemies that appear while you dodge the asteroids.
When the asteroids stop appearing, it is important that you move to the center of the screen and prepare yourself for the next encounter. You will now have to face off with the Zabu Mark II enemies. These enemies will first appear around your current location as a set of eight enemies in a circle. Once they fully appear, they will advance on your position. They will do this four times, and then a different version of this enemy will appear in a circle of 16. If you have Options, try to arrange them in a protective circle around you. Fire forward as soon as they appear, and fly forward behind your bullets. You should be able to punch a hole through the circle and fly safely through, but once you break beyond the perimeter, you must return to the center and set yourself back up before the next set appear.
After you survive your ordeal against the Zabus, you must now face a menacing army of gray Beruberumus. They will appear in a single file on both the top and the bottom of the screen. They will fire a stream of bullets at you if given the opportunity to stay on the screen long enough. As the lines proceed, they will begin to edge closer and closer to the center of the screen until the two lines are practically touching. While you are safest on the right side of the screen, you will eventually have to punch through either line and climb to the top of bottom of the screen while continuing to avoid their bullets. Obviously, Lasers are an extremely effective weapon in this situation, and the more Options you have with Missiles, the safer you will be.
Boss: Aircraft Carrier Death
When the gray Beruberumus stop appearing, advance to the right side of the screen. Death will appear from the left side and will easily kill you if you're not expecting him. When Death moves into position on the right side of the screen, move back around to its left. Death has two forms of offense, a fighter ship that it sends out from its front hatch, and blue orbs which fly out from the core. In order to attack the core, you will first have to destroy the hatch. Doing so will not only expose the core, but it will also stop the fighter craft from appearing. However, Death will fill the screen up with more orbs as a result. Still, there won't be as many orbs as there was when fighting the previous boss, and you will have more room to maneuver. Focus on shooting down the craft and avoiding the orbs, and shoot at Death when there are no other immediate threats.