Stage 9
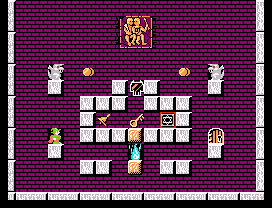
- Drop the blue flame to ground level
- Make your way up and replace the brick you just destroyed
- Open the drain hole with a few headbutts and quickly make your way up the left side
- Drop the gargoyles
- Descend into the inner chamber and hold-left to get the bell
- Cross the gap and get the seal. Always remember to restore the drain after crossing.
- Make your way to the exit.
Alternatively (and much more predictable), do not open the drainhole at the start. This leaves a landing platform for your descent into the chamber. Basic timing of the gargoyles easily allows you to go one way or the other, then remove the drainhole quickly. Then cross the gap to get the seal or bell.
Stage 10
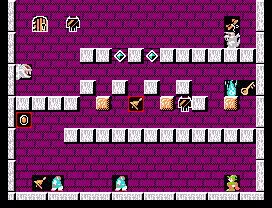
- There are two methods for clearing the pair of golems. Choose one depending on your strengths.
- Pair them up & jump them (requires Timing):
- As soon as the game begins, spawn one brick toward the incoming golems.
- In the same instant that the first golem destroys the newly created brick, the second golem will be directly over the same spot.
- Leap over both the golems
- Build a bridge to avoid the golems when they eventually turn around, and make your way to the next level up
- Delay them on the left, climb on the right (requires quick making/jumping):
- As soon as the game begins, make a brick to the left.
- Immediately turn around and make a brick to the right, and jump onto it.
- As the golems rush in, reverse, make a brick to the left. Jump onto it as the golemns smash the brick which was supporting you.
- Pair them up & jump them (requires Timing):
- Progress to the right, either placing blocks to send the demonheads back, or using the spaces above you to jump them, and progress to the next niche. They only travel to the left, so you're safe once past the Kameera mirror.
- Ascend the right side while avoiding the blue flame
- Build a brick on the ground level, but to the right of the blue flame
- Drop the blue flame to ground level
- Whack the flame with your wand to temporarily stifle the flame. This allows you to leap over the flame safely.
- Jump on to the brick you created, then replace the one your destroyed to make a cap over the flame.
- Complete the board.
Additional Bonus: if you drop the gargoyle at the top of the screen, it poofs into a fairy.
Stage 11
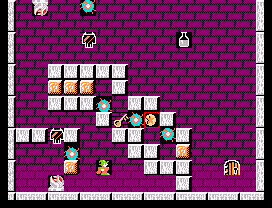
Do not enter the inner chamber from the left. Instead, you need to go all the way around and open it from the right.
- Build a Sparkie jail.
- As soon as the board begins, build a block to your right.
- Wait for the first speedy-Sparkie to come your way
- Once it arrives, trap it in the narrow alley you just created
- Compact the Sparkie into the smallest space possible with well-timed blocking. This will make room for the next trap.
- Create a second trap.
- Reroute the other Sparkie into your trap by creating a brick directly underneath it.
- Build two bricks directly above the gargoyle-head to protect yourself against the fireballs.
- Make your way up the left side of the board and over the top.
- To safely release the (4) speedy-Sparkies, you must release them from the right side. At no point should you build any bricks side-by-side or one-on-top of the other. Make sure to maintain a gap as long as the speedy-Sparkies present a danger.
- Build a brick in the lower right corner;
- Jump on top of that brick and create another one directly to the left of the exit door;
- Jump on top of that brick and reach across to destroy the blockage (do NOT build a bridge until they have safely departed.)
- Retrieve the key and quickly make your way to the exit before the balls return.
- There are fairy bells at coordinates (4,2) and (11,3) which is not shown by the picture.
Stage 12
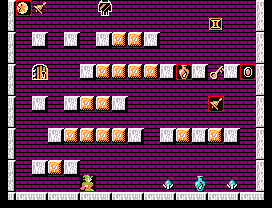
Because there are so many Salamanders, don't even bother with the fireball. Your only real protection is to make them fall away. If they ever get on your level, they will burn through anything in their path to get you. Always leave a gap or pitfall. Never build directly below the gray bricks because it is a barrier that won't last. Always build below and either to the left or the right. This allows you to control the direction of the Salamanders and to stay out of their way.
Stage 13
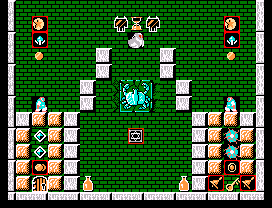
This is one of the harder boards. The key is to never give the Salamanders any ground to stand on, and to move quickly.
- Retrieve the orange bottle while you get your bearings.
- Build your way up either side while avoiding the constant rain of salamanders.
- While on your way, reach toward the middle and build a block under the seal.
- Ascend one more level.
- Reveal and retrieve the seal.
- For the remainder of the ascent you will need to build a column directly in the middle of the screen. Climbing is slow and tedious, but it is the safest way to avoid the Salamanders. Climbing requires five actions in quick succession:
- Build a stepping-brick one layer up and to either side;
- Hop up one step;
- Build another brick directly above your column;
- Return to the safe place on top of the column;
- Destroy the stepping-brick
- Repeat this climb until you are just under the ghost.
- Descend into the right side of the screen and drop the goblin.
- If you have a nuclear fireball, use it to destroy all of the sparkies in one shot. If not, then you have to extend the sparkie chamber:
- Incrementally extend the chamber one brick at a time;
- The sparkies travel in two packs--the slow and the fast. When extending the chamber, do not split the packs or else your timing will become very difficult;
- Build the chamber as high as you can without interfering with the ghost's flight path;
- Do not build any bricks on the right side of the chamber. Use the border of the screen instead in order to gain the maximum space possible;
- The inside of the chamber should like somewhat like the letter "f";
- With the right amount of timing, trap the sparkies in the top half of chamber;
- Because of the close quarters, be prepared to return the sparkies to their original location on your way out. Resist the temptation to make the chamber any bigger than necessary.
- Get the key and climb out of the right side.
- Get the hourglass
- Descend into the left side of the screen
- Drop the goblin
- Collect the fairies
- Exit.
Stage 14
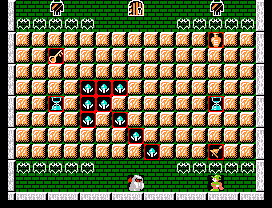
Knock out the block directly above your head to get the bell, then create drains for all of the falling monsters and collect goodies along the way.
Stage 15
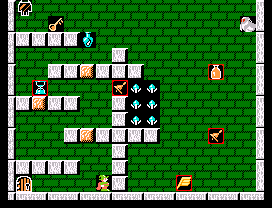
- Move quickly up the first level and knock out a gap in the second level for the salamanders to fall into.
- Open a second gap on the third level with a few head-butts
- Build Salamander jail
- Go back to the first gap you opened up
- In a pocket just over the first gap, build two blocks which will function as the floor of the jail
- Build one block directly above the gap
- Build the other directly next to it, but to the right
- Open the last gap on the fourth level with a few head-butts and move quickly to the right side of the board. The Salamanders should immediately begin to collect in jail.
- Move to the right side to the board and collect the items
- Return to the left side and get the key
- Descend toward the exit door while avoiding Salamander jail. Make sure the Salamanders always fall into jail or else they will get you on your way out.
Stage 16
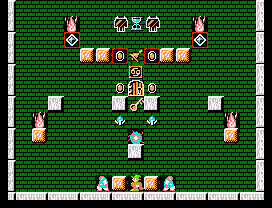
- Move up either side and drop the red flames
- Transform the blue diamonds into fireballs
- Create an umbrella of blocks to keep the Demon-heads away from the exit door
- Prepare by opening a hole directly underneath both the Demon-head generators
- Build a solid row of five blocks. They should start next to the hole and work outwards and should be built immediately below the level of the Demon-head generators. The row should NOT be built all the way to the wall because that will defeat the umbrella effect.
- Build one block directly below the hourglass
- Leap over to the other side and build a mirror image of blocks
- Return to the center and plug the holes. With the proper timing, the next batch of Demon-heads will move away from the center and away from you.
- Resist the temptation to open another hole and drop though for the key. Instead walk off the edge of the umbrella and work your way back up. If at all possible, pull to the center while falling and you may avoid the Goblins patrolling below.
- Ascend up either side toward the key while avoiding the Ghosts and the falling Demon-heads.
- Drop through to get the key. Beware of the Sparkie below.
- Drop through a second time to exit the board.