Sonic the Hedgehog/Marble
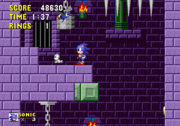
A zone with ancient buildings made of marble and an underground castle with spiky chandeliers. There is a lot of lava that can harm Sonic in this level. Certain bricks can be destroyed for points; sometimes up to 30,000 could be obtained, if the bricks are destroyed in sequence.
Act 1[edit]

- Run forward and collect the three rings. Soon, you should come across a Buzz Bomber and a Caterkiller. Dodge the Buzz Bomber's fire and make sure to aim for the Caterkiller's head, either by rolling into it or with a small hop.
- Continue moving to run into another set of badniks, a Buzz Bomber in the air and a Caterkiller on the ground. Finish them off and carry on.
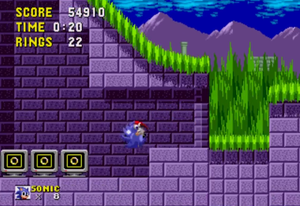
- There should be a moving strip of land leading inside, to the left of a bobbing platform at the bottom of a hill. Go inside and break open the three ring boxes for 30 rings, then exit the area and head back out.
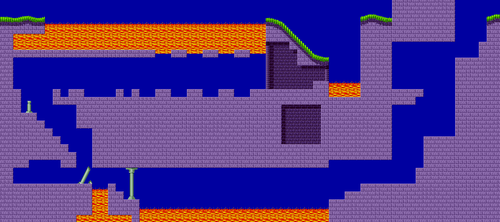
- You should see some platforms floating in lava. Quickly jump across these; if you don't, the platform will sink into the lava. When you get back on solid land, you should see another floating strip of land. Go inside.
- Dodge the glass pillars and defeat the bat enemies. You should come to a spiked chandelier with a block on it.
- Push the block onto the switch and the chandelier should rise. Descend while dodging the spikes on the wall and head left to hit a checkpoint and get a shield.
- Head right, past the glass pillar, and there should be blocks that fall from the ceiling as you approach them. Jump across each and get to the other side.
- There should be two more falling blocks and four rings on the floor. Do NOT pick up the four rings yet; there is a spiked chandelier above you that can fall and crush you.
- Wait for the chandelier to fall and rise, then jump onto the ledge; as the chandelier is rising, jump on it and jump towards the left wall. You should go through it into a passage with four ring boxes and an extra life.
- Leave the passage and get on the ledge. Jump on the blocks and head up. Be careful; there is a crushing weight and a chandelier above. Jump onto the weight and then onto the chandelier and head outside.

- There should be a few baddies and lava platforms to jump over, then comes the signpost. If you have 50+ rings, be sure to jump into the big ring.
Act 2[edit]
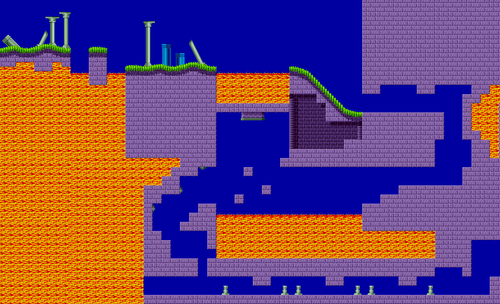
- As you begin this upper part of the stage, look out for the two Buzz Bombers up above and the Caterkiller on the ground.
- The first platform floating on the lava will begin to burn once Sonic sets foot on it; time your jump so that you avoid the fireballs springing out of the pool of lava on both sides of the platform while moving quickly enough to dodge the fire.
- Once inside, hit the switch to drop the glass pillar. Collect the rings on the way down and avoid the Bat Brain badnik down below.
- Push the block onto the long pool of lava and it will begin to move slowly on its own. Hop on for a ride, avoiding the hazards along the way. After the first platform you can jump over will come some periodic lava from up above. Once it drops the first time, climb the platforms into a secret room on the left for rings, a shield, and an encounter with a couple of Bat Brains.
- Drop back down onto the platforms you climbed and head left. Fireballs will be spurting out from the ceiling and wall, so make sure to move at a quick but cautious pace.
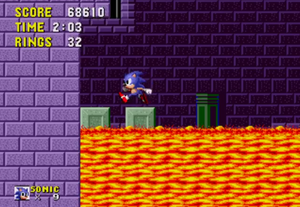
- Push the blocks until Sonic can squeeze through the gap; doing so will set off a lava chase. Jump over blocks and run past spikes to make it through into a more open area.
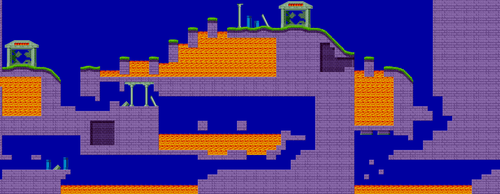
- Destroy or dodge the bats here before moving on to a swinging lift. If you're able to, use the platforms with spikes jutting out of them as well as the bats as steps into a secret room.
- After using the swinging platforms to cross the lava pool, roll into the two Catterkillers on the other side, but stop short before hitting the spring to avoid being dropped back into the lava.
- Hit the switch to lower a pillar and climb up to another block. Before pushing it into the lava, jump to a ledge on the right for a shield.
- Ride the block to the other end of the pool, hopping on some platforms for some rings. Sonic will occasionally be launched into the air by lava springs. Make your way all the way to the left, under the exit, to find a secret room hidden within the wall. This room contains rings and an extra life. To return, ride the extra block back. The only way to reach the exit is to be launched upward by the lava.
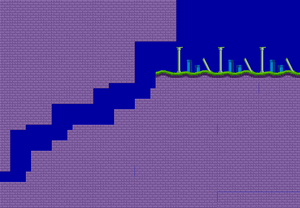
- Roll into the Caterkiller, then climb the blocks back to the outside. To the left is an item box containing rings and a checkpoint. To the right is the way forward. Just avoid the fireballs and Buzz Bombers/Caterkillers along the way, but make sure to check to the left of a bobbing platform again to find another secret room. Destroy the Bat Brains and collect the rings in here before exiting.
- Once you make it to the end of the path, hop on the destructible blocks to be dropped back inside. Pick up the shield and avoid the hazards (in this case, Bat Brains, a Caterkiller, and falling lava) to make it to an invincibility item box. This will allow you to walk along the pool of lava, so collect all of the rings spread across it while you make your way to the other side.
- Climb the spiky chandeliers up to make it back outside and to the goal post. Jump through the ring if you have 50+ rings for another special stage.
Act 3[edit]
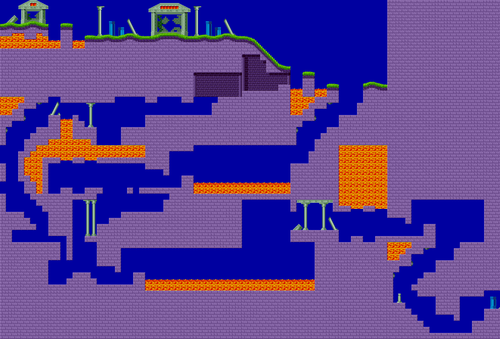
- While the layout of this map may seem daunting, it can actually be moved through relatively quickly. After dealing with some badniks along the path, take the shortcut inside to the left of a bobbing platform. As can be seen on the map, the alternative is having Sonic dodge fireballs and cross a long pool of lava.
- Move past the chandeliers, crushing weights, and crumbling platform to reach a glass pillar that has the potential to crush Sonic. Past these are some fireballs; time your jump so that you may dodge them all, and Sonic will drop down onto some destructible bricks. Past another set of destructible bricks is an item box containing rings.
- From the item box, progress right, pushing the block onto the lava to cross. The only hazards here are some platforms that Sonic can hop over. Some lava at the very end of the pool will launch Sonic to the exit.
- Hop over some spikes and drop past some fireballs to make it to the next area.
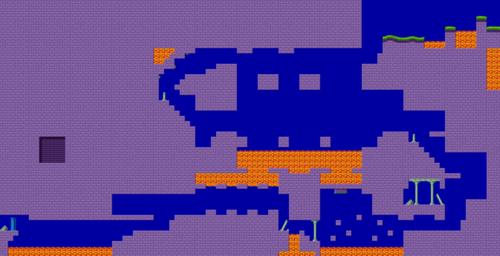
- Take the swinging platforms to the other side. Be wary of the fireballs that rise out of the lava where they meet.
- Hop onto a ledge to the left with a spike jutting out of it for a shield and a checkpoint. Progress right past some spikes and glass pillars.
- This next pool of lava will have two moving blocks. Activate them both with a touch to dodge the lava that drops.
- The path back outside is pretty straightforward, as you should be familiar with all hazards by now. Hopping across some weights may pose a challenge balance-wise, but you can always make your way back up if you fall.

- This straightforward path leads to a checkpoint and a boss.
Act 3 Battle[edit]
At the end of Act 3, Dr. Eggman attacks with an improvement to his craft that shoots fireballs on one of the two platforms Sonic can stand on, briefly setting it on fire. Start by nailing some hits on Eggman as soon as he floats by; he'll start by setting the left platform on fire, so make sure you're on the right. When the fire starts to fall off of the platform and Eggman floats toward the right, hit him once before leaping to the left. Continue this pattern to defeat him.
