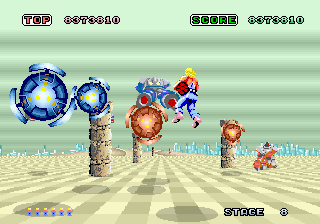
With a name like Ida, you can expect this stage to contain many instances of the very enemy that it's named after. However, there's still a good mix of other enemies to present a good challenge. There's even a new type of Dom that appears here. There will be a significant amount of ammunition thrown at you here, from bullets to fireballs to missiles. Keep moving, never hang out in one place for too long.

- Eight Ida, four from the upper left, and four from the lower right, will arrange themselves in a circle, much like the boss of the previous stage, and fly around clockwise before retreating into the distance.
- Two groups of three Mukadensus will fly in from the distance, first one trio, then the other. They will approach you slowly, while occasionally rising high in the air, and then falling back down to the ground.
- Three green Dom robots will skirt back and forth in the distance, followed by a trio of gray Doms. The gray Doms will move a bit slower than the initial green ones, but they will stack up on top of each other.
- A trio of Tomos will appear, but unlike their previous appearances, they will start out in the foreground, and remain there for all three of their shootings before retreating.
- Two Idas will appear and circle around the middle of the screen, while three Mukadensus fly towards you from the background and three green Doms approach you along the ground.
- A red Dom will appear in the distance, rapidly firing missiles at you, while three blue Doms fly out from behind you. They also launch missiles at you, as they fly away from you into the distance.
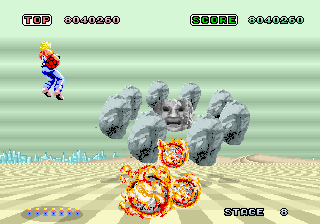
Boss: Shura

This boss of this stage is a large stone face surrounded by a ring of rocks which orbit around the face. To destroy Shura, you must hit the face with enough shots. However, the rocks orbiting around him will absorb a lot of the shots, so you may have to remove a few before you have a clear shot at the face. This boss moves around in a wide circle, getting close to you, but then disappearing very far into the background before making a return trip. Anticipate when he begins to approach you, and stay near the right side of the screen on the approach. Be prepared to move out of the way as soon as he shoots a barrage of fireballs at you.
