| Protoss mission 9: Shadow Hunters | |
|---|---|
| Location | Aiur |
| Special Units |
|
| New Units | Protoss Arbiter |
| New Enemy Units | Zerg Defiler |
| Special Structures | 2 Zerg Cerebrates (destructible w/1,500 HP) |
| Objectives | |
| |
Aggressive Mining[edit]
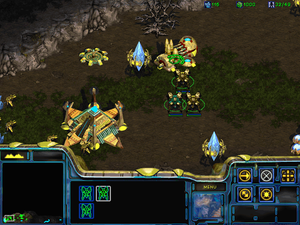
This scenario has a rather odd start. You're given four Probes, Zeratul, Fenix, a handful of Zealots and Dragoons, and an Arbiter, but no base. As it turns out, there are four resource deposits across the bottom edge of the map—two to the left of your starting location, and two to the right. First take all your units to the left side of the bottom edge. You'll find some mineral patches. Plunk down a Nexus here, and use your remaining minerals to build several Pylons around the area. Try to have about two near the Nexus, and the rest spaced out along the left side valley until you get to its mouth (brick-and-stone ground will prevent any building at this point). Place the Zealots and Zeratul at the entrance to this area, and Dragoons plus Fenix right below the cliff. As you build Probes and start mining, build a Forge and start placing Photon Cannons at the mouth of the valley. The Zerg start attacking quite early, so it's actually advantageous to have Cannons coming in before your Gateway does.
Ideally, you should be building your second Nexus, next to the Vespene Geyser on the left side, at the same time as the Cybernetics Core. Yes, you will be building a separate Nexus for that gas deposit, because it's simply too far away from the minerals for efficient gathering. This is why you'll be building a total of four Nexuses to harvest from the two mineral deposits and two Geysers that you start out with.
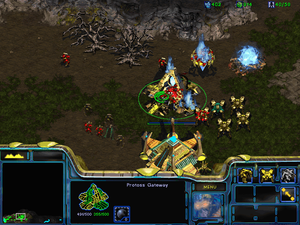
The Zerg attacks on your base will be relentless. Remember the previous mission and the massive Photon Cannon network that it involved? You'll be using something similar here, except this time it's a bit easier due to the fact that the enemy ground forces only have one direction they can come from—the center mouth of the valley. For now, since you're only occupying the left side of the resource field, put your defenses in the entrance to your Vespene area. About six Photon Cannons plus units should suffice for a while, provided that you remember to rebuild. Be sure to put extra Cannons along the cliff that forms the upper edge of your base; Mutalisks and Overlord-dropped Zerg like to come harass your Probes.
A unit of interest is your Arbiter. This new aircraft has a range of interesting abilities, but the most useful one to you in this mission is its passive area cloak. The enemy's inability to see any of your units around the Arbiter without detectors is certainly a boon, and will definitely come in handy later on. At this point, though, you need to be careful not to lose that starting Arbiter. The Zerg will send in Defilers very early in the game, and attempt to cast Plague on your defending buildings. If the Arbiter is unlucky enough to be around at that time, it may get hit as well by the splash ability and have its HP permanently reduced to 3 points. It's not the end of the world if this happens, but you get the point—protect that Arbiter.
Aggressive Mining, In More Places[edit]
The preferred order of teching in this mission is as follows: the Templar tree, followed by the Robotics Facility, and finally the Stargate. As you do this, remember to have at least two Gateways pumping ground units and keep building Photon Cannons whenever you have the money. Once you have a good number of Cannons defending the left side base, start moving out into the east—be sure that new Pylons are being protected by Cannons as they are warped in. When you feel that the defense is solid, take your ground units and go east until you get to the second mineral deposit. Build a Nexus and a defense network here, and soon after colonize the Vespene deposit at the lower-right corner of the map as well. You need the money flowing in as fast as possible.
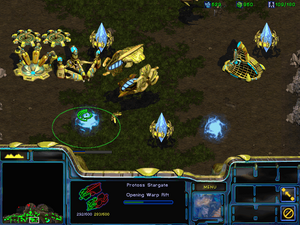
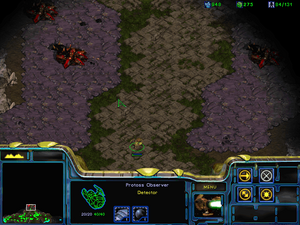
As you build things in your four bases, you'll realize that there's not a lot of real estate for your tech buildings after all the Pylons and Cannons are placed. Fortunately, there's a good amount of space in the bottom center of the map, where you started out initially. After putting down some Cannons here, use the space for a Robotics Facility plus all of its related tech buildings. You can also put down a Stargate or two later on. Just make sure you're leaving room for lumbering Reavers to crawl out of this area. Build some Observers when the Robotics Facility is complete, and send one out along the center of the valley until you can see Sunken Colonies. Park the Observer there so that you can spot incoming enemy attacks in advance.
Strike Force Composition[edit]
To reach the Cerebrates, you need to punch through layers of thick Zerg defense while beating back reinforcement attacks and harassment from several directions at once. Even a very large force would be worn down to the point of annihilation by the time it gets to the top edge of the map, where they are located. This is where the Arbiter shines: by having it continually Cloak your army as it marches up to the Cerebrates, you will be protecting it from harm most of the way. The only problem is that the Arbiter is unable to Cloak itself, and therefore it's the only thing that the Zerg will attack if they're in range (and no, having two Arbiters don't make them Cloak each other). Your goal, therefore, is to assemble a force that can not only take out the Cerebrate's defenses quickly, but can also defeat enemies quickly and from long range before they reach your precious Arbiter.
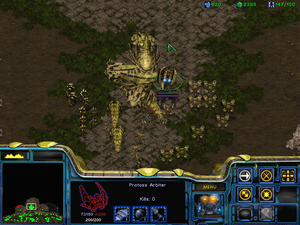
Build up 11 Zealots, and group them with Zeratul. Also prepare 12 Dragoons (or take Fenix along with 11 Dragoons), three Reavers, six High Templar, and five fully loaded Carriers. Don't bother building more Arbiters if you still have your first one, and neither Stasis Field nor Recall are necessary abilities for this mission. This will obviously take a lot of resources, especially with all the defenses you're building and the upgrades you need (at least level two on Ground Weapons, Armor, and Shields, and at least level one on Air upgrades; the Singularity Charge upgrade; Zealot Leg Enhancements; Psionic Storm for the Templar; and Reaver Damage Upgrade). You should still be mining when you have the force completed, but you will most likely run out of resources at some point during the push northward. That's okay (since you will not need to supplement any units once you make it halfway), but it does mean that you will be unable to restock Scarabs or Interceptors.
Securing the Center and Pushing Up[edit]
When ready, cluster all your units around the Arbiter. Have the Reavers go first and destroy the few Sunken Colonies that dot the way out of your valley, while everyone else follows closely. Make sure an Observer or two is always scouting out where you'll be going before you actually do. When all the Colonies around here are dead, slowly start pushing up to the north. You should be taking the valley corridor on the left side of the map.
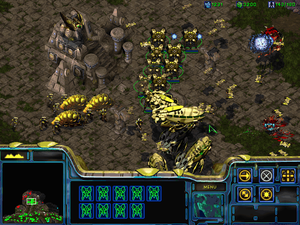
Along the corridor, there will be several Spore Colonies atop both sides of the canyon. These will fry your Observer if you're not careful, so have an Observer just close enough to spot it while Hold-Positioned Dragoons hit them from below.
You will be attacked by a huge number of enemy units along the way, coming from all directions; when faced with large waves, stop everyone and follow the guidelines below.
The Zealots don't have much to do until you get to the Cerebrates, so just have them under Hold Position to keep them from chasing things far away. Do the same with the Dragoons, and they will happily shoot at anything that comes near enough. The important part: every Zealot and Dragoon needs to be under the Arbiter's Cloak. One of the most annoying things when playing against AI-controlled Zerg is the disruption caused by Queens and their Spawn Broodlings ability. By keeping the vulnerable Zealots and Dragoons under Cloak, the Queens can do nothing but cast Ensnare over your units; while this does reveal the Cloak, by that point your Carriers and Dragoons will have ripped the Queen apart anyway. The slowdown effect doesn't matter either, since you're not exactly employing a Blitzkrieg strategy here.
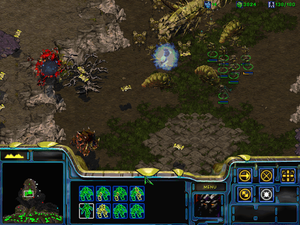
The High Templar are also crucial in this mission. No matter how powerful your Carriers or Archons (if you chose to make them, though they were not part of the recommended lineup) may be, large numbers of Zerg will bring them down quickly. However, Templar shine against large numbers, as it isn't uncommon to kill 10 or more Hydralisks and Zerglings with one well-placed Psionic Storm. Don't be afraid of "wasting" Storms; you have six Templar, who can cast two Storms each (three, if you upgraded their mana) before having to recharge. The recharge isn't very long either, so feel free to throw Storms on any unit or group of units that looks like it'll take more than three seconds to eliminate otherwise. In addition to light ground units, Storms are also extremely useful against Mutalisks, Overlords, and Ultralisks—in short, every unit that you face here. Just make sure to keep these guys under Cloak at all times as well. Later on, when you get near the end of the mission, you will start facing less and less enemy units; when this occurs, combine Templar with spent mana into Archons rather than wait for recharges. They will give your force some much-needed boosts in normal firepower.
The five Carriers form your answer to essentially every threat in this scenario. As long as they're Cloaked, they'll survive almost indefinitely while their long-ranging Interceptors kill anything that attempts to close in on the Arbiter. When you're inside the corridor, the Interceptors will also automatically kill things in the Zerg base on the plateau to the left.
Reavers will do their job as long as possible, but there might come a point where you no longer have enough minerals to restock their Scarabs. If this happens, just leave the Reavers and go on—they are extremely difficult to move along with the rest of the units under Arbiter Cloak, and will not be needed in the final assault anyways.
Base Defense[edit]
While this is going on, your base will fall under multiple attacks. Ground-based attacks can usually be held back with your thick network of Photon Cannons, so just rebuild destroyed Cannons for as long as money allows. More problematic are Guardian rushes: their range is greater than that of your Cannons. If you have the resources, build a Scout or two to counter this threat; otherwise, you'll need to keep a few High Templar or Dragoons around base. You can also keep Fenix there, though you will need to make sure he doesn't get killed.
The First Cerebrate[edit]
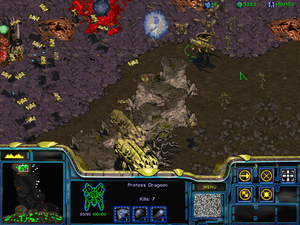
Eventually the strike force will reach another Sunken Colony blocking your way. Quickly take it out with the Carriers. On the opposite side of the narrow rock wall is the Zerg base. At this point, move the Zealots and Dragoons in, taking out the static defense and units by force, while the Carriers attack over the wall. The Arbiter and High Templar should be placed somewhere between the two pincers of the assault, able to provide support either side but staying out of direct fire. (Carriers need the Cloak more than the ground guys do, though, so keep them closer to the fleet.) Once the Sunken Colonies around the Cerebrate (who is located at the center of their base, next to the Hive) have been destroyed, move Zeratul inside along with the group and kill the Cerebrate. He has to participate in killing it, but does not necessarily have to deal the killing blow; the game will only check whether Zeratul is nearby or not. The Cerebrate will die for good if Zeratul is close enough when it is destroyed.
The Second Cerebrate[edit]
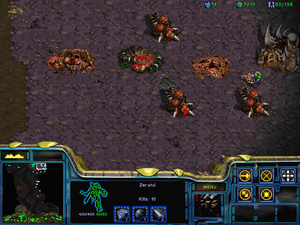
Chances are, your ground forces suffered heavy losses during that first assault. The more you have left, the better, but at any rate the second Cerebrate can be taken out with just the Templar, Carriers, and Zeratul. Still under Arbiter cover, have your surviving army lumber over to the east. Move the Observer in to spot burrowed units, and have High Templar cast Storm on wherever they are to thin their ranks. Just make sure they're either out of Sunken Colony range or Cloaked. Preferably both. The enemy will most likely keep making units to supplant ones that are lost, though, so you can do one of the following: keep casting Storm to kill enemy units until the AI runs out of resources, or look for an opening and move in. Whenever you're ready, move your still-Cloaked force in and repeat the strategy with the First Cerebrate. Carriers and any ground units should target the Sunken Colonies and once that's done, have everyone including Zeratul in for the kill while the Templar keep casting Storm on any Eggs that the enemy Hive produces. When the second Cerebrate bites it, victory is yours.
Alternate strategy[edit]
Two dozen Carriers under the cover of two Arbiters can wipe out the two Cerebrates with ease. If you want to do this, you should secure two high grounds just above your four normal resource fields. Don't bother creating many ground units; if you're fast, you may actually not have to produce any of them. Use Carriers as a fast, mobile defence until you've got a dozen of them. Then, cautiously hit the Zerg above your base, to rid the ground of their structures. This will buy you time to create the second dozen Carriers.
At this point you should have three or four Stargates and a lot of resources. When you're ready, just push your Carriers under Arbiter cover. Keep Zeratul from wandering, as the Zerg is a detector-crazy race. When the ground around Cerebrates is clear, your hero may finish them with ease.
At this point your base is defenceless. Just make sure you have some spare Pylons - you need only one building to stay in the game and slay Cerebrates. Do not try to save a base. If you're prepared, push will win; if you go back, you will lose many units without any real need and probably will not be able to recreate your strike force.
Alternatively, you could systematically pick off the individual Zerg bases and claim additional resources - a group of Scouts can take care of Spore Colonies one by one with no health loss if properly micro'd (keep an eye on which Scout the Colony is hitting and have him retreat to a Shield Battery when his shields are low, forcing the Colony to choose a new target) and Carriers, preferably under Arbiter cover, will mop up everything else. You will want to have some defences at all of your existing bases while doing this, as the enemy will often choose to counter-attack in the hopes that your base is left unchecked.
Also a Zeratul Rush might be a good option for a start. At the very beginning of the mission slow down the game speed to minimum, so you can share your attention. While building a base in the bottom-left corner of the map, simultaneously take the Dark One on a trip north. Your enemies have NO DETECTORS at this moment, so you can do some damage. Destroy the first barricade (four sunken colonies and some Zerglings), next kill the Hatchery, larvae, and two sunken colonies nearby. Probably one Ultralisk as well. Finally go to the upper edge of the map and destroy the brown Ultralisk cavern and its sunken defences. Don't go any further. Overlords are on their way, so fall back at once. On the way back you might find a few more Hydras and Zerglings. Annihilate them and return to base. Because you remembered to build a base, right?