 Wolf Team
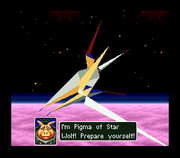
Each member of the Star Wolf Team will initially remain in orbit around a particular planet, meaning battle will only engage if you attempt to liberate the particular planet. However, as the game goes on and you continue to defeat Andross' forces, they will attempt to take the fight to you, leaving the planet they're assigned to and attacking you directly. Fleeing them is impossible; they will even engage you in battle when you are fighting other enemies. On Easy you will only face Leon and Pigma, with Andrew (also known as Algy) appearing on Hard and Expert. On Expert the Wolf Team are assigned to the last three planets. Wolf will only engage you in battle before your final mission at the Astropolis.
Fighting each member of the Wolf Team involves dueling them in head on attacks. Their Wolfens have all the abilities your Arwings do. They will attack with regular lasers and homing attacks which will cause a lot of damage. The only way to defend against these is a well-timed barrel roll. They also have the ability to barrel roll themselves and will do so regularly. Standard blaster shots do little damage to them, with homing attacks being the best method of defeating them unless you are armed with Type B Twin Blasters. Bombs can also cause a lot of damage if you are in a pinch.
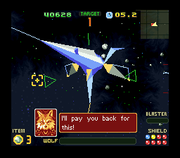
On Easy, they will be fairly inaccurate with their attacks and only rarely use homing attacks, and can be fairly simply dealt with using a couple of your own homing attacks, but on Hard they will be able to take a lot more damage before being defeated, and will more often use their homing attacks. On Expert however, things get considerably more difficult; each member of the Wolf Team will be very skilled at defending against homing attacks with accurately timed barrel rolls. They will also often counter with their own, using them regularly. The best way to connect is wait for them to come at you with regular lasers and unleash a homing attack to hit them after they finish a barrel roll. Bombs and other Special Weapons will be very useful against them on Expert.
Wolf has a special blue Wolfen, similar in shape to Panther's Black Rose in Star Fox Command. While tougher than his team mates, he is largely the same to fight as the other three. Remember that he will always engage you after you wipe out the rest of Andross' forces, and you will have no opportunity to switch character before the battle, so try not to leave yourself vulnerable to a quick defeat.
 Hunters
Mirage Dragon
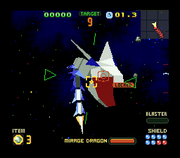
The Mirage Dragon is the only Hunter to appear on Normal difficulty. Its main attack is the powerful beam that can cause a lot of damage. It is fairly inaccurate, but it will be fired a number of times. The second involves it spewing fire balls and wrecked ships it has swallowed. These should be blasted before they connect with you. Be careful not to let the Mirage Dragon crash into you as you get closer to it, as its thrashing tail can cause a lot of damage. To defeat the Mirage Dragon, simply aim for its mouth.
Hunter Tektron
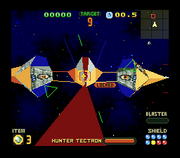
Hunter Tektron seems to be of a similar design to the Hunter Fantron, and exhibits some similarities to the original Phantron in Star Fox by moving at high speed to try and avoid your attacks and disorient you. It will attack from a distance with a fast arcing beam, and most of the time it will be invulnerable to attack. Hunter Tektron will also sometimes flee from battle, regaining any health it lost for the next encounter. You must defeat it quickly to avoid this happening. Keep focus on its location using the radar, and when it opens to fire at you, return fire at its vulnerable midsection.
Hunter Fantron
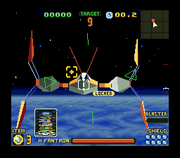
Hunter Fantron appears to be an upgraded version of the Phantron (under a different English spelling) from the original Star Fox, with some similarities to the Plasma Hydra from the same game. While Phantron was called a Special Close Orbit Robot, the Hunter variety seems able to travel away from Astropolis over long distances using its boosters, which also double as extendable arms for attack. Hunter Fantron will stop in front of your ship, extend the arms and either swing them at you, aim them directly at you and slam them into you, or spin wildly around in a large circle, hitting you with the arms as it does so. While it is fairly easy to damage Phantron just by aiming for the main body, it can cause a lot of damage with its attacks. The attacks can be hard to avoid, but if you use your Retros and Boost you can move out of range where you are free to attack. Be careful however, as it will often revert the arms back to boosters and sometimes crash directly into you.
Space Blade
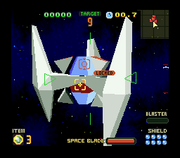
The Space Blade is a possible upgrade to the Blade Barrier from the original Star Fox. To begin with, it will move slowly and generally keep its distance, launching large spiked balls that will home in on your location. These appear on the radar and can be disorientating, but you can shoot them down with your blasters. It has six launchers from which it fires the spiked balls which must be first be destroyed, but the spinning blades can block your shots, much like the original Blade Barrier. When it spins the blades horizontally, it moves much faster and it's usually best to boost past it and turn to face it once it slows down. Once the launchers are destroyed however, it becomes much more aggressive, moving rapidly and launching a near constant stream of spiked balls from it's middle section. This leaves the center vulnerable as it opens to attack though, so fire at it to quickly finish it off.
Land Bosses
Queen Dragoon
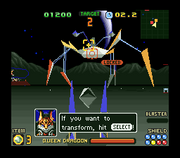
Despite the name, the Queen Dragoon has an appearance not dissimilar to the crab-like walkers on Titania in the original Star Fox. She will fire missiles at you from a long distance which should be shot down, and uses lasers as well when you get closer. She does not move much, and will be easily destroyed in only a few shots directly to the body. She is especially simple considering the Twin Blasters are readily available upon landing on Meteor. Upon her defeat, as with all four bosses on the surface of a planet, she will leave behind the switch to open the base. APPEARS IN: Meteor Easy Mode
King Dodora
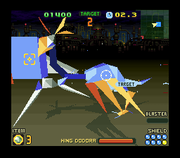
A clear relative of Monarch Dodora from the original game (possibly the male of the species, although Monarch Dodora was also referred to as male in the Star Fox manual, despite laying eggs), this giant bird-like dinosaur wanders around the surface of Eledard on Hard difficulty. He will aim to torch your ship with regular streams of fire from it's mouth, which can cause a lot of damage if they connect. Unlike the original Monarch Dodora, these attacks are short range, and King Dodora only has one head with which to attack. Nontheless, if he gets close he can cause a lot of damage merely by crashing into you, so keep at a distance and aim for the body. Every now and again King Dodora will take to the air, allowing it to travel faster and move out of range, so it helps to switch from Walker to Arwing to keep up with him.
APPEARS IN: Eladard Hard Mode
Kamantis
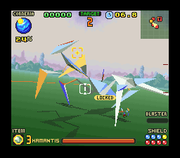
Kamantis appears as a huge mantis-like creature on Venom on Expert difficulty. While it will not attack directly, it will unleash numerous offspring onto the planet's surface that will do anything to protect the parent. They will be very aggressive and leap at you at any moment, and a whole swarm of them can cause a lot of damage in a short space of time. They should ideally be shot down before they hit you, but it is hard to see them coming and difficult to avoid them. It's best to focus your strengths on defeating Kamantis. Kamantis can take a lot of damage, and will rear up and move faster upon being hit, making it hard to continue a sustained assault. Continued blaster shots to the body should eventually defeat it, however.
APPEARS IN: Venom Expert Mode
Queen Dioray
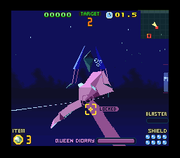
Queen Dioray is an initially docile octopus-like creature living underneath the sea of Fortuna on Expert. She will not attack until you first strike, at which point it will rise to the surface and become aggressive. You must switch back to Arwing form to continue attacking her. She will now actively move around the sea and will fire plasma balls at you from her swinging tentacles. She will actively target you during this time, but you should continue to fire at her to cause damage. After a short while she will retreat back under the waves and refrain from attacking until you once again disturb her.
APPEARS IN: Fortuna: Expert Mode
Base and Battleship Bosses
Kick Gunner
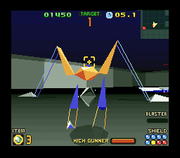
A Kick Gunner appears in Fortuna's base on both Hard and Expert modes. It leaps from pools of water and hops around the area, firing ring lasers to attack. On Hard the pools are spread far apart and it will have to spend time reaching the next pool, making it an easy target. On Expert it has considerably more health and the pools are closer together, allowing it to jump directly from one to another while firing at you. There are also more threats within the room itself, making the battle more time consuming.
Knight Nack
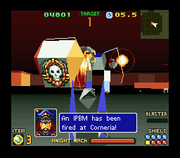
The Knight Nack appears in Macbeth's base on Hard and Expert, within a large battleground area. It is a bigger version of the enemy walkers you encouter regularly in bases and the Battleships, and is armed with a huge shield and a large ring laser blaster. The shield will reflect attacks and can cause you to hurt yourself if you fire while too close. Most of the time it keeps the shield infront of its body, but will move it to one side to attack, leaving itself vulnerable. If you can sneak behind it without it being aware of you, you can get a clear shot at it as it walks around the arena.
Heavy Chariot
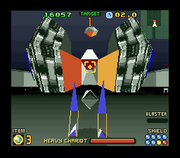
Heavy Chariot appears merely as two huge tracked wheels at first, charging at you before opening up and revealing the vulnerable midsection. When it opens, it launches a series of bombs at you before closing up again and rolling to a new location in the area. It will commonly aim to hit you while moving, and can cause a lot of damage if it rolls over you, so it helps to circle around it during the battle. Shots to the wheels merely reflect, meaning it can only be harmed when it is open. The Heavy Chariot appears in the final Battleship on Hard.
Tal Kong
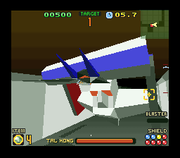
Tal Kong only appears in Titania's base on Expert. It appears as a variation on the large statues that appear outside the base, but armed with a giant roller. It will retreat from you as soon as the battle starts, firing three lasers in intermittent bursts. It will continue in a large loop around the arena, only changing direction if you get behind it. Therefore you must fight in Arwing form and chase, firing all the while. Tal Kong's main attack is to throw the huge roller at you; this can be dangerous if you get too close, but you will often have to use the boost to keep up with him, causing you to get in range of this attack. The roller will be replaced with a new one after throwing it. Tal Kong and his roller throwing seems to be a reference to the infamous barrel throwing ape Donkey Kong.
- Note: A thrown roller will remain active and can still damage you after Tal Kong is destroyed.
Base Cores
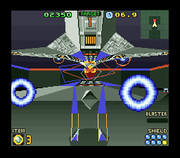
Base Cores are similar in design and appearance to the Cores of the ships of the Space Armada in the original Star Fox. Like those, the cores themselves have no means of defense against repeated blaster shots, making them easy targets. Unlike them however, the Cores are defended by a constant stream of ring lasers from the array that houses them. Thankfully these shots are fairly inaccurate, and can easily be avoided. It often helps to circle the Core while firing upon it.
On Hard and Expert you will on certain planets come across a Core defended by a large barrier and two or four ring laser blasters in the corners of the room. Once these have been disabled by a few shots, the barrier will drop away and you are able to fire upon the Core as normal.
Battleship Cores
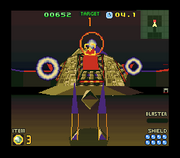
Battleship cores come in two different varieties. The first variety is fairly simple, consisting of a large Core in the center of the room with protrusions that will fire ring lasers at you. On Normal there will only be two, one on either side of the Core, while on Hard and Expert there will be four, sometimes with additional ring laser blasters on the walls of the arena. To destroy the Core, you need to destroy each of these ring laser blasters. They don't take a lot of damage to destroy, and a single Nova Bomb can destroy the whole Core.
The second type of Core first appears as a small blue target in the center of the room. Firing upon it will cause it to raise, revealing a pillar with four weak spots, similar to the standard Battleship Core. Two large hatches will also be in the arena, and small ships will be released from each one. They attack with lasers and aren't too much of a threat, yet should be destroyed before firing upon the Core. Once the Core raises, you have a limited amount of time to destroy all four of the weak points before it retracts. Once retracted, you shall have to fire upon it for it to raise again, and the hatches will release additional ships to make up for those you destroyed.
Andross
Astropolis Core
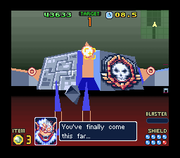
This battle is very similar to taking out a Type A Battleship Core, except it is considerably larger in scale, meaning you will have to traverse the entire arena to hit each of the weak points. After you destroy all four, Andross' Core Brain (the cube that bears his face) will be revealed. It does not attack but should be fired upon. Defeating it will cause it to retreat deeper into the base, where your ship will follow in Arwing mode for the final battle.
Andross
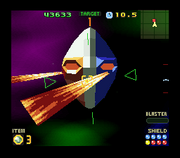
Andross' battle has a number of different phases, but the battle always begins the same way. At first Andross appears simply as a large mask. He attacks with beams of fire from the eyes; each hit will take off a significant amount of your shield and the attack can be hard to avoid. Like the original Star Fox, aim to shoot out the eyes. Each shot causes the mask to move, making it hard to repeatedly shoot each eye. This also affects the direction of his attacks, so be aware that the fire beams will go in a different direction depending on it's movements. He will often raise up while firing as well, so be careful when he floats lower than you. Every now and again, Andross will vanish and appear behind you in a very similar manner to the final battle in Star Fox 64. Elements of this fight were also used in the final battle of Star Fox Adventures.
On Normal, once the mask is destroyed, Andross' Core Brain will appear once more and should be fired upon. If you do not destroy it, the mask will reform and you will have to destroy the eyes again before you can finish off the Core Brain.
On Hard and Expert however, destroying the eyes of the mask will simply cause the mask to open, revealing Andross' glowing eye. Andross' hands will also form, and he will charge up a swarm of Plasma Balls from his palms and unleash them at you; you must barrel roll to deflect them. Keep firing upon his partially visable face and his glowing eye and eventually you should defeat him. On Hard, this will reveal the Core Brain, but on Expert, this will merely destroy the mask.
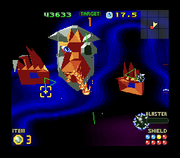
The final phase of the battle on Expert is the most challenging. With his face fully revealed, Andross appears virtually identical to his appearance in Star Fox 64, including the weak points in the center of his hands. He will attack by breathing fire at you from close range, and launching spiked balls at you from his hands. First you must destroy each hand by firing upon the weak points. Once this is done, Andross' face will glow a blue colour and he will attack with a deadly stream of ring lasers. He will also attack with a swarm of eyes. When he does this, part of his face will fade and you can fire upon the visible Core Brain. Once damaged enough, his head will be destroyed and the Core Brain will remain, which you must destroy! On Hard and Expert, if you do not destroy it, Andross' mask will reform but you will only have to destroy the eyes again for the Core Brain to be revealed a second time.
