Speak to Grey and Sol in the hangar. Sol will express to Grey why the Imperial senate is necessary, though Grey disagrees - believing officers like Gralm needing direction, not a leash. Now that they have the coordinates to the Nadiri Dockyards acquired from their first Starhawk encounter, they will be at the forefront of the attacks - having been taken from a near shipwreck to a key military asset following the previous mission.
In the briefing room, Kerrill will announce that Sloane has a plan to deal with Vanguard Squadron, the only obstacle between them and the Starhawk. You will play a key part in this plan, though she advises you to not let the success get to your head.
Mission Briefing[edit]
Our baradium munitions give us the firepower to take on the Starhawk, but the situation isn't that simple. The Nadiri Dockyards are protected by a massive rebel fleet. We cannot engage the Starhawk until it is vulnerable. Admiral Sloane's strategy is simple: lure the Republic fleet away from Nadiri, with simultaneous attacks on enemy targets across the galaxy. We've been assigned to attack Mon Cala. We don't have the numbers for a pitched battle, so you will have to strike fast. Your mission is to sow chaos through multiple attacks, moving quickly. These refueling pods are your first target. Next, attack civilian transports, and any medical frigates supporting them. This will certainly draw out Anvil Squadron, who are defending Mon Cala. Stay ahead of them if you can. Titan 3, you're ready for more responsibility. You will lead the assault. Make this fast and brutal. They've earned it.
Speaking to Kerrill again will prompt a discussion between her and Admiral Sloane. Sloane will note your achievements, with Kerrill continuing to vouch for your talents. Sloane will also overlook Kerrill's stealing of Colonel Gralm's supplies, saying that both of them should have learned something from the encounter - applauding Colonel Gralm's efficiency while also commending Kerrill's finesse.
In the hangar, Grey will also be happy on your behalf, but also warn you that pilots are expendable, but not replaceable. Good leaders inspire those below them, and when one is lost, the void cannot be replaced with just anyone. Shen will look forward to shooting down Anvil Squadron, who shot him down in a previous engagement and lost two vertebrae.
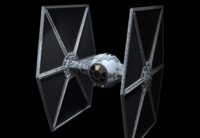
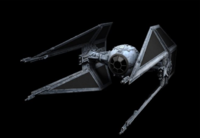
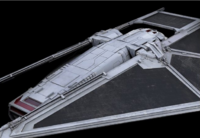
For this mission, you'll have the option to fly a TIE Fighter, Reaper, or Interceptor.
Mission Start[edit]
Upon arriving, wait until everyone is finished talking before boosting your way to the fuel pods. The fuel pods are tightly stacked together, and destroying three prompts a chain reaction that destroys the entire facility. There are 14 facilities in all - destroy all of them for an achievement. After destroying approximately half of them, Anvil Squadron will arrive with a mix of A-wings and X-wings. Also present will be Anvil Squadron's CR90s. Ignore these and focus on the starfighters.
After destroying the first wave of Anvil Squadron fighters, a second wave will appear. There is no benefit to destroying these, so ignore them and head for the waypoint.

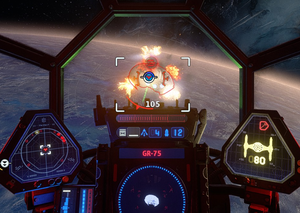
The next area will contain six GR75 transports escorted by a number of Anvil Squadron fighters. Ignore the fighters and go for the transports, which will split up and book it to safety. At least two must be destroyed to complete the mission. Utilize a combination of energy conversion to weapons and shields, and either rockets or dumbfired concussion missiles to intercept each transport in turn. To further drive home Anvil Squadron's failure, and to earn a medal, destroy all six transports.
After destroying all the transports, Anvil Squadron fighters arrive en-masse. Run straight to the next area, using energy conversion to engine power to leave Anvil Squadron in the dust.

The third target is a Nebulon-B frigate escorted by a quartet of X-wings. Begin by instructing your wingmates to attack the frigate - once their attacks have the shields down, you can focus on the frigate's guns. Use your experience in the previous mission to remove the teeth from the medical frigate. The frigate will receive a large number of reinforcements, consisting of all four New Republic starfighter types.

Once it's down to about half health, Anvil Squadron's MC75 arrives - the Silver Coronet. Sink the Nebulon-B and Anvil Squadron will withdraw to the Silver Coronet. Pick off any stragglers and head for the Silver Coronet. Ignore the two corvettes that arrive to aid the enemy battleship - you'll have your own reinforcements in the form of Terisa Kerrill herself and the Overseer, which begins trading shots with the Silver Coronet. Best of all, with the Overseer's arrival, you now have a hangar to return to for supplies.
Your team will suggest to aim for the two shield generators on the Silver Coronet. Fly through the Silver Coronet's shields and unload everything you have into each shield generator in turn. With the shields down, your next target will be the targeting system, in order to give a TIE Bomber flight some cover. With the shields down, you can attack the targeting system at any range. Wrap the mission up by targeting the power subsystem and any remaining turrets - with the destruction of the Silver Coronet, the mission is complete.
Medals[edit]
- Mission Complete: Complete Mission 9
- Efficiency Medal: Complete Mission 9 in 13 minutes or less
- Enduring Service Medal: Complete Mission 9 without dying
- No Mercy: Destroy the medical frigate
- No Cargo: Destroy all cargo ships


