In the hangar, Gunny confirms what Keo sensed - Lindon Javes is dead. Gunny tries to rally the group before leading Vanguard into the briefing room.
Hera Syndulla will be present in the briefing room, and letting you know that she'll need you as the leader and inspiration Lindon saw you as.
Mission Briefing[edit]
Thanks to your work on the comsats, Anvil Squadron heard our call and, with Lindon Javes, bought us time to repair our ships for escape. But not the Imperial fleet has Anvil's ships pinned down. They can't get out. So, we're going back into the fight, because we need to buy everyone time to escape. No one left behind. Ardo thinks we have one chance. It's drastic, but here it is. The moon is highly unstable, and the Imperial ships are positioned around it. If we crash the Starhawk into the moon's core, the shockwave should destroy those Imperial sihps and let us escape - if we're fast. How? The ship's tractor beam is firing uncontrollably as it overloads. If we can get a couple of corvettes into that beam, we can tow it up to speed. Vanguard Squadron, you're up first. We're counting on you to clear the path and take out the closest Star Destroyer. Corvettes will then enter the tractor beam and, if Ardo's plan works, get the Starhawk moving. It should have a straight shot. Defend our fleet, in case the Imperials get wise to what we're doing. When the Starhawk collides with that moon, the shockwave will hit every Imperial ship in range...and you, unless you outrun it. It's risky, but sacrificing this Starhawk will save our fleet, and the engineers who will build the next one. And the next. The future of the New Republic depends on it. Let's finish this.
In the briefing room, Ardo mourns the loss of Lindon, who he counted as a friend. Ardo also mentions Lindon never forgot how you saved him at Fostar Haven. Ardo continues to believe in Vanguard Squadron, just as Lindon did. Hera, meanwhile, mentions how she evacuated everyone off the Starhawk, and has sent Meteor and Hail squadrons to reclaim Nadiri.
In the hangar, Frisk asks Grace what will be next, and suggests visiting a cantina on Nar Shadda. Grace remains skeptical of their ability to accomplish this mission, but Frisk remains optimistic.
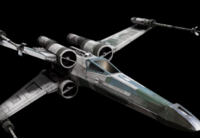
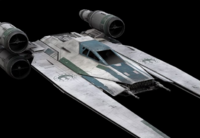
You'll be able to return to the Temperance during this mission, and it is highly likely you'll need to do so several times in the mission. One of the first enemies you'll be facing down is an entire Star Destroyer. It is strongly advised you equip you U-wing with ion torpedoes to disable its shields, and then equip your Y-wing with proton torpedoes to hit its subsystems from a safe distance.
Once you've kitted out all four ships with the loadouts you need, go ahead and start the mission.
Mission Start[edit]

If you equipped the U-wing and the Y-wing with torpedoes, start the mission as the U-wing. Use its ion torpedoes from a safe distance to cripple the star destroyer's shields with two of them. The Temperance is some distance away, so you'll need to divert maximum power to engines and fly home in order to switch to your Y-wing. In the meantime, order your squadron to attack the star destroyer directly - this will keep its shields down long enough for you to return in your Y-wing.
As a Y-wing, approach the star destroyer from its side and aim torpedoes at its shield generators. Stay at maximum range (1500-1400) and let your torpedoes lock on from a standstill, then fire them in. A single torpedo each for the left and right shields should be enough to knock them out. Follow this up with torpedo strikes to the targeting subsystem since it also is on the dorsal side of the star destroyer. If the shields of the star destroyer return, have your squadron attack it until the shields are down, then fire another torpedo.

After sinking the star destroyer, return to the Temperance and switch to the fighter you're most comfortable in for dogfights. The squadron will comment on receiving a signal from inside the Starhawk, even though it's evacuated. Ardo will instruct you to fly close to the Starhawk's surface to determine the source of the signal.
Upon flying close to the signal, Lindon will burst out from the Starhawk's wreckage in the remains of his fighter. Ardo will quickly appraise him of the situation as Hera gives the command to move the corvettes into position. The corvettes will then be attacked by huge waves of TIEs - go specifically for bombers and TIE Reapers - these will throw tactical shields on the bombers, making them tougher to kill.

After destroying as many as four waves of bombers, an Imperial light cruiser will arrive and attack the Starhawk. Make attacks against it and its guns, and have the rest of the squadron assist you to kill it quickly. This will be followed by a second Arquitens, which you can handle in the exact same manner. Don't forget to switch your shields to forward as you're making your attack run, and aft as you pass over it for another run.
After destroying the two Arquitens, there's no stopping the Starhawk now. It slams into the moon, and Lindon and Vanguard Squadron begin the escape. Although the rest of your squad is panicking about the shockwave, ignore it - avoid boosting and keep your mobility up. Trail Lindon closely, but don't bite into his wing either - he makes a few sudden movements that you'll need to see beforehand to predict.
If you've maintained maximum speed (boosting, again, is unnecessary) you'll easily achieve both the achievement and the medal. Escape Galitan to complete the mission, and the campaign.
Medals[edit]

- Mission Complete: Completed Mission 14
- Efficiency Medal: Completed Mission 14 in 18 minutes or less
- Enduring Service Medal: Completed Mission 14 without dying
- Scorching Escape: Maintained maximum speed during the Galitan escape
- Piece by Piece: Destroyed 2 flagship subsystems
- For the Good of the Galaxy: Completed all New Republic missions
Hope is like the sun. If you only believe in it when you can see it, you'll never make it through the night. We know our New Republic faces great challenges. But thanks to Vanguard Squadron, peace is closer than ever. General Syndulla sacrificed one Starhawk, for the chance to build a fleet. From Nadiri, Commander Javes will guide our best and brightest, forging the strength to challenge an Empire. The war goes on. But we face it with renewed courage - inspired by heroes who fly for freedom, as we emerge from the darkness of Imperial oppression...into the light of a new era.


