The penultimate mission for the New Republic.
In the hangar, Keo is concerned and speaks to you about any other alternatives to the Ringali nebula. With no other options, Lindon has given the order, at Ardo's recommendation, to head into the nebula, which Keo has reservations to, but recognizes there aren't any alternatives.
Mission Briefing[edit]
Let me speak plainly, Vanguard Squadron. We're in trouble. We have the Overseer behind us, and Imperial reinforcements moving to cut us off. There's no way we'll fend them off. We need to send a distress call to our allies in the New Republic and hope they can reach us in time. The problem is, we're wounded, outnumbered, and the Ringali Nebula is already disrupting our long-distance communications. Luckily, General Syndulla has located an old broadcast hub that once orbited a nearby moon called Galitan. If we restore the Galitan broadcast hub, we can send a distress signal to New Republic forces outside the nebula. Chief Mechanic Zerelda Sage will lead a repair team to do just that. She'll also locate communication satellites in the area to boost our distress signal. The more active comsats we have, the stronger our transmission will be. Terisa surely knows this too. We can suffer minor losses with the comsats, but the more we have working, the faster we can signal Chandrila for help. But the Empire's fighters must not destroy the broadcast hub. We lose that, we won't survive. Keep Zerelda and the comsats safe. I'll call for aid as soon as you get the signal strength high enough. From there, all we can do is wait and hope.
Lindon will speak of certainty, and how in the Empire, doubt is seen as disloyalty. Now he recognizes that a certain degree of doubt is essential to good leadership. Meanwhile, Hera is confident that Vanguard Squadron and the others are up to the task, but Ardo says his team is feeling the strain of their current situation.
In the hangar, Frisk speaks about how Grace changed his mind about staying on Vanguard Squadron after Endor. While at home, his clanmates would always be questioning him, but he feels at home when in Vanguard Squadron. Gunny gives the player a rousing speech about not giving in, no matter how bleak the situation seems. Zerelda expresses fear and apprehension over the upcoming mission, having never been deployed off the Temperance before.
Start the mission when you're ready.
Mission Start[edit]
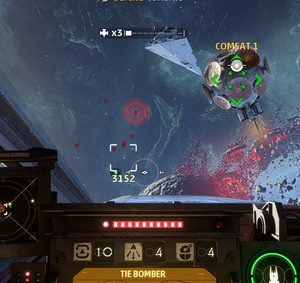
Follow Zerelda's corvette and head for the broadcast hub. Once her corvette docks, she says she'll need time to get the various comsats surrounding the broadcast hub online. The comsats will be numbered 1 through 6, and you'll be jumped by a large number of TIE fighters and a trio of TIE bombers in the direction of number 3. They'll ignore comsat 3 and go straight for the broadcast hub.

The game will prompt you to deploy a turret mine to help defend it. Turret mines don't last long and only contribute lightly to defence, so don't rely on them. What helps more with defending the broadcast hub will be the tactical shield and, of course, you splashing the TIEs. As you're dealing with the first wave, a second wave of bombers will arrive for you to deal with. Ignore the fighters and splash the bombers; lose the broadcast hub and you fail the mission.

After dealing with these TIEs, Zerelda will get the comsats online and the Imperials will attack those. Target TIE interceptors and bombers, as these will tear through the comsats. They'll target the comsats in reverse numerical order - 3, 2, and then 1. Use the tactical shield liberally to have the comsats absorb as much damage as possible, giving you time to shoot down the seeming endless waves of TIEs. Also don't forget to target the comsats and press ![]() ,
, ![]() , or to give defend orders to the rest of your squadron.
, or to give defend orders to the rest of your squadron.
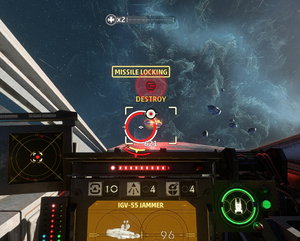
Once the signal strength reaches 50%, it immediately drops to zero. Zerelda realizes that an enemy jamming ship is in the area and is preventing them from sending the distress call. Have your squad attack the jamming ship directly, as once it is destroyed, the signal strength jumps to 100% and you'll be clear to proceed.
With the jamming ship out of the way, the TIEs withdraw from the battlefield and the mission is complete.
Medals[edit]
- Mission Complete: Complete Mission 12
- Efficiency Medal: Complete Mission 12 in 16 minutes or less
- Enduring Service Medal: Complete Mission 12 without dying
- Comsat Savior: Do not allow any comsats to be destroyed
- Loud and Clear: Destroy the jammer in less than a minute
