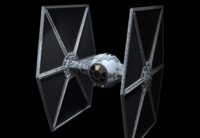
Star Wars: Squadrons/Secrets and Spies

You will now switch to the perspective of the Empire. Admiral Sloane will brief now-Captain Terisa Kerill on having found Lindon Javes and Project Starhawk. Sloane tasks Kerill to bring Lindon to justice and destroy his project.
After speaking with Titan 1, head into the hangar to be reunited with Terisa Kerrill, now a captain but disgraced after Lindon's betrayal.
Mission Briefing[edit]
One of our spies, Agent Thorn, has discovered vital intelligence on Project Starhawk. Your mission is to extract her from an orbital outpost above Hosnian Prime. Your job is to secure the outpost for our extraction team who will arrive aboard the shuttle Gladius. Behind enemy lines, you must be precise and swift. We have no room for error, Titan. To gain access, you'll have to eliminate perimeter defenses. Intelligence reports missile platforms defending Hosnian space. Destroy them. The outpost itself is protected by turbolaser cannons on all sides. Evade and eliminate them all. When you've secured the area, you will escort the Gladius to the outpost, and our extraction team will acquire Agent Thorn. Once Thorn is secure, reach your Gozanti cruisers and return to the Overseer. Do not lose our spy under any circumstances. That is all.
Following the briefing, speak with Captain Kerrill and Sol. Sol will speak of her parents and how they were senators. Kerrill will talk about the state of the Empire post-Endor, and how they cannot afford to fracture and must remain united.
In the hangar, the remaining crewmembers will introduce themselves to you. Shen talks about how his cybernetics keep him going, and Vonreg will be as eager as ever to destroy the rebellion. Waylin will also introduce himself as chief engineer.
When ready, take off.
Mission Start[edit]
Upon coming out of hyperspace above Hosnian Prime, you'll be warned off by the New Republic. Follow Sol and begin the attack on the five missile platforms defending the facility. Much like the turrets from Fostar Station, these turrets aren't a major threat. They do fire missiles at you, but since you are flying at them to attack them with guns or rockets, simply shoot the missiles down as they approach.

Destroying the turrets lets you close in on the station itself. Your next target is the station's shield generator, which is located at its bottom. Fly inside the shield and destroy the generator station quickly - you'll be taking fire from X-wings and the station itself as you do so. You no longer have shields, so you'll be more reliant on requesting repairs from Shen in his Reaper and your own fighter-borne repair kit.
Destroying the shields next marks the turrets as your next target, as well as a pair of GR75s attempting to leave the station. Use the emergency power conversion ability of your TIE to dump all power into weapons when you get in range of the GR75s - they're slow enough to not need engine power. Unload rockets and gunfire into both GR75s to accomplish a secondary objective.
Attack the nine turret on the outpost itself next. Hug the station and destroy each in turn, using weapon power to quickly destroy them before they do notable damage to you. With all the turrets down, your next target will be the swarm of X-wings launched by the station that have likely been harassing you this entire time. Chase and destroy X-wings before meeting with the Gladius to accomplish a secondary objective.

Your next objective is to protect the Gladius as it makes its way to the landing platform. It will be attacked by a pair of A-wings followed by a trio of X-wings. Although the shuttle can take a beating, destroy them quickly to minimize damage. After the shuttle lands, you'll be attacked by a mix of A-wings and X-wings, launched from beneath the outpost. These next two waves can be particularly dangerous as, with the shuttle landed, there is nothing distracting them from ganging up on you. A second wave of fighters consists of a mix of X-wings, A-wings, and a pair of supporting U-wings.
With Agent Thorn aboard the Gladius, it's time to leave. Head back to the Gladius and follow it.
The shuttle's escape route is blocked by a pair of CR90 corvettes. The shuttle will turn and flee, but be intercepted by a pair of X-wings. Ignore the corvettes and splash these X-wings. A third X-wing will attack, and Gladius' escape will be interrupted by even more CR90s. Keep changing course and stick to the shuttle, destroying fighters that get behind it and ignoring the corvettes.
Yet another trio of CR90s arrive to box the Gladius in. Stay close to the Gladius to keep it moving, and shoot down all fighters that get behind it. Even more rebel capital ships arrive, including a second frigate and more X-wings.
After having evaded no fewer than eight corvettes and three frigates, the Gladius jumps to lightspeed. Head for the rendezvous point to complete the mission.
Medals[edit]
- Mission Complete: Completed Mission 4
- Efficiency Medal: Completed Mission 4 in 13 minutes or less
- Enduring Service Medal: Completed Mission 4 without dying
- Collateral Damage: Destroyed New Republic GR75s before they can escape
- Thin the Herd: Destroyed all fighters before the Gladius' arrival
