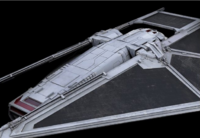
Following the previous mission, speak to Grey. He will approve of your performance and be relieved the squadron won't be compromised by nepotism. Head into the briefing room. You will meet Captain Kerrill's adjutant from Imperial intelligence, LT-514.
Mission Briefing[edit]

| |
| Weapon | Ion Cannon |
| Left Aux | Squadron Mask |
| Right Aux | Tactical Shield |
| Countermeasure | Seeker Warheads |
| Hull | Standard Hull |
| Engine | Standard Engine |
| Shields | Standard Deflector |
Agent Thorn's intel has paid off. We've learned that a convoy of New Republic engineers is traveling from Hosnian Prime to Project Starhawk's secret base. Their charted path leads them straight through the contested territory of Desevro. According to our new information, the convoy will attempt to conceal its presence in a local debris field. Follow the convoy through the wreckage, and allow them to jump to hyperspace. We will calculate all possible destinations along their trajectory to find Project Starhawk. You must not be detected. We cannot risk losing this convoy. Local Imperial forces have been advised not to interfere. Once the convoy is clear of the debris, it will leave the system, pointing us toward their hidden headquarters. Once we have their jump vector, return to the Overseer and prepare for immediate redeployment.
After the briefing, speak to LT-514 and Captain Kerrill. They will express concern that a local Imperial captain, Captain Amos, may interfere. In the hangar, Vonreg will express her distaste of Imperial traitors, dropping names like Yrica Quell of Alphabet Squadron and Iden Versio as "loose ends".
Rella Sol will hold Admiral Sloan in high regard, suggesting that destroying Project Starhawk will unify the Imperial factions which are now without a grand strategy. Grey will advise to expect the unexpected when fighting the rebels.
Launch your TIE when ready.
Mission Start[edit]
Simply follow the instructions of your squadron - you won't get detected unless you're careless.
Creep forward and watch the gauge at the top of the screen to watch your visibility. Avoid boosting, as this will cause your visibility to spike unnecessarily. Nevertheless, put power into engines and travel to the first waypoint. As you approach the convoy, it will start to spike. Grey will warn you at this point. Deploy the Squadron Mask ability to reduce visibility.
Eventually you'll come in visual range of the convoy. Kerrill will give the instruction to hold - avoid approaching the convoy, which consists of a Nebulon-B, three GR75s, and two CR90 corvettes.
Be patient and wait for the group to jump to hyperspace.

LT-514 will then announce that the Star Destroyer Tormentor has arrived. Captain Amos has decided to Leeroy Jenkins his way into the rebel fleet. Ignore the New Republic and make a beeline for the Imperial Star Destroyer.
Captain Kerrill will instruct you to shoot down all of the Tormentor's missiles. Simply sit close to the Tormentor's bow and shoot the missiles as they fly away from you. The Tormentor will not fire on you, so redirect all shields to the front as you do. There are ten missiles in all to shoot down - your squadron will aid to a degree, but the brunt of the work will be on you.
If you're having trouble catching all the missiles, use the Target function ![]() ,
, ![]() , and to target the missiles.
, and to target the missiles.
The gauge at the top only tracks the number of missiles you yourself have shot down, and will not update if one of your squadmates shoots one down.

With the GR75s now split from their escorting warships, you receive instructions to ionize them. Several X-wings will engage you. Remember that you have shields now, so redirect power to aft shields while you blast the transports. Only a few hull hits will be enough to disable the transports. Target each in turn to accomplish a secondary objective.
With the transports disabled, you'll need to escort shuttles to the transports to retrieve their information. Use the tactical shield to give them some extra health, and work on disabling attacking X-wings for the rest of your squadron. Don't forget to use the jammer as well - it limits the engagement range of the enemy AI fighters, and also covers the shuttles.
When the shuttles reach the Overseer, the remaining X-wings will bug out. You'll receive instructions to cover the Tormentor's retreat, but Captain Amos stubbornly refuses to. The Tormentor goes down with its delusional captain aboard, completing the mission.
Medals[edit]
- Mission Complete: Completed Mission 5
- Efficiency Medal: Completed Mission 5 in 14 minutes or less
- Enduring Service Medal: Completed Mission 5 without dying
- Marksman: Prevented any missile from damaging the GR75s
- Ionizer: Disabled all GR75 transports