Super Castlevania IV/Stage III
Block 3-1[edit]
This is a large cavern, where you simply head from the top-left to the bottom right.
As you are heading down, there is a large set of breakable blocks on the left wall. Behind these blocks are candles that hide a mixture of hearts, gold, a boomerang, and a health restore.
The tunnel leading to the exit has stalactites that are visibly shaking. They will fall a few seconds after they first appear on-screen, and have only spread shrapnel for a short distance. They may be run past as long as you don't get stopped by another monster.
Block 3-2[edit]
This stage is a simple upward climb. The upward scroll acts like a ratchet, with platforms below the visible area being non-existent.
There is nothing special about this stage - simply jump from platform to platform, and whip the grapple rings as needed.
Block 3-3[edit]
There are four distinct sections to this block, but only two checkpoints. It is also the more difficult block of the stage, with certain things approaching with limited warning.

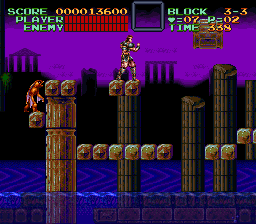
In the first section, you will have mermen jump from the water below. When you jump over the pillar and land on the isolated platform, you will see rocks fall followed by four heavy blocks. One method to avoid the blocks is to hold still for the first three, and jump backward before the fourth one appears. There are also collapsing floors, recognized by the lack of diamond within the individual block. When you reach the pillar after the collapsing floor, an eyeball will approach.
The second section has mermen shoot diagonally, but it is otherwise not difficult.

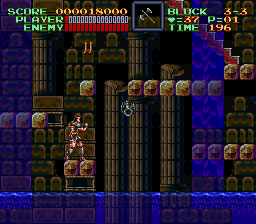
The third section has a zombie hiding behind a wall, which may be lured out by approaching, retreating and attackign when it is exposed. Continue left, smashing the upper candle and collecting the rosary that it drops to destroy all monsters on the screen. Further left is a gap requiring use of the grapple ring to swing across. You can now reach the upper floor, but need to be quick because of the collapsing floors. If you lose the platform and are trapped on the lower floor, head to the right (approximatly where you find the rosary) and return left to restore the platforms.
The fourth section is a tower climb. The significant threat is from the three crows which attack all at once.
Boss: Orhphic Vipers[edit]

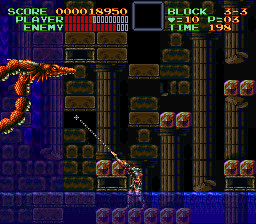
At the top of the climb, the bottom of the level will flood (but is not lethal), and the orhphic vipers will appear on the left.
There are two heads to defeat, one shoots a short-range flame, and the other shoots a fan of 3 projectiles. Their attacks are easily dodged due to their rarity, and they can be easily struck from directly below (or by using a special item.)
The two Vipers also follow a pattern, and will always perform their attacks in the same positions, so memorizing the boss is actually a good strategy. The only thing the player should be careful of is the head that shoots the melee flame attack - the hitbox for the flame goes into effect as soon as its mouth opens, NOT when the flame itself appears.