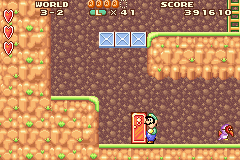
Welcome to World 3-2. You'll need strong legs in this terrain because you'll be running up and down a lot of ladders as you go from the surface down to the second floor of the underground and back again. Here, the only way to get to map C is by going up and down the ladders between maps A and B. Watch out for sneak attacks and make plenty of headway by blasting off your bombs where necessary. Blast your way through walls that stop your forward progress.
Map A
Part 1
Beezos and Panser. A swarm of Beezos is hovering around the start. You may have a tough time handling them. Try jumping to safety. Smack in the middle of the above ground scene you'll encounter the hot-headed Panser. This guy can do big damage. He spits fireballs. In this case, fight fire with vegetables.
Part 2
(1) Don't take this POW! You'll run into many enemies in map A and you'll be tempted to use the POW. But hold it! If you drop to the underground, you'll never make it to Sub-space on the right. Even in Super Mario Advance, where these two small POWs are replaced by one big bouncing POW, don't risk missing out on the precious mushroom.
(2) Sub-space 1. Pull up the Potion hidden on the far right and drop it right back down. Once you're in Sub-space, look to your left, near the wall, and you'll see a Mushroom. Take the two coins too, but watch out for Snifit; he'll attack you from below when you return from Sub-space. Take care of him, and then use the bombs to your left to help you destroy the blocks that cover the entrance to the underground.
When you play with the Princess, you can jump from the A-coin to ladder B to skip the first part of map B.
Map B
Part 1
(3) Make headway with a bomb. Make every blast count as you bomb your way to your goal. Use the bombs above you to destroy the first and second walls. Use the ones below to destroy the third and fourth walls. Watch out when the bombs explode! After all, you don't want your own trick to backfire. In Super Mario Advance, you can also throw one bomb at the newly-added bricks on the right ledge to reveal a roulette basket.
Part 2
Hardly a shortcut. It won't save you much time or trouble at all, but Luigi or the Princess can make the leap from the bottom of ladder D to the bottom of ladder E without the need for the trip to the surface.
(4) Don't get hurt! This wall will crumble if you know how to use your bombs. It won't be easy though, because this is one tough wall. Time your throw carefully.
(5) Sub-space 2. Now you've finally cleared the underground. Good! Before you enter Sub-space, be sure to destroy the floor on the right with a bomb—if you want the Mushroom, that is.
Map C

(6) Defeat Birdo. It's a cinch to defeat Birdo here. You already know how. Just throw the eggs she spits back at her or use the Mushroom Blocks on your left, and it's good-bye Birdo. If you remove a Mushroom Block from Birdo's platform and fall to the ground, you can use the block as a stepping stone to reach Birdo.
After defeating Birdo, grab the Crystal Ball ![]() and head through the hawkmouth gate.
and head through the hawkmouth gate.


