Super Mario Bros. 2/World 5-3
World 5-3 will be a long one. First of all, Bob-Ombs will attack you one after another. So climb up inside the big tree and ride on Pidget's carpet. But brace yourself: Clawgrip, the big crab, will hit you with a rock at the end. Be prepared for a hard fight.
Map A[edit]
Life up in Advance: in Super Mario Advance, the start room has been altered again. You will face three Shyguys, and a Shell can be found in the grass. Knock out the Shyguys and you'll get at least one Heart, which is all you need for now.
Map B[edit]
Part 1[edit]
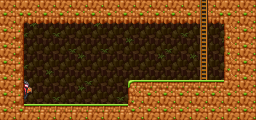
Summon Starman. Collect the many cherries in the area to summon your pal Starman. The temporary invincibility Starman grants you when you pick him up will help you get safely through the enemy-heavy and vegetable-free area.
(1) Sub-space 1. If you enter Sub-space in front of the hill, you will find a Mushroom. But watch out for the Albatoss—he'll be dropping Bob-Ombs at you from above.
(2) Here come the Bob-ombs! You're being attacked by a barrage of Bob-ombs. They can hurt you by touching you, and they can also explode by themselves. Get away from them by taking small jumps.
At the beginning of Map B, when you climb the ladder, you'll see a jar above. That's the Warp Zone, but you'll need an incredible jumper to get there. Make a Power Jump to the upper platform with Luigi—or another character can jump on an Albatoss if done right. Enter Sub-space with the Potion and go into the jar, and you're off to World 7-1!
Part 2[edit]
(3) Sub-space 2. You can see the Potion on the hill, but first you must take care of the Bob-ombs and break the wall. If you decide to exit here and enter Sub-space, you'll get a Mushroom and Coins. And who wouldn't want those?
Map C[edit]
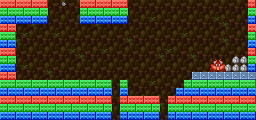
(4) Bob-omb's blasting services. Pick up the Mushroom Block to release the Bob-ombs, and toss it to the left of the gap in the floor. Eventually, one or two will blow up on top of the blocks, blasting a hole down to the lower area where you can pick up a Potion.
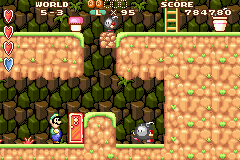
(5) Sub-space 3. Before you get the Coins, use the Bob-ombs from above to create an opening in the floor. Then go downstairs, pull the Potion from the grass, and enter Sub-space.
| Super Mario Advance Mushroom |
|---|
| In Super Mario Advance, however, that potion isn't only good for collecting coins. It's also pivotal for finding the third hidden mushroom that has been added to Sub-space for this version of the game. Make sure that you have a way to get back up to the top level or this mushroom will remain out of reach. |
Plant a plant on the plant. Pull up the vegetable, then toss it at the fireball spewing Panser ahead of door A to put the nasty plant out of commission. If you don't have an item to throw, you will have to use split-second timing to jump over the Panser.
Map D[edit]
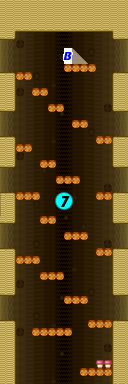
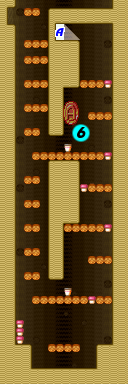
(6) Plug the jars. You're right in the middle of a gigantic tree. Go down to the bottom and around to the left, then climb all the way to the top branches. On your way, you'll find two jars with Shyguys bursting out of them. This is not as bad as it looks. Just cover them with the Mushroom Blocks. Defeat the Sparks the same way.
(7) Fight or flight? Panser will come down the stairs spitting flames. If you have a Mushroom Block, throw it at him. If not, avoid him. If Panser approaches you from the left, run to the right and you will appear on the left. Lucky for you, the sides of the screen are connected.
In Super Mario Advance, you can find a random item basket at the bottom of the stack of three mushroom blocks at the floor of this tower.
Map E[edit]
Part 1[edit]
(8) A mid-air flight. Ride Pidget's flying carpet all the way to the edge of the cliff on the right. But take care of Snifit first. Then wait for Pidget to fly your way. Once you've seized his carpet, move quickly to the right. In Super Mario Advance, you must utilize the carpet in order to safely collect the final two A-coins of this level. When you come to the log with the grass, you're safe. You may encounter another Pidget. Just ignore him and keep going.
Part 2[edit]

(9) Will Birdo stop you? Two bosses will show up in World 5-3. One of them is your old enemy Birdo—you've beaten her many times before. She's a piece of cake by now, right? Don't be too confident. This egghead is smart!
After defeating Birdo, grab the Crystal Ball ![]() and head through the hawkmouth gate.
and head through the hawkmouth gate.
Boss: Clawgrip[edit]

Fight rocks with rocks! The second boss is Clawgrip: one of the most powerful bosses. Clawgrip is a mean crab that throws rocks, which you can grab and throw back at him. There's a platform near the center of the room with pits on each side, and small wall on the left side. Stand against the wall and watch for rocks coming your way. You need to determine if the rock is high or low as it comes toward you. Stand still if it's high, or jump if it's low. If it's low you can land on the rock and pick it up. Then move fast, and when you see an opening, throw the rock back at Clawgrip. Five hits and Clawgrip will get knocked back to the sea.
In Doki Doki Panic, you will face a third Mouser instead, which you must hit with seven bombs to defeat.


