Super Mario Bros. 2 (Japan)/World 6
From StrategyWiki, the video game walkthrough and strategy guide wiki
World 6-1[edit]
Part A[edit]
- A Power-Up, a 1-Up, and a Starman are yours for the taking. Grab the items that you need, then dash with invincibility past the Hammer Brother ahead.
- Another massive 1-Up opportunity presents itself here for expert players. Trap the Buzzy Beetle along the right side of the first platform by creating a mini-staircase. Then jump up and hop on top of the Beetle so that it bounces off the right block, popping you back up in the air while you accumulate points, and eventually 1-Ups.
- If things don't work out with the Buzzy Beetle, you can try again with the one of the Koopas on the third platform, after the jump
- The 1-up is only available if you don't hit the flying Koopa and it is in the center of the U shaped blocks
Part B[edit]
- The first pipe is too tall to top with one hop. Pop up the hidden Coin Block in the area and use it as a step to clear this Mushroom Kingdom skyscraper.
Part C[edit]
- If you're in need of a Power-Up Mushroom, knock out the one in the fourth Coin Block from the left, then run to the right and catch it on the fly.
- The wind will start to push you to the right when reaching the stairs. Use this to your advantage to clear that long gap.
- Alternatively, you can try to reach the pipe under the solid brick platform. Jump to the first falling platform and face left quickly. Once the Red Piranha Plant is gone, jump and drop down to reach swim area B.
Part D[edit]
- Run to the left while riding on the moving platform to avoid blowing off to the right.
- Just before the staircase, wait for both plumber-eaters to sink into their pipes, then make a run for it.
World 6-2[edit]
Part A[edit]
- With Bloopers and Cheep Cheeps patrolling the area, collecting the two Coins in the coral box at the end of this section is too much of a gamble. Pass them up.
Part B[edit]
- Wait for the downward moving platform to pass by the opening in this section, then swim for the hole as fast as you can.
- Bloopers are a menace in this area. Go low and run along the ocean floor to avoid being hit by one of these sinister squids.
Part C[edit]
- A host of underwater creatures will try to catch you off guard as you negotiate the mess of coral spanning the last section and this section. This is the acid test for evasive maneuvers.
- Exit through the pipe to arrive at the standard level end.
- In Vs. Super Mario Bros, there are no Paratroopas or Troopas and the level is slightly longer.
World 6-3[edit]
Part A[edit]
- Cheep Cheeeps and Koopa Paratroopas make for dangerous combination here. Watch for these critters and try to top them.
Part B[edit]
- After you hit the mid-air Koopa Troopa, target the Power-Up Block and grab the prize as it slides to the right.
- In Vs. Super Mario Bros, the last power-up is omitted.
Part C[edit]
- Bouncing off of Koopa Paratroopas is an important technique to know in this open-air stage. Hit the Koopa before the large trees and bounce to safety.
- You can reach the flagpole by leaping from the tall bluff in this area, but you can only reach the top of the pole if you hit the Koopa.
World 6-4[edit]
Part A[edit]
- If you don't follow the correct routes through the dungeon, you'll be locked in a never ending maze.
- The correct route for the first part is under the long clockwise-moving fire-bar that is shown in the next picture.
- Later editions of this game sound a tone to let you know that you're on the right path.
Part B[edit]
- Watch the Hammer Brother's flying weapons and jump over this tool-tossing villain when there's a break in the action. Then leap up to the top and keep moving along the path.
- The correct route continues to the top brick platform. Dash over the small gap when the fiery flying Podoboo sinks into the lava pit.
- Once you're through the high platform, drop down to the bottom level to progress to the next section.
Part C[edit]
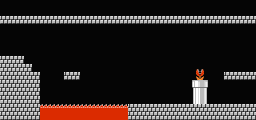
- The first portion of this section is over-populated by red Piranha Plants. Be patient and wait for them to sink into their pipes before you advance.
- Landing on the one-block Fire-Bar platform calls for all of the accuracy that you can muster. If you try to move with super speed, you may be lava bound.
- The proper path through this section is the very bottom. Dash over the small gap, then stop and watch the Fire-Bar. When it swings back up to the top, run with super speed to safety on the other side.
Part D[edit]
- King Koopa's Fireballs fly far. You'll encounter his fiery fury as soon as you land on solid brick. Run, jump, and don't get burned.


