Jump to navigation
Jump to search


World A-1
| The Challenging Secret Letter Worlds |
Welcome to the Worlds A, B, C and D; the most challenging of the Lost Levels. To unlock these top secret Worlds, you will need to acquire at least eight stars on your title screen by finishing the game eight times (regardless if you use warps or not).  In the original Super Mario Bros. 2, the Japanese version, Worlds A through D are played completely apart from the original Worlds by accessing them through the title screen as previously mentioned. However, if you are playing Super Mario All-Stars, you will play Worlds A through D right after you finish World 8 or World 9 with the same amount of lives and they will respectively behave as Worlds 10 through 13 as enemies and gimmicks will not revert to easy as is the case of its counterpart Famicom version. These Worlds are the real challenge in the SNES edition. *Please note that Worlds A through D are not available to players in Super Mario Bros. Deluxe. |
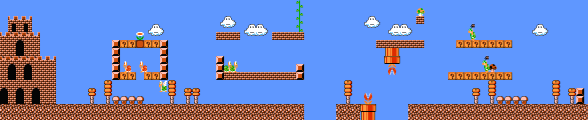
Part A

- Pop a Koopa through the space between the blocks, then hit the shell in the air for 8,000 points.
- Be sure to reveal the hidden vine from the right most block of the right elevated platform. Climb up to discover coin heaven C.
- You'll be dropped at the top of the row of bricks above the pipe from the bonus area and avoid a tricky jump below, as well as find an opportunity to net yourself a 1-Up.
- This level is a source of infinite lives until you cross the halfway point (Except in Super Mario All-Stars). You can collect a 1-Up and a potential 77 extra coins.
- In All-Stars, there are no halfway points beyond World 7-3, so you can collect as many coins as you want. Here, you can collect a potential 122 coins as opposed to 77.
- Either way, you have to sacrifice a life if you want to loop. This level does not advance backwards.
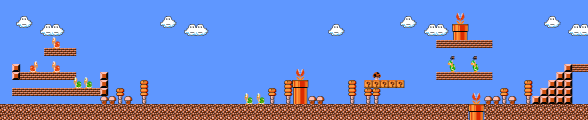
Part B

- At the beginning of this section, kick the top Koopa shell to the left, then follow it as it plows through the enemies for a 1-Up.
- After you clear the middle pipe, stop for a moment and wait for a Hammer Brother to approach. Then dash and jump over this pesky critter.
- Jump into the high pipe for a chance to explore coin room G.
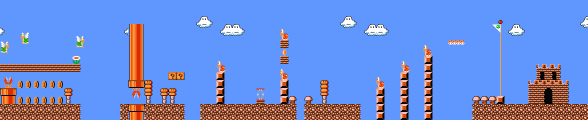
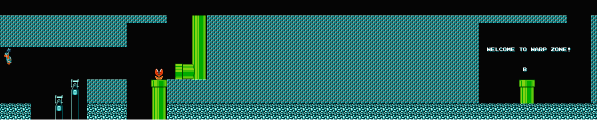
Part C

- Only patience and great timing of your jumps will help you clear this last section.
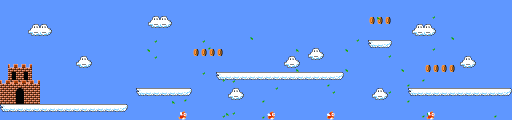
World A-2
Part A

- Use the Spring to bounce up and pop a 1-Up Mushroom from the brick. Then collect it as it falls through the next opening.
- If your hero is small, the Power-Up item in the row of bricks will be a Mushroom. Run to the right as it slides and catch it on the platform.
Part B

- A super-sized character can crash through the bricks at the top of the staircase and jump to the top row.
- A small character's only way to the roof is to jump onto a lift near the end of the section and jump again.
- The big ramp in the middle of the section is a restart point.
Part C

- You can take the normal exit pipe to the level's end and move on to the next world, or continue to run along the ceiling and be taken to a Warp Zone that leads to the next world, World B.
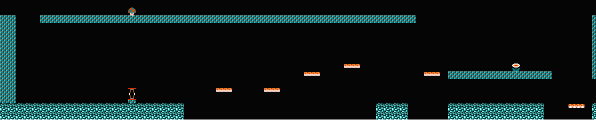
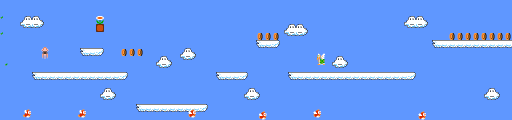
World A-3
Part A

- You'll be hit by a strong gust while running on this cloud platform. Let the wind blow you as you go and try not to lose your footing.
Part B

- Now that you've survived several underwater stages, you are familiar with the danger of Bloopers. This mid-air Blooper is not as menacing as its fishy buddies.
Part C

- If you hit the red spring here just right you'll have enough air to clear the top of the pole and you will be able to move on to the Warp Zone ahead.
- Beware of Sprite Limits! If there are five enemies on the screen before you approach the red spring, it won't show up and you won't be able to take the Warp Zone ahead. If this happens, you can still make it to the Warp Zone as long as the Red Koopa Paratroopa appears. All you'll need is a well-landed jump on the winged fiend while running towards it.
- Due to the game's sprite capacity, if there are five sprites in total on screen (without counting our hero), and among them the red spring and the Koopa Paratroopa, the Flag at the Goal Pole won't show up, and you will have a glitched up ending of the level without receiving any points from how high you reached it.
Part D

- The Warp Zone that you find here will take you all the way to World C.
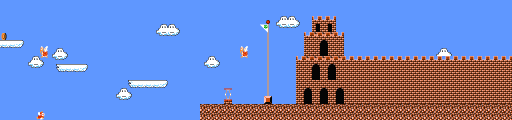
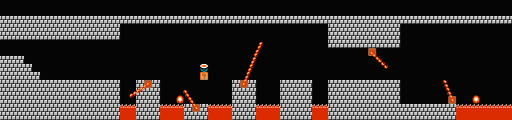
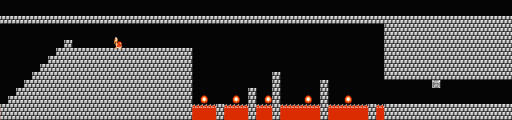
World A-4
Part A

- The four shorter fire-bars rotate at double speed, so beware.
- The Fire-Bars will not scathe your character if you stand on the left edge of the "?" Block. Wait there, then grab the Power-Up when the timing is right.
Part B

- You can stomp this Koopa Troopa and send it sliding to the right. There's no danger of it bouncing back.
- Five Podoboos pop up and sink back into the lava in this section. Start jumping as they are on their way down.
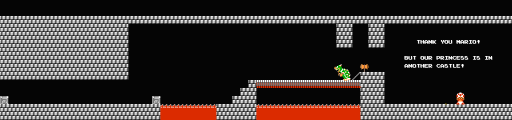
Part C

- Approach the edge with a super quick dash, then jump on the cannon at the end and jump again.
- Prepare for another face-off with the King of the Koopas!