
| B | |
| C | |
| E | |
| F | |
| H | |
| I | |
| J |
Moving from the dry desert to the bottom of the sea, Mario is in for quite a change in scenery. You'll have to imitate an amphibian to survive your aquatic adventure. It can't get any wetter than this!
You'll earn a second Hammer item from a Hammer Bros. and you may wish to use it on the rock to the right of World 3-5. Doing so will give you access to a canoe that you can row around the world. Two docks let you visit remote islands that contain Toad Houses, which offer free items for your inventory, as well as two chances at bonus lives.
World 3-1
Exploring the bottom of the sea can be dangerous. Take a deep breath—you'll need it. Ocean Side is one tough world. The critters in the sea are mean, lean and hungry! Since water is the primary element in this world, the Frog Suit or Firepower is the recommended choice of gear.
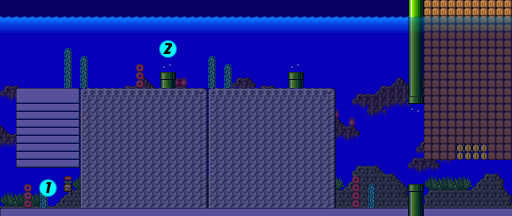
- 1: Immediately after you enter the stage, sink down to reach a hidden nook with a ? Block holding a power-up. You should always collect power ups because they're worth 1000 points.
- 2: Powerful currents jet out of the pipes, so take care not to get pushed out of control and into enemies lurking nearby. Swim through it as quickly as possible. Be mindful of the Bloopers—they are a constant underwater hazard. Swim with care when you see one.
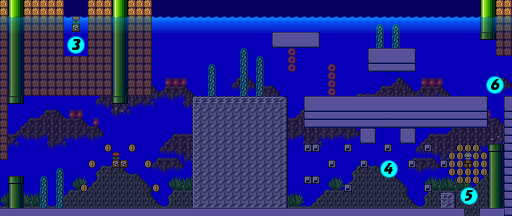
- 3: By jumping at the water's surface, you can get on top of this island. Jump over the green pipe and walk along the wooden ceiling to find a secret area containing a power-up. Use the Fire Flower to gun down any troublesome Bloopers that swim your path.
- 4: Be careful not to get bounced around like a pinball on the Jump Blocks, or the Lava Lotus will burn you.
- 5: Bump the ? Block to reveal a 1-Up, and collect it before it's lost down the unfathomable depths.
- 6: Catch a ride on the current up to the tube—it leads to the end of the stage. A Blooper lies in wait to ambush you, but the current will carry you past this Blooper at high speeds. Watch out and go for the goal.
World 3-2
Leap quickly from platform to platform. Just don't fall in the drink. Those pesky flying fish, the Cheep-Cheeps, are back and more bothersome than ever! It's best to use firepower to fry them, but you can also stomp them.
- 1: Cheep-Cheeps, always trying to take a cheap shot, will jump up at you from the water. Try fireballing them.
- 2: The hollow blocks on this stage will hold you weight for only a moment before they flicker and fall. Don't dawdle!
- 3: It's tough but possible to be invincible for most of the stage by grabbing three Starmen in a row. You'll need to get the first Starman hidden in a Wood Block and remain invincible to make the second one appear in a ? Block. The final Starman, hidden in another ? Block, won't appear unless you're still invincible by the time you reach it.
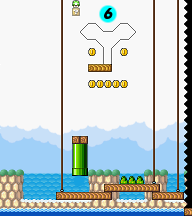
- 4: Hit the Switch Block to change the coins into blocks, creating a platform to stand on that will allow you to collect a 1-Up from an invisible block.
- 5: If you don't have the Raccoon Suit, and you think you can snatch it without getting nibbled by the Cheep-Cheeps, go for the power-up in the water beneath the pipe. Then use the pipe to reach the exit area (shown right).
- 6: Before you exit the stage, use the Raccoon Suit to fly up to a hidden area overhead to score a few extra coins and a secret 1-Up.
World 3-3
Boss Bass: he's Big, he's bad, and he's hungry. Try not to become his next meal. You'll probably dislike him. He can swallow you whole even if you're fully powered-up! Plus, the land in this world rises and sinks, putting you right within his reach.
- 1: This stage is a lot easier to complete as Fiery Mario—you'll be able simply to shoot Boss Bass out of the water.
- 2: Use the nearby Koopa to reveal the Switch Block. Stomp the Switch Block to convert the blocks into a sea of coins. Try to grab the Fire Flower from the Jump Block, but beware of Boss Bass.
- 3: Use an Ice Block to make another helpful Switch Block appear. Pound the Switch Block to create a bridge across the waters patrolled by Boss Bass. Boogie across the bridge (holding
 as you run) and Boss Bass won't be able to catch you. You'll have to hurry though, the bridge won't last long.
- 4: Time your jump onto the Rotary Lift so that you land just as it finishes a spin. That way, you'll have time to jump off. The pipe just beyond leads to the exit.
- 5: If you're feeling brave, a lonely 1-Up sits far past the pipe leading to the exit. You'll put yourself in danger trying to get it if you don't remove Boss Bass with a fireball first, but it could be worth it.
World 3 1st Fortress
Doors, Thwomp Traps, Boo Diddlys and a flooded basement stand between you and BOOM-BOOM. This is a complicated fortress! The doors in the fortress lead to a flooded "back" stage. Most of the doors will just waste your time if you take them, so follow the map carefully.
Front side
- 1: It's difficult to do, but you can warp directly to BOOM-BOOM by entering the third door, then repeatedly tapping
 as fast as you can.
- 2: You'll face a double threat near the Thwomp Trap. In addition to having to avoid the dangerous Thwomp Trap, you'll need to outsmart both Boo Diddlys. Be sure to give both ghosts a look as you wait for Thwomp to reset, or one of them will get you. Watch your back and don't let Boo sneak up on you!
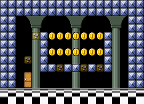
- 3: An easy 1-Up is what awaits you if you take this door. Hit the ? Block so the 1-Up falls to the right.
- 4: Take this door to BOOM-BOOM. If you're in a hurry to get through the Fortress, head for this door and climb up the steps to the left to go straight to BOOM-BOOM's room.
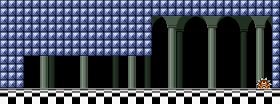
- 5: Enter the very last door to gain access to a coin vault (shown right). Jump above the door where you come out to reveal an invisible block that will allow you to hop up and a little to the right to get to another block right next to the wall. this will let you get into the area containing the coins. Simply leap out once you've grabbed the loot.
Back side
- 6: Falling from a door into the flooded basement isn't so bad—going back and forth between the Front and Back of this stage will reset the ? Blocks in the Back Stage, you so can collect them again. The power-ups in the bowels of the fortress will make bringing down BOOM-BOOM much easier.
Boss room
- B: You'll face an extra aggressive BOOM-BOOM at the end of this fortress. This BOOM-BOOM can fly! You'd better stomp this guy three times as fast as you can, otherwise he'll sprout wings and fly about the room. Then he's really tough to defeat.
