Getting to the Wrecked Ship[edit]
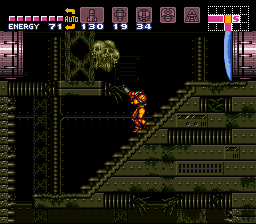
Starting from Samus' ship in Crateria, keep heading right until you get to an orange door. Go through, and you'll see grapple points, with a ![]() Missile Tank on a pedestal underneath, with water below all that. Again, the water will slow you down so try not to fall when grappling. Drop to the Missile Tank pedestal, but make sure you notice the second part of the grapple points. The ones that appear to have cracks will crumble and reappear after some time, so grapple quickly when on them. You should have enough time to swing back-and-forth once or twice, then forward where you can jump to where you need to go before it crumbles.
Missile Tank on a pedestal underneath, with water below all that. Again, the water will slow you down so try not to fall when grappling. Drop to the Missile Tank pedestal, but make sure you notice the second part of the grapple points. The ones that appear to have cracks will crumble and reappear after some time, so grapple quickly when on them. You should have enough time to swing back-and-forth once or twice, then forward where you can jump to where you need to go before it crumbles.
Through the next door, you'll be outside again, with water nearby. Hop into the water, then head to the bottom left, below the submerged scaffold. Shoot to reveal a path, then jump and morphball to enter, and head left to get a ![]() Missile Tank. Return to the surface.
Missile Tank. Return to the surface.

Keep heading right with the grapple points over water, but after the second there are no more points. Instead, grapple onto the Gripper flying to-and-fro. It'll remain in place upon the beam hitting it, where you can continue right to a green door, which signals the entrance to the Wrecked Ship.
Starting the Wrecked Ship: No Power[edit]

The Wrecked Ship is currently lacking power, and you must find a way to restore it to explore the whole thing. Go right past the entrance room to reach the main shaft. Across from here is a Save Station, but it is currently inoperable. As you are exploring the powerless ship, you may come across ghostlike Coven enemies which come into existence near you. As they're appearing, they won't damage you, so don't worry about going too fast and hitting them. Once they appear, you can ignore them if they're not in right front of you, or shoot them. To continue, head down, ignoring the first locked door.
On the left platform, bomb the wall to get to a passage where you can find a ![]() Missile Tank through the path. There are spikes in this passage, but because of the lack of power they won't hurt you, even if you touch them. Now head to the bottom of the main shaft. If you aim down, you can shoot away some of the pipes, allowing you to reach a green door in ball form. Enemies called Atomics are encased in glass domes. Ignore or kill them, but take the door on the floor.
Missile Tank through the path. There are spikes in this passage, but because of the lack of power they won't hurt you, even if you touch them. Now head to the bottom of the main shaft. If you aim down, you can shoot away some of the pipes, allowing you to reach a green door in ball form. Enemies called Atomics are encased in glass domes. Ignore or kill them, but take the door on the floor.
In this room, head right, bombing the obstruction in the tunnel. Another Gadora eye door blocks the boss room to Phantoon. A single Super Missile will get rid of it quickly.
Fight with Phantoon[edit]

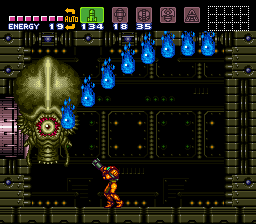
When you enter, you will see a circle of blue flames, which cause damage should you touch them. After a while, the flames will merge and the boss Phantoon will appear. He will start out in a transparent state, flying around left and right and dropping blue flame “tears” from his closed eye. Be ready to dodge the tears, as they bounce on the ground, but can also be shot, possibly awarding pickups. The tears can only be shot after their first bounce, though.
Eventually, Phantoon will disappear, then reappear in solid form with its eye open and throw flames in a circular pattern from the eye around the room. The first time its eye opens, it may disappear again quickly, with flames dropping in random spots afterwards. After that, it'll drop eight flames from the ceiling upon appearing again, which will not bouce. Some will drop on one side, then after the rest will drop from the other, so watch out for which side they fall on first, though it is also possible the entire line will fall in sequence. At this point, Phantoon's eye will remain open for some time, so try to get a hit in now. To do damage, shoot the eye with a Missile, Super Missile, or charged shot. After hitting Phantoon with a Missile or a charged shot, he will begin to swoop around the room for a bit (until you have done enough damage, he disappears again, or you hit him with a Super Missile) so take this time to so some damage to him. Super Missiles will cause Phantoon to "enrage", however, by shooting multiple circles of flames around the room about eight times, which is hard to avoid. To not take damage from this, just make sure to charge the normal beam immediately after hitting with a Super Missile, then flip jump to activate the psuedo-Screw Attack, allowing you to not be damaged by the flames. The flames won't even break your jump, so you can just keep the charge going.
Phantoon is one of the enemies in the game that takes double damage from Super Missiles (but they make him angry). It will only take 5 Super Missiles to defeat him but 25 regular Missiles. If possible, try and hit Phantoon with a charged shot or missiles before the Super Missile so that you can eliminate the number of times he is "enraged." This pattern repeats, so remember to be on the lookout for moments when the boss' eye is open. Upon Phantoon's defeat, power is restored to the ship. So, head back left.
Wrecked Ship After Phantoon[edit]
You may see loose wiring with green sparks, so be sure not to touch it. Anyways, keep going left, and the cylindrical Work Robots are now awake. They do no damage if touched, but shoot a slow ring of energy. They cannot be destroyed, but can be pushed back with normal hits. Also, the previously trapped Atomics are now free and floating around, and can be taken out with normal shots or Missiles.
All the way to the left of the corridor where you faced Phantoon is the Map room. Enter there to download the area's full map. Then return up to the main shaft.
The first door on the left is unlocked, so go inside for a ![]() Super Missile Tank.
Super Missile Tank.

In the main shaft again, bomb across this door for a secret area. In here flying enemies called Bulls are found. They'll try to fly into you, so use Missiles or charged hits to take it out fast. Dash on the conveyor belt, and jump on the platform with the robot, making sure to time it so you don't get hit by the spikes on either side. Repeat this for the next platform, then bomb jump and leave a bomb next to the wall to reveal an area which you can get to by bomb jumping again. Inside is a ![]() Super Missile Tank. Head to the main shaft again.
Super Missile Tank. Head to the main shaft again.
Keep going up, past the next door, and you can save across from the entrance. Go to the top, where there are more pipes on the ceiling which can be shot away. From here, keep going up, through the door in the ceiling.
Here, the doors are locked until the Atomics and Kihunters are destroyed. The Kihunters in this room are slightly more powerful than they were before. If there are green sparks above, it is possible for smaller sparks to fall from the ceiling, so be careful of that. Once the enemies are all gone, take the flashing right door.

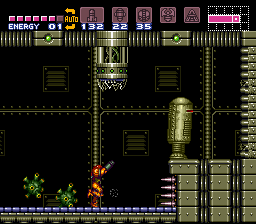
The conveyor belts move quickly in this room, so dash on them and jump over the spike pit. Keep shooting the robots while moving right until they fall into the spike pits, so you can make a safe passage to a ![]() Missile Tank.
Missile Tank.
Again head to the left room, killing the enemies. This time, take the left flashing door.
Back Outside[edit]
You're outdoors again, in an upper part of Crateria. A Tripper can be found left of the grassy floating platforms. Jump atop it, waiting until another one comes into view above it. A third is above this one, and you can shoot the wall left of its path to reveal a ![]() Missile Tank, which you can get to with a flip jump.
Missile Tank, which you can get to with a flip jump.

Now go bottom left, where the X-Ray Scope reveals a spot that can be Super Missiled to enter the tunnel system. As soon as you land here, bomb the left side to get to a ![]() Missile Tank. You'll need to destroy the bombed segment and jump then morphball to escape, otherwise if you fall you'll have to enter the Wrecked Ship again. Super Missile the top again and get out.
Missile Tank. You'll need to destroy the bombed segment and jump then morphball to escape, otherwise if you fall you'll have to enter the Wrecked Ship again. Super Missile the top again and get out.

Now head a bit right, and the X-Ray Scope will reveal another segment into the tunnels that can be shot. Take the right tunnel path through the door.
Wavers are here, as well as a new enemy: Chutes. These enemies will hop straight up, then slowly descend while moving left and right back to their starting point. The Grappling Beam is a quick and cost-effective way of getting rid of both enemy types. Take the next two doors right to get back inside.
To the Gravity Suit[edit]

Grapple points must be utilized above to head right, over the spikes. The points become more difficult as they lessen in number, and the last set will crumble. At the end is a standing Chozo Statue with no items. Turn into a ball on its hand, and it'll awaken. Then, it'll walk harmlessly into the spikes, and drop you in a hidden area.
Once the Statue lets go of you, bomb the floor and take the right tunnel. The pipes in the way up and right can be shot, where you'll find more robots which must be shot into the spike pits. Continue right to get a ![]() Missile Tank. Use a Power Bomb here to get rid of the statue and wall behind it. Ahead is a conveyor belt, and you must run across it to Speed Boost, where you can Shinespark up the right small path in the ceiling. You may want to start your run to the left of the trapped robots.
Missile Tank. Use a Power Bomb here to get rid of the statue and wall behind it. Ahead is a conveyor belt, and you must run across it to Speed Boost, where you can Shinespark up the right small path in the ceiling. You may want to start your run to the left of the trapped robots.
At the top, the X-Ray Scope will show that the first flashing green bar is actually a pit. So, jump over it to get to a ![]() Reserve Tank. Now fall down the pit, and continue left through the door.
Reserve Tank. Now fall down the pit, and continue left through the door.
Shoot the ball in the middle and collect its contents to get the next suit upgrade: the ![]() Gravity Suit. Aside from the purple color change, this suit allows for freedom of movement underwater, allowing new areas to be reached. Also, you will take 75% less damage from enemies.
Gravity Suit. Aside from the purple color change, this suit allows for freedom of movement underwater, allowing new areas to be reached. Also, you will take 75% less damage from enemies.
After Getting the Gravity Suit[edit]
Head out left, feeling free to jump off the cliff. If you fall in the water, that is fine, since you'll get to test out the maneuverability granted by the Gravity Suit. You should easily be able to jump back to the platforms, and you may notice that you are back at the outside entrance to the Wrecked Ship.
The next area is Maridia, and you'll have to go through Brinstar to get there. First, there is an Energy Tank to get in the Wrecked Ship, so head right and back in.
Return to the main shaft, then go through the second door on the right on the way down, under the Save Station. Watch out for the Bull, then jump out of the water to the right, through the door.
You can safely stand on the top part of the dropping spiked platforms, so wait until they are down to do so. As they're rising when you're on them, if they get too close to the spikes above, just morph into a ball to avoid getting hurt. Time your jumps on these platforms, until you gain safe passage to the next room.
Head up, destroying the pipes in the way and passing over the door on the right. Instead, shoot the central pipes in the ceiling to continue up to a red door to take.

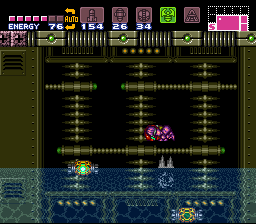
The water-filled part of the room here has spikes at the bottom, and Skultera fish enemies swimming around. Get the Grappling Beam ready, because you need to use it at the end. You have to jump on the yellow platforms, which fall as long as you're standing on them. You can jump before they get too far down, so let them drop a bit before jumping. At the end, you'll find a set of crumbling grapple points, so use them to get to a Chozo Statue holding an ![]() Energy Tank.
Energy Tank.
Now, return to Crateria. You can save and refill everything at Samus' ship, then you need to head through Brinstar to get to Maridia. The direction you go in is dependent on whether or not you want optional items. Either way, continue to the next section.
Your journey continues in Maridia.