Super Smash Bros. Melee/Regular Matches
There are three Regular Matches in 1-P Mode, two of which are available from the start. You begin with Classic and Adventure Modes, and open All-Star Mode after unlocking all 25 characters. A large amount of unlockable content can be obtained from completing these with multiple characters and on higher difficulty settings.
- Difficulty
Each mode features five levels of difficulty: Very Easy, Easy, Medium, Hard and Very Hard. As the difficulty setting increases, so does the opponents' intelligence and handicap. Friendly CPUs also decrease in strength as the difficulty goes up. In Classic and Adventure Modes, your player's stock is also adjustable between one to five lives. All-Star Mode is automatically set to one stock.
- Continuing
If you run out of lives, you can continue where you left off if you have enough coins to purchase a continue. If you do, just select "Continue" from the menu selection. The higher the difficulty setting, the more continues cost, ranging from one to ten coins. Continuing will halve your score, take coins away and give you a point penalty at the end of the game. Not continuing, selecting no, or not having enough coins results in a game over.
Each playable character has three trophies which are unlocked by beating each Regular Match with that character. Along with the trophy, winning brings up a short gameplay movie and screenshot of the character, and then allows you to play a credits minigame where you can shoot the creators' names for fun.
-
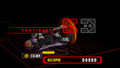
The Continue screen when the player runs out of lives while having enough coins to pay for a continue.
-
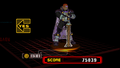
If yes is selected the trophy stands back up. The score and coins will be reduced as a penalty.
-
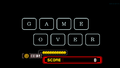
Game Over if no is selected or if the player does not have enough coins.


Classic Mode
Classic Mode is based off of the 1P mode from the original Super Smash Bros. and once again accumulates to a battle against Master Hand. Unlike in the original Super Smash Bros.' 1-P mode, which pitted you against a pre-scripted list of opponents, your opponents in these rounds are chosen at random and can be anyone you have unlocked.
Note that CPU difficulty slightly increases as the Classic Mode progresses towards the end, but the overall challenge is largely dependent on your difficulty setting.
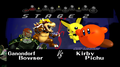
- Stage 1: you versus a single opponent, generally the easiest of the battles.
- Stage 2: you and a CPU helper versus a two opponent team, who usually share a common theme, (i.e. Mario, Yoshi). Through the different difficulties, your helper becomes increasingly useless while the team becomes increasingly stronger.
- Stage 3 — Bonus Stage: Break the Targets: try to break eight targets in a character-specific obstacle course in under two minutes, no penalty for failing.
- Stage 4: you versus a single opponent. This is similar to Stage 1, but sometimes a little tougher.
- Stage 5: you and two CPU helpers versus a single giant opponent. On Very Easy, Easy, and Normal, you can let the helpers do all the work. However, on Hard, they actually need your help. On Very Hard, they're KO'ed almost instantly so you have to fight the giant. On very easy you can KO the giant in under 30 seconds. It's also possible that the enemy will just fall off the edge by accident.
- Stage 6 — Bonus Stage: Snag Trophies!: try to hit three falling trophies into pink rings.
- Stage 7: you versus a single opponent, the hardest of the three. On Hard and Very Hard, your opponent's behavior is mostly defensive. He'll stay in one place, but attack viciously when you come near and move to the other side of the screen. These are the most frustrating because they eat up a lot of time.
- Stage 8: you versus a ten-man group of a single character, who are weaker than the average fighter (except on Very Hard), on higher difficulties, this is where any loss of lives occurs.
- Stage 9 — Bonus Stage: Race to the Finish: race through an obstacle course for coins, the time limit varies depending on the speed of the character.
- Stage 10: you versus a single metal opponent. On Very Easy it flies far, but on harder difficulties this can be the most frustrating of your battles. Metal DK, Bowser & Ganondorf may resist until 330%, 300%, or 400%, but with a throw at the edge they will fall.
- Stage 11: you versus Master Hand, and under certain conditions, Crazy Hand in Normal or Above.
-
Match #1: Player vs. CPU
-
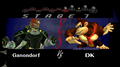
Match #2: Player and assistant vs. 2 CPUs
-
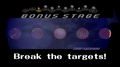
Match #3: Bonus - Target Test
-
Match #4: Player vs. CPU
-
Match #5: Player and 2 assistants vs. Giant CPU
-

Match #6: Bonus - Trophy Snag
-
Match #7: Player vs. CPU
-
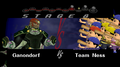
Match #8: Player vs. Team CPU
-
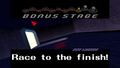
Match #9: Bonus - Race to the finish
-
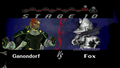
Match #10: Player vs. Metal CPU
-
Match #11: Player vs. Master Hand and Crazy Hand


Along with his attacks getting stronger, Master Hand's HP gets higher when difficulty is raised. He has 150 HP on Very Easy, 250 HP on Easy, 300 HP on Normal, 330 HP on Hard, and 360 HP on Very Hard. To battle Crazy Hand, you must reach Master Hand on a difficulty of Medium or higher in under fifteen minutes without using continues. Crazy Hand will appear and join the fight once Master Hand's HP is halved. Ironically, Master Hand (without Crazy Hand) is the toughest opponent of Very Easy while the easiest opponent of Very Hard. His difficulty increase is only in the strength of his attacks starting from Normal and up. On Very Easy and Easy, his attacks are equally weak, with the main difference being the HP increase. On Normal, his attacks start to become stronger along with an HP increase. On Hard, his attacks become much stronger along with a slight HP increase, two hits can KO you. On Very Hard, he is so strong that one hit will likely KO you unless you're very lucky.
Rewards
If you complete Classic with any character, you unlock the character's normal trophy. The character's trophy depicts the character from their appearance in one of their main series games focusing with their own universe. Zelda and Sheik's normal trophies are unlocked simultaneously. Completing Classic with all 25 characters (not including Sheik) and unlocking normal trophies for all characters unlocks the Donkey Kong Junior trophy.
Adventure Mode
Adventure Mode (which is like the enhanced successor to 1P Game from Smash 64) has you fighting through multiple stages based off of the various video games heavily featured in the game. Along with regular rounds against CPU fighters, several rounds have you running through a large side scrolling environment filled with other hazards. It doesn't feature nearly as much randomization as Classic Mode, and the adventure is identical for each character.
Increasing the difficulty level not only makes your regular opponents stronger and smarter, but also increases the danger of small enemies such as Goombas and Koopa Troopas. On easy difficulty levels their damage is so small that unless you are extremely weakened they are nothing more than a nuisance, but towards hard they can cause severe damage and KO you quickly.
Adventure in Melee can be seen as the enhanced successor to 1P Game from Smash 64 (which did not return proper for Melee). However, order isn't quite the same. But it features many opponent characters returning from and found from 1P Game in Smash 64; including the Yoshi Team, Giant DK, the Kirby Team, and Metal Mario.
Stage 1: Mushroom Kingdom
Part 1: Side scrolling adventure; versus team of ten Yoshis
The stage begins in a special side scrolling stage of Mushroom Kingdom, with Princess Peach's Castle and various Mario Golf courses in the background. The path starts from a warp pipe and continues rightwards along a straight road inhabited by Goombas and Koopa Troopas. Goombas can simply be defeated with an attack or by being stomped on from above. Doing so to Koopa Troopas however cause them to retreat into their shells, upon which they can be kicked around into other enemies or carried around, although you should be careful as they can come back out after a while. Take care not to get hit by the enemies, as they cause damage and can send you flying off the screen and to your death. The path at the beginning isn't too tricky, just littered with small ledges to jump over and plenty of brick blocks, which can be destroyed with attacks but contain no items.
After a warp pipe on a hill, the stage becomes more hazardous, taking place over a pond with a bridge, some small islands, and several small floating platforms. Koopa Paratroopas join the fray along with the other two classic Mario enemies, so you must be extra careful when crossing this section. Jumping on or attacking a Paratroopa will cause it to change back into a normal Koopa Troopa. This segment concludes with a tall ledge with platforms sticking out, and climbing to the top will begin the battle against a team of multicolored Yoshis.
The Yoshi battle takes place on a small circular ledge with two elevated platforms. A group of ten very weak Yoshis attack three at a time. The screen won't scroll onward until all the Yoshis are defeated, so falling off either side will result in death. A Toad flails around helplessly in the background.
The final segment has you crossing a long horizontal pipe across a chasm with a few enemies and blocks before reaching a ledge with another flailing Toad and the checkered finish line. Touch the finish line to end the round and move on. It is noteworthy that at some random location in the stage there was a trophy lying around to be grabbed, as fell as a few more hidden inside some enemies that are dropped once the enemies are killed.
- Very Easy: 1
- Easy: 1
- Normal: 2
- Hard: 5
- Very Hard: 7
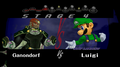
Part 2: Versus Mario & Peach; and under certain circumstances, versus Luigi & Peach
This part is simply a battle of you versus a team of Mario and Peach on the Princess Peach's Castle stage. An exploitable CPU quirk occurs whenever a giant Bullet Bill starts careening towards the castle; the opponents will stop focusing on you to run and hide on the far side of the castle opposite of the Bullet Bill, where they can be carefully attacked at range.
There is a secret battle where Luigi replaces Mario in the beginning of the round. CPU Luigi is typically considered easier to kill than Mario, as he tries to use his Luigi Rocket attack to recover from falling offstage, and can often suicide by using it improperly. However, he is known for using many smash attacks, so he can rack up damage quicker. Defeating Luigi gives you a minute point bonus, and winning the whole Adventure Mode after doing so will unlock him as a playable character. To activate the secret, finish the first part of the Mushroom Kingdom stage with a two in the second digit of the seconds counter (XX:X2XX).
- Very Easy: 1
- Easy: 3
- Normal: 5
- Hard: 7
- Very Hard: 9
With Luigi:
- Very Easy: 2
- Easy: 4
- Normal: 6
- Hard: 7
- Very Hard: 8
Stage 2: Kongo Jungle
Part 1: Versus team of two small Donkey Kongs
This stage begins with you battling a team of two small Donkey Kongs in the Kongo Jungle stage. Lighter characters are easier to KO, but harder to hit. They are still large enough to hit easily, and their lighter weight should help to keep them from being too much of a challenge, as they can get knocked away from the playing field with relative ease.
- Very Easy: 1
- Easy: 3
- Normal: 5
- Hard: 7
- Very Hard: 9
Part 2: Versus giant Donkey Kong
After taking down the first two, you face off a large Donkey Kong in the Jungle Japes stage. He may look difficult at first, but his large size actually becomes a handicap to him, as it is easy for his large hitbox to come in contact with either the rushing water or a Klaptrap that jumps out of it. He won't fly far from your attacks, but knocking him downwards off a ledge often will give you an easy KO.
- Very Easy: 3
- Easy: 4
- Normal: 6
- Hard: 7
- Very Hard: 8
Stage 3: Underground Maze
Part 1: Side scrolling adventure; versus Link x 5 (optional)
This Legend of Zelda themed stage has you exploring the dark catacombs of a dungeon overrun with ReDeads, Octoroks and Like Likes. Hidden within the dungeon are six special battlefield platforms, five of which hold the Master Sword. Landing near the center of these platforms will activate a battle against Link, and you cannot move on until he is defeated. However if you choose a high jumping character you can jump over to the other side and skip it. The sixth platform, which is chosen randomly, holds the Triforce. Finding and stepping on it finishes the stage. The Link battles can be completely avoided by noticing the Master Sword and jumping across the platforms without contact near the center, but engaging and defeating all five Links before winning will reward you with a 30,000 point bonus.
The dungeon itself consists of a large central chamber with various tunnels branching out. To the left a torture room and volcano guard two battlefields, and to the right lies a winding maze of caverns hiding the other four. ReDeads will try to grab onto you, causing damage but not threatening your stock. Octoroks like to sit up high and shoot small projectiles at you, which can send you flying to your death if you are damaged enough. Like Likes will swallow you and then violently spit you out. All three can be defeated by standard attacks or carried around with the grab button. However, they (especially the Re-Deads), can deal high damage, which a Link in the next room could take advantage of for a KO.
- Very Easy: 1
- Easy: 3
- Normal: 4
- Hard: 8
- Very Hard: 10
Part 2: Versus Zelda/Sheik
A simple battle against Princess Zelda and her alter ego Sheik in the Hyrule Temple stage. There are no big surprises here, so just keep attacking until she is weak enough to send flying away. Although Sheik has medium weight, Princess Zelda is light and usually doesn't take much damage to send flying, especially on easier difficulty levels. Remember to seek shelter in the lower portion of the stage if your damage gets too high.
- Very Easy: 1
- Easy: 2
- Normal: 3
- Hard: 6
- Very Hard: 8
Brinstar WARNING
Brinstar: Fight Samus. This is a basic fight with no gimmicks. It shouldn't be too hard except in higher difficulties. CPU Samus likes to hide out on the top platform. Take advantage of that by hiding underneath and continually attacking her. Eventually she'll be weak enough to KO.
- Very Easy: 1
- Easy: 3
- Normal: 4
- Hard: 8
- Very Hard: 10
Escape: Escape Brinstar in 40 seconds. Only take time to grab the trophy if you're making good time. You might get the "Lucky Sevens" bonus here. Don't worry if time runs out, you just lose a life and progress (unless, of course, that was your last life.).
All difficulties: 4
Green Greens Kirby Hat
Kirby: This is a regular battle against Kirby. He isn't very hard. CPU Kirby tends to suicide a lot by turning into a stone over the breakable blocks. Take advantage of this.
- Very Easy: 1
- Easy: 2
- Normal: 3
- Hard: 5
- Very Hard: 8
Kirby Team: Each Kirby has a unique copied ability. They are much weaker than the first Kirby, but stay alert because the damage adds up! Again, take advantage of Kirby's tendency to suicide.
- Very Easy: 1
- Easy: 1
- Normal: 3
- Hard: 7
- Very Hard: 10
Giant Kirby (Beat Kirby Team within one minute): Giant Kirby fights like regular Kirby. Beat him the same way. One difference is that this Kirby is less likely to suicide, so you can't use that trick here. One advantage is that he moves a lot slower.
- Very Easy: 2
- Easy: 5
- Normal: 7
- Hard: 9
- Very Hard: 10
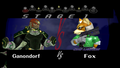
Corneria Race
Fox 1: This battle is a regular battle against Fox at Corneria, except that there are no Arwings. Fox is fast, but he can't take much punishment, so try to stay on the offensive for this one. Fox fights defensively here, meaning he'll run away from you but attack if you come close. If you have Falco as a playable character, then you may fight either of the two in the second battle.
- Very Easy: 1
- Easy: 2
- Normal: 4
- Hard: 6
- Very Hard: 9
Fox 2: In this battle, there are Arwings to help Fox/Falco win. This battle is usually easier than the first one because Fox/Falco can be KO'ed by the Arwings. Staying away from the lasers or reflecting them is more important than defending yourself from Fox/Falco in this battle. Otherwise, this is almost the same as the first fight, except Fox/Falco is slightly lighter than in the first fight.
- Very Easy: 1
- Easy: 2
- Normal: 4
- Hard: 8
- Very Hard: 10
Pokémon Stadium Battle
This is a very difficult battle because you have to KO twelve Pokémon with no breaks in between. You fight mostly Pikachu, though if they're unlocked, a minority of Pichu and Jigglypuff could appear as well. Many Poké Balls appear, however, and if you can get to them before your foes, the prizes inside should help you a great deal. However, on Very Easy this should be as easy as the Team Yoshi and Team Kirby battles, but on Very Hard, many of you will need a continue here. It's possible that you will be KO'ed not by the Pokémon themselves, but the Pokémon that emerge from their Poké Balls. Mario or Dr. Mario is one possibility, since their super Jump Punch sends them flying, even on the highest difficulties. Link's clearout also works great.
- Very Easy: 1
- Easy: 3
- Normal: 6
- Hard: 8
- Very Hard: 10
F-ZERO Grand Prix Race
F-Zero Grand Prix: Avoid the cars and jump over all the ditches without getting hit. Land on every third or so platform. A few places are safe for some characters to crouch. A car deals 35% and big knockback. It's possible you'll survive a hit once, but any future impacts are a near guaranteed KO. Yoshi's Egg Roll and Jigglypuff's Rollout can be used to travel long distances here.
All difficulties: 5
Mute City: Fight Captain Falcon, just don't leave yourself open and you should be fine. What makes him a pain is that he's very fast and a heavyweight at the same time. Luckily his attacks are slow enough that you can sneak behind and attack him. Watch out for his Falcon Punch, that can KO you at 0% damage!
Note: On Very Hard, Falcon uses his Blood Falcon costume.
- Very Easy: 2
- Easy: 4
- Normal: 6
- Hard: 8
- Very Hard: 10
Onett Battle
Fight three Nesses. On the easier difficulties they fly far and are weak and rarely attack until a Mr. Saturn appears, but on the harder difficulties it feels more like a standard 3 on 1 battle, and they attack until a Mr. Saturn appears. Use a character with an area of effect technique, such as Link or Zelda. Try to knock the Nesses towards one of the sides, even if that doesn't KO them, there's a chance that an oncoming car might. Also, try to lure them towards the bottom to leave them vulnerable to passing cars.
- Very Easy: 1
- Easy: 2
- Normal: 5
- Hard: 8
- Very Hard: 10
Icicle Mountain Adventure
Play through the Icicle Mountain stage and then fight two teams of Ice Climbers. Watch out for the Topis and Polar Bears though. You can grab a Freezie in the stage, and use it on the Ice Climbers. Characters can force the stage upwards a bit by jumping up. Players can use this to set up the terrain for the Ice Climbers battle.
- Very Easy: 1
- Easy: 3
- Normal: 4
- Hard: 6
- Very Hard: 8
Battlefield Metal
Giant Wire Frames: These wire frames are huge, but they fly very far when you hit them, and their attacks aren't that powerful. The low gravity makes this battle even easier. A nice break from the tough battles you've faced before. They're even easier than the Yoshi team you face early on. Their attacks do little damage and they can't send you flying very easily. You're likely to survive without a single KO here, even on Very Hard, unless you self destruct. These are the game's "cupcake opponents".
- Very Easy: 1
- Easy: 1
- Normal: 1
- Hard: 3
- Very Hard: 7
Metal Mario Bros: Metal Mario appears in this battle, and so does Metal Luigi if Luigi has been unlocked. Although they can take a great deal of damage, they are slow, and they fall very quickly if you knock them off. Peach is by far the best character for this segment, as she can stay at the starting point, wait for the metal characters to come down, downsmash repeatedly to deal 130%+ damage easily, and then KO with her forward throw. Aside from Peach, characters with long-ranged moves are also good choices, as they can edge guard the metal characters relatively well because neither one of them, especially Luigi, can get back on stage effectively. If you beat both, you earn the Metal Bros KO bonus.
- Very Easy: 1
- Easy: 2
- Normal: 4
- Hard: 8
- Very Hard: 10
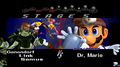
Final Destination Bowser
Bowser: In this level, you must KO a slightly-larger-than-normal Bowser. He has a little more endurance and power than the regular version, but his speed hasn't improved at all. Use the same tactics that you use against the regular Bowser. On Normal or higher, he will have a black shell. But it doesn't guarantee you make it to the bonus stage.
- Very Easy: 1
- Easy: 3
- Normal: 4
- Hard: 7
- Very Hard: 10
Giga Bowser (special conditions): To get to Giga Bowser, you must complete Adventure on Normal, Hard, or Very Hard, in 18 minutes or less, with no continues. Giga Bowser, the gargantuan and powered up version of Bowser, has more endurance and can deal more pain than the one you just sent flying. Due to his tremendous size, he's also immune to grabs, Kirby's inhale, and Yoshi's egg lay.
Unless you have Jigglypuff or Luigi, be prepared for a very difficult battle. However, on Normal, Giga Bowser isn't that tough and should be easy to dispose of. Swordsmen have a lot of luck here, however, especially Link. Be careful, because even on Normal mode it's very possible to lose a life. His weight requires near 200% to even get a gimping chance, and near 300% for a legit KO opportunity. If you defeat him, you unlock the Giga Bowser trophy.
- Normal: 6
- Hard: 8
- Very Hard: 10+
Rewards
Completing Adventure with any character, you unlock the character's Smash Red trophy. Zelda and Sheik's Smash Red trophies are unlocked simultaneously. Completing Adventure with all 25 characters (excluding Sheik) and unlocking Smash Red trophies for all 25 characters unlocks the F-Zero Racers trophy.
All-Star Mode

All-Star Mode is a game were you, with only one stock, must survive fighting all twenty-five characters in the game in consecutive rounds, with damage carrying over between rounds. Unlike in regular 1 player modes (Classic and Adventure), there are no recovery items so damage does not restart to 0% after a stage is over. At the All Star Rest Area, you only get a limited number of recovery items. Between rounds you are given the option to use one of three special Heart Containers that recover all damage, instead of only 100% damage. There is also a painfully steep difficulty curve between each difficulty. Normal in All-Star is actually harder than Very Hard in Classic Mode, even though Very Easy in All-Star and Classic are similar difficulties.
The game opens in a one-on-one fight against a randomly chosen character, and once you win you are taken to an intermittent area where you can see your next challenger, as well as a list of the upcoming opponents in the top-left corner of the screen and the trophies of the defeated in the background. Before moving on to the next fight you can choose to grab a heart, and sometimes a random trophy appears for you to grab. There is strategy involved here concerning how much damage you should take before using one of the healing items, and you should learn your own limits and the strength of your opponents, as CPUs are better controlling certain characters than others.
The first four stages are one-on-one fights against random characters. This is followed by you fighting two random characters at once in four two-on-one fights. After this you must face off against three random characters at a time in four three-on-one battles. Once all these battles are over, you always face off in a final stage (Stage 13) against a large group of twenty-five weak Mr. Game & Watches in Flat Zone. In the one-on-one fights, the stage will be that of your opponent. In the two-on-one fights, in the intermittent area, you see the characters you face on tv-screen-like pictures and the stage will be that of the character on the left. In the three-on-one matches, the stage will be that of the character in the middle. Each character's stage follows:
- Link: Great Bay
- Yoshi: Yoshi's Story
- Fox: Corneria
- Mario: Rainbow Cruise
- Pikachu: Pokémon Stadium
- DK: Kongo Jungle (Melee Version)
- Kirby: Green Greens
- Samus: Brinstar
- C. Falcon: Mute City
- Ness: Onett
- Zelda: Temple
- Peach: Princess Peach's Castle
- Bowser: Yoshi's Island (Melee Version)
- Ice Climbers: Icicle Mountain
- Jigglypuff: Poke Floats
- Luigi: Mushroom Kingdom
- Dr. Mario: Subcon (Mushroom Kingdom 2)
- Falco: Venom
- Marth: Fountain of Dreams
- Roy: Final Destination
- Ganondorf: Brinstar Depths
- Young Link: Jungle Japes
- Pichu: Fourside
- Mewtwo: Battlefield
- Mr. Game and Watch, Flat Zone
Difficulty
One-on-One Battle Difficulty:
- Very Easy: 1
- Easy: 1
- Normal: 1
- Hard: 5
- Very Hard: 9
Two-on-One Battle Difficulty:
- Very Easy: 1
- Easy: 3
- Normal: 7
- Hard: 9
- Very Hard: 10
Three-on-One Battle Difficulty:
- Very Easy: 1
- Easy: 5
- Normal: 10
- Hard: 10+
- Very Hard: 10+
Mr. Game And Watch 25-on-1 Battle Difficulty:
- Very Easy: 1
- Easy: 2
- Normal: 5
- Hard: 8
- Very Hard: 10+
Overall:
- Very Easy: 1
- Easy: 3
- Normal: 10
- Hard: 10+
- Very Hard: Out of this world
Rewards
Completing All Star with any character, you unlock the character's Smash Blue trophy. All of the characters's Smash Blue trophies depict the character in an alternate color instead of their default color. The only exception is Mr. Game and Watch who focuses with his default color on his Smash Blue trophy. Zelda and Sheik's Smash Blue trophies are unlocked simultaneously. Completing All Star with all characters (excluding Sheik) and collecting Smash Blue trophies for all 26 characters unlocks the Meowth trophy.