The Log Cabin[edit]
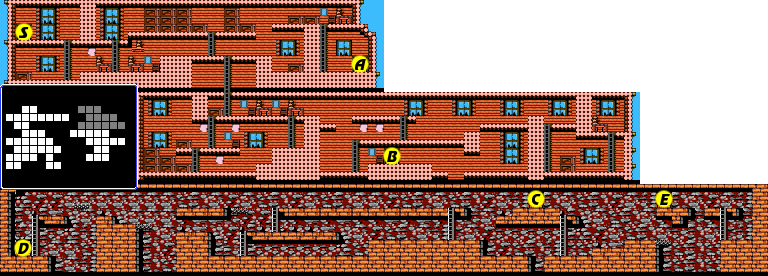
In addition to the house where you began the game, the Fratelli hideout also includes a log cabin hidden deep in the woods. You can only arrive there by utilizing the proper warping points. If you've followed the walkthrough and used the warp from the lava zone, you will arrive in the upper left corner of the back layer of the cabin, through the door marked Door S.
In addition to the usual snakes and spiders, you will be introduced to a slew of new enemies, such as the armored knights and skeletons. These enemies are much tougher, and it you haven't been making regular use of the Molotov Cocktails up to this point, you may wish to start using them now.
For starters, head straight across the top level of the log cabin to the right side, and enter through Door A.
Door A[edit]
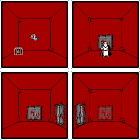
As it turns out, this door too is a warp zone, but you happen to be entering through the opposite side. If you were to follow this warp zone to its origin, you will find yourself at the unreachable door in the Purple Cavern, Door X. But you'll want to remain in the log cabin for a while, so don't actually return to the Purple Cavern. The real reason you came here is to find the hidden item in the upper left room. Punch the back wall, and you will find the last Bomb Box, which will raise your Bomb capacity by 5, for a total of 20 bombs. In order to return to the cabin, you will need to use your glasses in the lower right room to see the door that will take you back.
Once you have the Bomb Box, return to the cabin, and find the ladder in the center which leads to the section below. When you arrive, head to the right until you see Door B. While there is a bit more of the cabin to explore, you won't find anything of interest beyond the door.
Door B[edit]

In this simple one room chamber, you will find a Magic Locator Device which will help you pinpoint the location of the last hidden Goonie. However, you may be puzzled looking at it, and the Goonie appears to be all the way on the opposite side of the hideout. Don't worry, you're in the right place. You will soon find a warp zone that will take you to this far off location. Head down from this room to enter the front layer of the cabin.
Cabin front layer[edit]
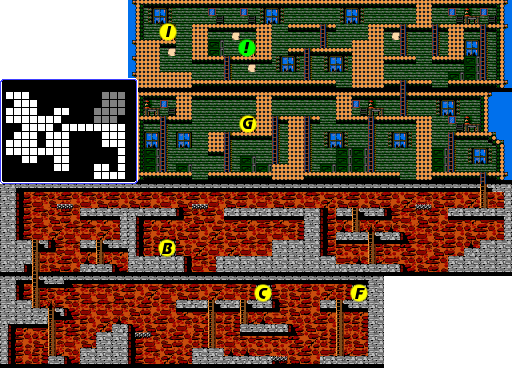
When entering the front layer of the cabin, you will find yourself in a basement level. You actually have a number of options at this point. You can run to the right and investigate doors G and I, or you can head left and visit the lower level of the basement. For the purposes of this walkthrough, we will head left first. Down here you will find doors C and F. If you don't yet have the Speed Shoes, you may wish to investigate door F first. Otherwise, make your way to Door C.
Door C[edit]

This seemingly empty room serves no other purpose than to unite the front layer of the basement with the back layer of the basement. This is the only means of access to that back layer section. Use the glasses and you can arrive through the door marked C on the map at the top of the page.
Two more doors can be accessed down here, doors D and E. Door D is very far away to the left, while Door E is much closer to the right.
Door D[edit]
Enter through the door that you find, and you will arrive at what appears to be an empty room. You'll need to be creative with your usual bag of tricks, and try using the Hammer on the floor. This will create a hole, which you can use your Ladder to access. When you climb down, you will see yet another empty room. This time, try hitting the back wall with your fists, and a Fire Box will appear. This third box will increase your Molotov Cocktail count to 15, and refill your stock, just when you need it most. Use your ladder to climb back up to the previous floor, and back out of the room. Start heading back to the right towards Door C.
Door E[edit]

As interesting as Door D was, Door E… isn't. Try as you might, you won't find anything in this room, whether you use your fists, your Hammer, or your Glasses. This is truly an empty room. Head back out.
If you are low on health, there is an invisible door leading to the final hidden Konami Man location in the game. Just stand on the moving platform and enter the door when it's at the far left.
Return to the front layer through door C. Once you're in the front layer, you can explore Door F if you would like to.
Door F[edit]

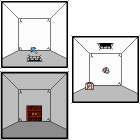
When you enter the room, it appears to be empty. A simple scan of the room with your Glasses will reveal a door in the back wall. Head through it to find another seemingly empty room. This time, you must make use of your Hammer. Tap the back wall, and you'll find a safe. Safes such as these are usually worth checking out. If you open up the safe, the Speed Shoes will appear. However, if you already knew about the secret of the bridge and collected them earlier, this safe will simply be empty.
Whether you acquired new shoes or not, there is nothing left to do but to return to the top section of the basement, and head all the way to the right, where you will find a ladder that will take you up to the front layer of the log cabin proper. You won't have to travel far to the left to find a ladder that will take you up to the second story, but if you continue exploring to the left, you will find Door G.
Door G[edit]
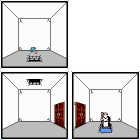
When you enter through Door G, the room will appear empty. It shouldn't take too long for you to discover the hole in the floor which can be revealed by using the Hammer. Use the Ladder to climb down and access the floor below. Head into the room to the right, and the old man standing before the water filled hole will inform you that you've found a warp zone. This is exactly what you need to reach the Goonie in the far off location. So put on your Diving Suit and hop in the water.
More underwater[edit]
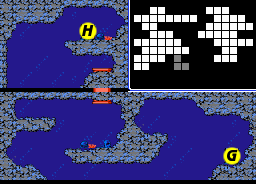
If you thought you were done with the swimming around, you're far from correct. This is another swimming section. The danger here really doesn't come in the form of the fish swimming around (although you do have to watch out for them), but rather from the very low lying rock that forces you to swim close to the bottom of the screen. Make sure you kick rapidly while you're swimming beneath it so that you don't fall too low and lose a life. Swim up the pipe to the small section above and enter Door H
Door H[edit]

According to the Magic Locator Device, this is where the last Goonie must be held. Since it was quite a challenge to get here, this Goonie isn't particularly well hidden. Just enter through the door on the right, and you will find her. Use your key to free her, and you will automatically have eight full health bars, the most bars your health meter can hold.
With the rescue of this final Goonie, there is only one person left in need of rescue: Annie the Mermaid. Return to the water, swim down the pipe and return through door G to the log cabin. Before you leave the cabin, pay a visit to the floor above for two useful discoveries. Door I lies in the far upper left corner of the cabin. However, just before you get there, you will see a small closed off chamber. It just so happens that it contains a little secret that you can read more about below.
Door I[edit]

You've come as far as anyone can in the log cabin, so you must be hoping for something good. If you can find it, the reward is well worth the effort. Head through the doors in the back and you will arrive in an empty room. Do the usual bit of investigating and you should be able to create a hole in the ceiling using your Hammer. Use the Ladder to climb up and explore the room above. Use the glasses and you will find a safe, and you'll definitely want to use a key on this one. This safe contains the ![]() Bullet Proof Vest. Most than just protection against bullets, this important vest will cut down the amount of damage that you take from any attack in half, effectively doubling your life force. Don't pass up the opportunity to collect this valuable item.
Bullet Proof Vest. Most than just protection against bullets, this important vest will cut down the amount of damage that you take from any attack in half, effectively doubling your life force. Don't pass up the opportunity to collect this valuable item.
All six Goonies are now rescued, but the game isn't over yet. You'll need to find the ultimate location where the Fratellis have hidden Annie the Mermaid. In order to start your search for her, you'll need to check an area of the house that you've probably long since forgotten about: the very beginning. The second door that you visited contained a room with an exposed hole in the ceiling. You'll want to return there and use your ladder to check out what lies above. To get back there, you have a couple of options, but neither of them will be quick. You'll need to return to the back layer of the log cabin. From there, you can either retrace your steps to the location where the first Goonie was kidnapped by passing through Door S and the Lava Zone. Or you can take the warp zone behind Door A, return to the Purple Cavern, and brave the trip across the bridge one more time with the hopes of holding on to your boomerang. Either way that you go, make it back to the very beginning of the game to start the trek to the end.
