Area 7 begins with a Blue Lander checkpoint. Open the door to the south, and proceed along the path to the center of the area.
X15 Y18
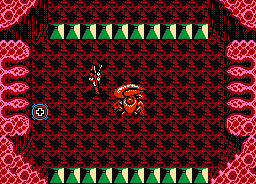
You will notice a biological theme for this portion of the labyrinth. Two darting creatures patrol this room. Shoot them to make item capsules appear, and then head to the room on the right for a mini-boss fight.
X16 Y18
The first mini-boss you encounter in this area is the kind that sticks its head up briefly before dropping back down and leaving creatures in it's place. In this case, this blue variety of mini-boss leaves many creatures in it's place. So many that it will be difficult to remove all of them without letting a few slip away. Don't worry to much about the roaming creatures however, and focus your attacks on the mini-boss. This one will have a lot of health, so you may have to put up with a number of appearances before you can put it down. Your reward for defeating it will be the final Grenade upgrade. Continue heading east when you're done, and follow the path further south.
X17 Y20
Follow the large arrows suggestion and continue walking east.
X18 Y20
The door above you will lead to the entrance to Corridor 17. However, before you visit it, travel one room south, and open the door on the left. It will take you to a Blue Lander checkpoint. Open the bottom door that you find.
X17 Y22
From this room, head west, then south, and then east again.
X17 Y23
From this direction, you will be able to approach the item capsule that is otherwise surrounded by red barrier tiles. Watch out for the blue darting creatures that guard the room, and shoot the item capsule to reveal another pack of Enemy Erasers. From here, return the way you came and go back to the Corridor 17 entrance.
X18 Y19
Naturally, the entrance to Corridor 17 will simply open up for you. Hop in and clear it out. Upon your return, you will receive the final upgrade to your Saber Laser. While it won't change in appearance or length, it will definitely cause a lot more destruction to whatever it touches. The cost for this added damage, however, is higher chip use.
Continuing the biological theme of the labyrinth, it will look as though you are exploring the interior organs of some very large creature. You will be first greeted by a pack of green creatures. These creatures are entirely impervious to almost all of your weapons; they will simply block any firepower you throw at them. However, the Guardian can safely crash into them without harm. In fact, that is the only available method of removing them if you want to save Enemy Erasers. Fly up and clear them away so that you will be able to shoot at the subsequent enemies.
Lobster will start out, along with blue manta rays. Shortly after that, pods will appear on the left side of the screen. These pods produce eyeballs that slowly home in on you. Sometimes a pod will be absent, but the hole it leaves behind will spew bullets in every direction. The pods will stop on the left side and begin on the right side. At this time, both slowly floating mushrooms and the quickly descending mushrooms appear at the top of the screen. If things get hectic, you may wish to consider using a heavy duty weapon like the Fireball, or even an Enemy Eraser, to clear the screen of enemies and give yourself a chance to recover.
Two blue bursting particle balls will appear, followed by more of the green shot-blocking creatures. Crash into them to clear them out of the way, and as the last one appears, green lampreys will appear at the top of the screen. As they do, you will fly over giant eyeballs on the surface below, which produce smaller eyeballs to chase you. Descending mushrooms appear before you fly through a valley with bullet spewing holes on either side. Use the Bullet Shield to protect the Guardian. When you're through, you will arrive at the boss.
The boss of this corridor is a large collection of eyeballs which fire smaller eyeballs at you. They are stationary and their only means of defense is to pummel you with large amounts of flying eyeballs. You can rely on weapons like the Fireball, Repeller, even the Grenade or Saber Laser. At times, more green creatures will come down to block your shots. You can proactively approach them, or just wait for them to reach you and destroy themselves. Either way, keep up a steady stream of fire that will destroy the eyeballs that fly towards you and potentially create item capsules.
Once every eyeball is destroyed, the attack will cease, and you will return to Area 7, where you will obtain an upgrade to your Saber Laser. If you like, you can explore the path to the north, but it leads to a Blue Lander checkpoint along with a shortcut back to Area 6. Since you don't need to go there, you should open the door to the right.
When you exit from Corridor 17, you will arrive here. Two small snake-like enemies occupy the room, and they are far tougher to destroy than they might appear. You can destroy them, but it will take a good amount of fire power. The item capsule in the center of the room provides another Level 3 upgrade opportunity, this time for the Repeller. From this room, you may go north or south, as both directions lead to the same place.
X20 Y19
Follow the large arrow to the east and continue down the path.
X22 Y20
It's time for a fight with another bubble-blowing crab. Use the same strategy as before: lure it to the top of the screen, and shoot at it with your main gun and your favorite special weapon. With the powered up Saber Laser, you may be able to remove it in one appearance. As a reward, you'll receive a defense upgrade, which should put you at defense level 6, one level away from maximum and you will reach that level very soon. When you're done, visit the room to the left to learn the hint on how to open Corridor 7. Then return to this room and continue south.
X22 Y21
Beyond the left door of this room is a shop where you must choose from among three items for the price of 1000 chips. The choices are a Rapid-Fire upgrade, a Heart, and a Wave Attack upgrade. Once again, ignore the heart. You have to decide between the Rapid-Fire upgrade and the Wave Attack. If you've found every Rapid-Fire upgrade to this point, and purchased one from the shop in Area 2, then this Rapid-Fire upgrade will not benefit you at all. A free Wave Attack upgrade is available in Area 9, but you may not wish to wait until then to get it, so if you're willing to part with 1000 chips, you might as well purchase the Wave Attack tile and earn your Level 3 upgrade now. If you decide to get the Wave Attack, this weapon will be the most useful throughout the Corridors due to the green absorbers who will block all special weapons and the Wave Attack will pierce enemies faster than any other weapon at this time. When you're done, leave the shop and continue south to the bottom of the area.
X22 Y23
Right on the heels of earning a defense upgrade by defeating the mini-boss above, you will collect the seventh and final defense upgrade in this room. Take out the four green creatures that appear, and shoot the item capsule. Collect the shield and start following the path to the west.
X20 Y23
From this very crowded room, you are one room away from the entrance to Corridor 7. Open the door and step inside.
X19 Y23
Standing before the gates to Corridor 7, you must execute the steps to open the door. If you visited the room to the left of the crab mini-boss, the hint you received tells you to enter the room over and over until the door opens. What happens is that, every time you leave the room by the warp panels, there's a chance the door will open as you leave. Once that happens, the door will remain open when you return. Since the room to the east is full of enemies, and the room to the north is empty, it's safer to use the north exit to travel in and out of the room. Do so until the gate finally opens. Then hop inside to clear out the corridor. Just as you earned the final upgrade to the Saber Laser for completing Corridor 17, you will earn the final upgrade for the Cutter Laser for completing Corridor 7.
Right from the start, you will be assaulted by blue versions of the small laser firing craft that are particularly dangerous. They will be accompanied by both types of mushrooms. Use a fast weapon like the Wave Attack to try and take them out before they get into a position to fire at you. The mushrooms will stop, but large eyeballs will appear on the surface below. After they pass, the blue laser ships will continue to appear alone for quite some time.
After a break, the green shot blocking creatures will begin to appear at the top. Two pairs of eyeballs will pass below, and then the green lobsters will begin flying overhead, joined by floating mushrooms and the occasional eyeball. The blue laser ships will join the fight again after a short time. Then the stage scroll will slow down, and you will arrive at the boss.
The boss is once again a collection of eyeballs. This time, a few more smaller eyeballs are situated on the outside edges, but other than that, it is identical to the boss of Corridor 17. Use the same strategy, focusing on continuous attacks with the Fire Ball, Wave Attack, Saber Laser, or Grenades to chip away at the large eyeballs' health as well as destroy the smaller eyeballs that fly toward you. All the while, mushrooms and laser ships fly in periodically to join the attack. Keep an eye on your health, and fly up every now and then to collect one of the energy items that are sure to appear near the top.
Once the last eyeball is destroyed, you will return to Area 7. Collect the final upgrade to the Cutter Laser, and then make your way back to Area 0. You are ready to proceed to Area 8, whose entrance can be found at X10 Y15. On your way there, however, you may want to make a stop at X12 Y15 and visit the room beyond the door where you receive the hint about Area 6. If you open the door below, you can visit the next room to receive a hint about Area 8 as well.