According to legend, Ganon sealed his tower on the peak of Death Mountain with the Golden Magic of the Triforce. The only way to break through the seal is to use the magic of the seven Crystals which were scattered throughout the land. The final crystal is hidden in Turtle Rock.
Odds and ends[edit]
The Bomb of Bombs[edit]
After receiving a message in Misery Mire that you can now buy a new sort of Bomb, head for the Bomb Shop below the Pyramid of Power. When you arrive, you will see that they are having a sale. Thirty Bombs for only 100 Rupees! Better yet, the odd-looking shopkeeper has a Super Bomb in stock. This single bomb also costs 100 Rupees — practically a steal. Haul the Super Bomb along with you, looking for a good place to use it. You can still fight, but the Super Bomb will prevent you from dashing since the ![]() button detonates the bomb. Also, make sure not to jump off any ledges, since the bomb will not jump with you.
button detonates the bomb. Also, make sure not to jump off any ledges, since the bomb will not jump with you.
The crack in the Pyramid[edit]
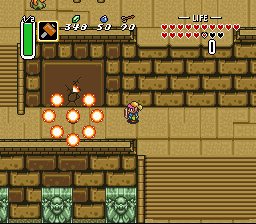
From your earliest explorations of the Dark World, you may have suspected that there was something hidden behind the cracked, dark block on the Pyramid of Power. Neither bombing it, nor dash bashing it will weaken the crack. Nothing will work until you obtain the Super Bomb. Set it on the ground in front of the crack and detonate the device. A tunnel is revealed which will lead you into the Chamber of Wishing.
The Chamber of Wishing[edit]
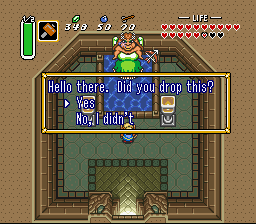
Inside this chamber, you will find a pond. If you toss an item in, you will discover an unfortunate Faerie whose beauty was stolen from her by Ganon. She will reward your honesty just as the Faerie at the Waterfall of Wishing does. If you toss in your Tempered Sword, she will bestow upon you the ![]() Golden Sword, which contains the fourth power level — the highest level attainable. Additionally, you must toss in your Bow and arrows if you wish to obtain the only weapon which is capable of defeating Ganon: the
Golden Sword, which contains the fourth power level — the highest level attainable. Additionally, you must toss in your Bow and arrows if you wish to obtain the only weapon which is capable of defeating Ganon: the ![]() Silver Arrow. It is also helpful to note that much like the previous Wishing Fairy, this fairy will fill any empty bottles with Magic Medicine.
Silver Arrow. It is also helpful to note that much like the previous Wishing Fairy, this fairy will fill any empty bottles with Magic Medicine.
The Western Mountain[edit]
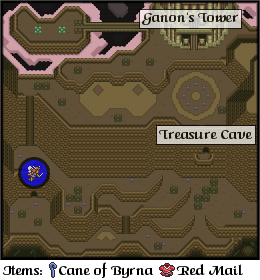
The caves of Death Mountain lead to many mysterious passages. Some adventurers left with valuable treasures and magical items while others were lost forever in the winding passages and bottomless pits. The only way for explorers to enter some caves, which are carved in the side of the mountain, is to position themselves above the cave entrance and take a leap of faith.
Faerie Fountain[edit]
The Faerie at the foot of Death Mountain provides explorers with a last chance to re-energize before they face the dangers of the climb ahead. The services of the Faerie are often used, as the area is prone to damaging rock avalanches.
Treasure Cave[edit]
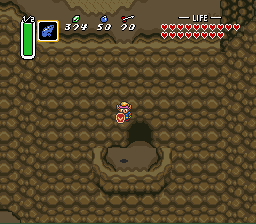
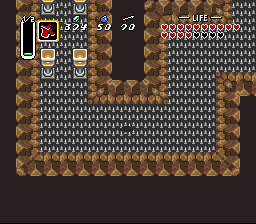
The cave built into the cliff of western Death Mountain is only accessible to those who leap off of the ledge above it. Inside, the floor of the cave is covered with spikes. If adventurers dare to brave this dangerous trap, they will be rewarded with the ![]() Cane of Byrna, an artifact which protects magic users from the spikes. The Cane of Byrna is said to contain powers of protection, but it drains Magic Power according to the length of its use, like the Magic Cape.
Cane of Byrna, an artifact which protects magic users from the spikes. The Cane of Byrna is said to contain powers of protection, but it drains Magic Power according to the length of its use, like the Magic Cape.
The Eastern Mountain[edit]
Item Shop[edit]
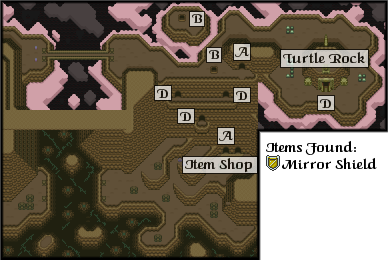
Once again, Red Potions, small Shields, and Bombs are available at this typical Dark World item shop. The prices are said to be the same as in the other shops in Ganon's kingdom.
Mountain Caves[edit]
Between the entrance to the Turtle Rock dungeon and Ganon's Tower is a large airy cave with both visible and invisible paths. Explorers can cross the gaps by using two different methods. If there is an object, such as a Pot, on the other side, they could use the Hookshot to grapple across. If invisible paths are a possibility, explorers can set down blocks with the Cane of Somaria or use Ether Magic in order to detect safe places to walk. If you manage to cross the gaps, you are rewarded by finding Hearts and Faeries. While the A caves allow you to traverse up the mountain, the B cave mysteriously leads to an isolated peak. A trip back to the Light World through the use of the Magic Mirror will lead you to a ![]() Piece of Heart. The D caves are not ordinary cave entrances, but rather routes between the Turtle Rock dungeon itself.
Piece of Heart. The D caves are not ordinary cave entrances, but rather routes between the Turtle Rock dungeon itself.
Reaching Turtle Rock[edit]

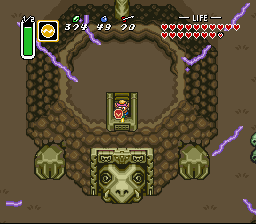
Turtle Rock can not be reached directly from the Dark World. The only way to enter the isolated area of Turtle Rock is through a Warp Tile in the Light World. The mound with three wooden spikes atop Death Mountain in the Light World might be a promising place to explore. Pound the spikes with the hammer, beginning with the bottom right spike and moving in a counter-clockwise direction. A Warp Tile will appear suddenly in the middle of the mound. It will warp you directly to the top of Turtle Rock.
The shell opened[edit]
Once you manage to reach Turtle Rock, only half the battle has been won. Now you have to find a way into the dungeon. The front end of the rock has a stone head and two feet while the back end has a stone tail. Like the Misery Maze, Turtle Rock is closed by a magical seal. Only someone with a particular medallion can conjure up the magic needed to break the seal. It is said that when this magic is used, the head of the turtle will disappear to reveal the entrance to the dungeon. On top is a medallion symbol that looks like the Quake magic symbol. Use the Quake magic on top of the stone symbol and the ensuing earthquake will open the dungeon.
Turtle Rock[edit]
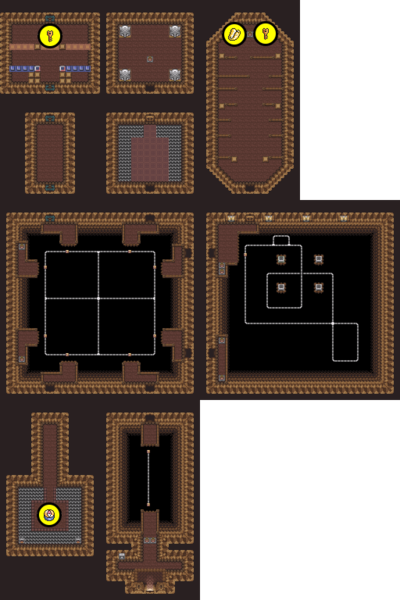
The huge Turtle Rock dungeon was carved deep into the core of the eastern Death Mountain. Its four floors are riddled with puzzling traps and bottomless pits. It is said that only those who possess the Cane of Somaria can float over the wide pits in many of the dungeon's chambers. The Fire Rod and the Ice Rod are also essential equipment for fighting the Trinexx which lurks in the dungeon's lowest level. This dungeon is where Princess Zelda is being held prisoner.
Floor 1[edit]
You begin your tour of the Turtle Rock dungeon at the bottom of the map. After removing two skulls in your way, you will come to a chasm with a question mark and a dashed white line extending from it. This may puzzle you at first, but you possess the item that you need to use to master it: the Cane of Somaria. If you try creating a block on the question mark, you will instead create a platform that you may board and ride across. You will be using this technique to travel throughout the dungeon so don't hesitate to try it out. Board the platform and travel across to the opposite side and enter the room above.
The next room will be a huge wide open space with question mark tracks reaching out to every platform destination. When you create a platform to ride on with your Cane of Somaria, you can direct the block in whatever direction you wish to travel from a question mark. The compass of the dungeon is immediately to your left. It is optional, as always, but let's examine how to collect it to learn an important lesson about this dungeon. Create a platform and travel to the left one stop and exit the door to the south.
From the entrance of this room, simply run south to reach the treasure chest that contains the ![]() Compass. Aside from the fireball traps and the bed of spikes surrounding you, collecting the Compass was relatively painless. Getting out, on the other hand may be more difficult. As you run back to the north to approach the door you came through, the door mysteriously disappears and becomes an eye on the wall that shoots lasers at you. When you turn around to dodge the laser, the door suddenly reappears. You could use your Magic Mirror to get out if you like, but it's not necessary. Instead, face south and charge up your sword. Without letting the power go, walk back to the door, facing south the entire time, and you will be able to safely pass through the door and back to the room above.
Compass. Aside from the fireball traps and the bed of spikes surrounding you, collecting the Compass was relatively painless. Getting out, on the other hand may be more difficult. As you run back to the north to approach the door you came through, the door mysteriously disappears and becomes an eye on the wall that shoots lasers at you. When you turn around to dodge the laser, the door suddenly reappears. You could use your Magic Mirror to get out if you like, but it's not necessary. Instead, face south and charge up your sword. Without letting the power go, walk back to the door, facing south the entire time, and you will be able to safely pass through the door and back to the room above.
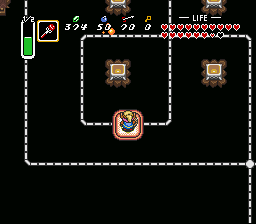
Now you must travel to the top platform along the right side of the wall. Create a platform on the question mark and ride it over to the second question mark on the right. Watch out for any blue Baris floating nearby. Stalfos heads may also be present to attack you. Get off and run through the door. In the next room, you'll find a room much like the previous one. The difference is, there is only one question mark, and four torches in the room. You know what four torches means by now, so create a platform and start riding along the track. Light the torches with your Fire Rod when you have a good shot at them. If you light all four of them up, the shutter door above the question mark will open. If you time the lighting of the torches so that they remain lit when you return to the question mark, you can run through the door up above. If you light them too early, they may go out before you return.
When you pass through the shutter door, you will enter a long narrow room with two rolling spike traps. The traps only extend so far, and blocks prevent them from moving everywhere, so there are plenty of safe spots in the alcoves along the wall. Run into them when the bars get too close. Navigate your way to the top of the room, avoiding contact with the bars as much as possible, and you will reach two treasure chests. The left one contains the dungeon's ![]() Map while the right one contains a
Map while the right one contains a ![]() Small Key. Now that you have a key, you can return to the first large open room and unlock the door in the upper left corner. Head south and to the left to return there.
Small Key. Now that you have a key, you can return to the first large open room and unlock the door in the upper left corner. Head south and to the left to return there.
On your way to the locked door, you could stop off on the right-hand platform along the north wall if you need health and magic. Defeat the Stalfos and run through that door. You will be trapped in a room where the floor tiles will spin around and attack you. When the last tile is destroyed, the doors will open. In the room above, you will find a fairy along with a skull that contains a full magic refill beneath it. Catch the fairy with your net if you don't need the health immediately. Return two rooms below and proceed to unlock the locked door.
When you unlock the door on the left side of the northern wall, you will enter a narrow room with two green Zols, and a strange new enemy: a Hokuboku. It bounces around, and every time you swing at it, pieces of it break off and bounce around before disappearing. These pieces can damage you if you get in their way, so attack it slowly. When you defeat it, it will drop a ![]() Small Key. Use it to unlock the door above.
Small Key. Use it to unlock the door above.
In the final room of this floor, you will find two chained-up enemies, known as Kelbens, trying to reach out and attack you. There are two Crystal Switches here and at first glance, they seem to be in the right position because you can reach the door. Unfortunately, it's locked, and you don't have a key. That's OK, because there's one in this room, you just need to make it appear. Start by hitting one of the Crystal Switches from a safe distance and lower the blue blocks. The top left block that was just to the right of the blue fence blocks can be pushed to the right, causing a treasure chest to appear. Now hit the crystal switch again, and run over to the chest, avoiding the Kelbens as much as possible. Inside, you will find a ![]() Small Key which you should use to unlock the door and access the floor below.
Small Key which you should use to unlock the door and access the floor below.
Basement 1[edit]
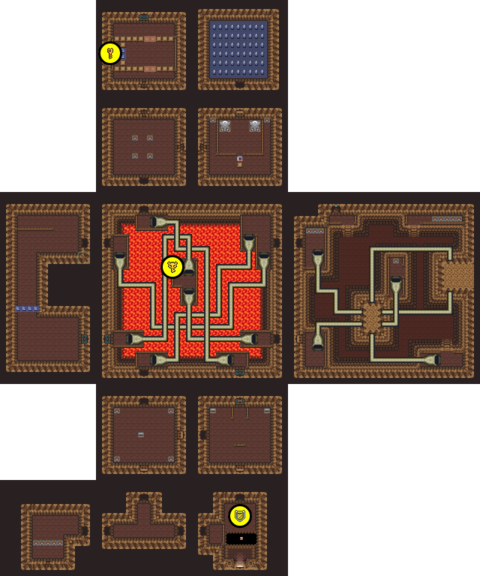
On this floor, the question mark tracks are replaced with a series of pipe tunnels. When you arrive, you will have to climb down the ladder and explore the lower portion of the room to find the way out. A Zol, a Hokuboku, and three Bubbles patrol this portion. A quick run to the right will reveal another ladder that leads to several skulls that contain some supplies. Your true aim is to reach the ladder in the bottom right corner of the room. When you climb up that ladder, you'll be standing in front of the entrance to a pipe tunnel. Walk through it, and you will be automatically shuttled around the pipe to its opposite end in the upper left corner of the room. Enter the left door.
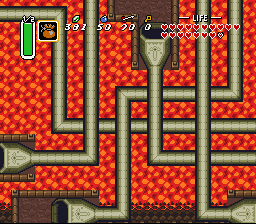
An intricate winding maze of five pipe tunnels floats over a bed of lava in this room. By the end, you will have explored all of them. Start out by taking the pipe closest to the right wall. This will bounce you over to the upper left wall where you can pass through the door to the next room. Four Bubbles will start out rather close to you. This is a good opportunity to use your Magic Powder and transform them into fairies if you need health. A Crystal Switch will allow you to lower the blue fence blocks, and continue to the lower portion of the room. Two Stalfos skulls will attack you, and a "Bunny Beam" trap will advance to render you powerless for a time. Avoid the beam at all costs. When the skulls are gone, defeat the Hokuboku that bounces around the room to receive a ![]() Small Key. Use it on the door to the right.
Small Key. Use it on the door to the right.
Back in the pipe room, take the one pipe tunnel in front of you to be deposited on the center island bearing a treasure chest. Inside the chest, you will locate the dungeon's ![]() Big Key. Enter the tunnel below and you will be dropped off in front of a one-way door that will place you back in the first tunnel room of this floor. Take the tunnel to the center platform where you will find a magic refill under the skull. Drop back down to the lower level and return to the second pipe room. Once there, take the pipe farther away from the wall. This will drop you off on the left side of the bottom wall. Pass through the door.
Big Key. Enter the tunnel below and you will be dropped off in front of a one-way door that will place you back in the first tunnel room of this floor. Take the tunnel to the center platform where you will find a magic refill under the skull. Drop back down to the lower level and return to the second pipe room. Once there, take the pipe farther away from the wall. This will drop you off on the left side of the bottom wall. Pass through the door.
In the next room, two Hokubokus bounce around. You must defeat both of them in order to open the shutter door. Head through the bottom door to the room below. In the simple "T" intersection, run to the left. The next room poses a tricky, but unnecessary problem to solve. There are five eyes on the wall, two which are always open and fire, and three which will only open and fire if something looks at them. Regardless, your only concern is to get past the row of skulls and through the doorway below that leads outside.
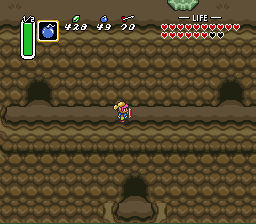
You may be surprised to find yourself along the cliff face of Death Mountain at this time. Don't question it too much and head to the right. You will find another dungeon entrance. Don't rush inside right away. In this particular portion of Death Mountain in the Light World, there happens to be a cave that had no apparent means of entrance. If you stand as far to the right as possible and use the Magic Mirror, you can reach this cave, and enter it for a chance to collect another ![]() Piece of Heart.
Piece of Heart.
Re-enter the dungeon through the right door, and you will be greeted by the large treasure chest on the other side of a pit with a question mark in the middle. Use the Cane of Somaria to create a platform that you can use to reach the chest (alternatively, you can use your Hookshot instead). Open it up and obtain the ![]() Mirror Shield: a shield so powerful, it can reflect the laser beams emitted from the wall eyes. Enter through the door up above. The next room has a couple of traps waiting for you, but all you need to do at this time is run directly up through the room and unlock the door at the top. You will find yourself back in the lava pipe room. Take the pipe you see to the left of you, and run through the door along the top.
Mirror Shield: a shield so powerful, it can reflect the laser beams emitted from the wall eyes. Enter through the door up above. The next room has a couple of traps waiting for you, but all you need to do at this time is run directly up through the room and unlock the door at the top. You will find yourself back in the lava pipe room. Take the pipe you see to the left of you, and run through the door along the top.
This next room may appear to be a dead end, but the map clearly indicates rooms to the north and east of you. After defeating the Hokuboku, you can bomb both walls to make the entrances appear. The path to the east is purely optional, and will only net you a large number of Rupees. If you choose to go that way, you will enter a room with three green Zols, and two tongue statues. Pulling one of the tongues causes bombs to rain from the ceiling while pulling the other opens the door to the room above. Inside you will find a treasure room of 54 blue Rupees, but it will be difficult to collect them all as three spiked bar traps roll all along the floor. When you are done, return to the room where you bombed the walls.
Proceed through the hole you created along the north wall (be careful to avoid the small black creatures known as Zoros that scurry out from time to time), and you'll encounter another Crystal Switch puzzle. In order to get to the center alley where the spike bar trap rolls back and forth, the orange fence blocks must be lowered. But in order to collect the contents of the treasure chest on the left, the blue fence blocks must be down. Hit the switch to gain access to the chest and collect the ![]() Small Key while avoiding contact with the spike bar. When you are ready, you must switch the Crystal back to orange so you can escape. If you're low on health, rely on the Magic Cape to avoid harm. Use the key on the door above to enter the floor below.
Small Key while avoiding contact with the spike bar. When you are ready, you must switch the Crystal back to orange so you can escape. If you're low on health, rely on the Magic Cape to avoid harm. Use the key on the door above to enter the floor below.
Basement 2[edit]
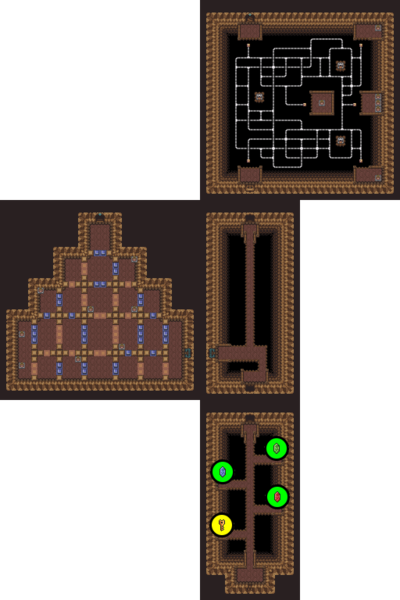
Unfortunately, when you arrive on this floor, the room will be very dark, and you will have a very limited field of vision. This large room is filled with questions mark tracks that travel in every direction. There are three fireball traps from which fire chains extend and swing around. There are a number of platforms on the right side, but the only two points of interest to you are the platform in the very center, and the platform along the bottom. You need to navigate your way to the platform in the center so you can reveal the switch underneath a skull. Step on the switch to open the shutter door on the very bottom wall. Now you must ride the tracks and navigate to that lowest platform from which you can reach the door. (Use the map provided here if you get truly lost.)
Once you enter the room below, you will be presented with a long narrow bridge. There are wall eyes positioned along either side of the bridge and they will fire at you as soon as you pass in front of them. Your best bet is to dash across the bridge as quickly as possible. Once you reach the other end, you will run into a Helmasaur. When you hit it, come to a stop or you will run right off the edge into the pit below. Instead, head right and around the ledge to the door below.
In the next room, you may be surprised to find four treasure chests. Unfortunately, three of them simple contain Rupees. Only one, the lowest, contains a ![]() Small Key. With such narrow ledges, you must fight it carefully so you don't get bounced back into the pit. Once you open a chest, escaping harm is difficult without the proper use of the Mirror Shield. The eye lasers will fire at you as you walk away. Hold your sword out so that your shield moves to your side and blocks the lasers. Link is left-handed, so if the lasers are coming from the left, face down so your shield will block your left side. After you collect the key, you may notice another dungeon entrance on the bottom. If you go through it and head outside, you will end up on a dead-end balcony, seemingly without purpose. Unlike your previous venture outside of the dungeon, transporting yourself to the Light World will yield no precious treasures, but does contain two fairies and some rupees. Collect those, then head back inside and return to the room above.
Small Key. With such narrow ledges, you must fight it carefully so you don't get bounced back into the pit. Once you open a chest, escaping harm is difficult without the proper use of the Mirror Shield. The eye lasers will fire at you as you walk away. Hold your sword out so that your shield moves to your side and blocks the lasers. Link is left-handed, so if the lasers are coming from the left, face down so your shield will block your left side. After you collect the key, you may notice another dungeon entrance on the bottom. If you go through it and head outside, you will end up on a dead-end balcony, seemingly without purpose. Unlike your previous venture outside of the dungeon, transporting yourself to the Light World will yield no precious treasures, but does contain two fairies and some rupees. Collect those, then head back inside and return to the room above.
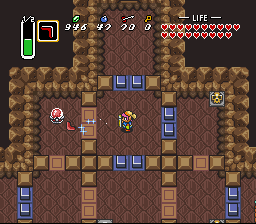
Back in the room of the eye wall laser bridge, use your new key to open the door to the left. You will enter a veritable Crystal Switch maze. As long as you have your Boomerang handy, it won't be too bad. There are three Bubbles, two Helmasaurs and one Hokuboku to contend with in the room. Skulls scattered throughout the room hold small amounts of supplies, but your ultimate goal is to reach the stairwell at the very top of the room. Use your boomerang to change the state of the block fences in order to progress closer to the top of the room until you reach the stairs. Climb down to the bottom level.
Basement 3[edit]
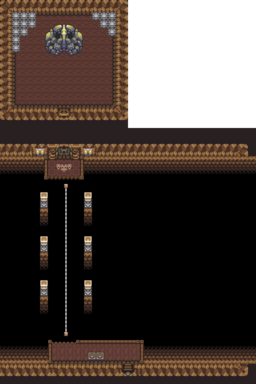
A simple platform leads to a single question mark track. Use your Cane of Somaria to create a platform and ride it across to the door which leads to the dungeon's boss.
BOSS: Trinexx[edit]
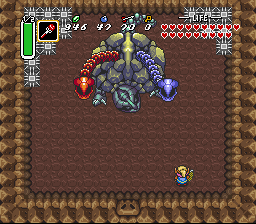
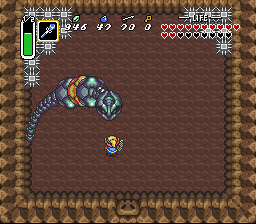
This fight is going to require a substantial amount of magic. While it's possible to win the fight with one full magic meter, it's wise to bring at least one green or blue potion to the fight with you in case you run out. Trinexx, as his name suggests, possesses three necks. The two lesser necks on the sides are red and blue. The red neck attacks with searing flames, while the blue neck attacks with blasts of ice that freeze the floor. The center neck physically attacks you, so you must always keep your eye on it while you focus on the outer two. Since the outer necks deal in heat and cold, they are susceptible to attacks of the opposite variety. Therefore, train your Ice Rod on the red head, and your Fire Rod on the blue head. You can simply shoot at the heads with just the rods, or you can hit them once to freeze them and get in close with your sword. They can be taken out in any order, although you may find the blue head to be a bit more of a nuisance as the ice it leaves will be detrimental to your mobility. Once both heads are destroyed, the outer shell of the center head explodes, leaving behind the center head at the end of a long snaking body. The body will slither throughout the room at a rapid pace, and this dungeon boss does a substantial amount of damage to you if he hits you. Do your best to stay out of its way, and observe the flashing point in the center of its body. You must strike this point with your sword. Strike it enough times to defeat it (three spin attacks with the level 4 sword should do it), and Trinexx will leave behind the final ![]() Heart Container of the game. Gather it, and the crystal which contains Princess Zelda will appear for you to collect.
Heart Container of the game. Gather it, and the crystal which contains Princess Zelda will appear for you to collect.
Use the crystals against Ganon[edit]
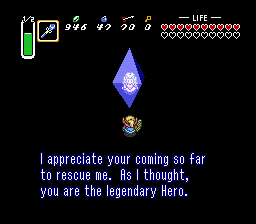
Princess Zelda does not waste precious time with thank yous. She informs you that if Ganon does in fact breach the barrier between the Dark and Light Worlds, he will become so powerful that not even you will be able to stop him. He is only vulnerable to the hero's attacks while he remains in the Dark World, so you must assail his tower quickly. Only the seven maiden crystals have the power to unlock the entrance. Only then can you proceed inside.
