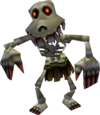
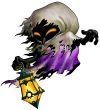
The following page lists all of the enemies that Link faces in his travels. They are listed according to the time period and location in which they are introduced.
Young Link
| Enemy | HP | Damage dealt | Location first seen | Locations | Navi description | Notes |
|---|---|---|---|---|---|---|
Deku Baba (withered)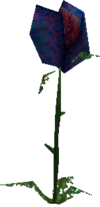
|
1 | 1/2 Heart | Kokiri Village | Kokiri Village | Though it looks withered, it will hurt you if you touch it. | This plant poses little threat, since it has no real means of attack. However, if touched, it will cause damage. A single blow will kill it, leaving a Deku Stick if it is killed. In the Kokiri Village area, these plants are only found around the Great Deku Tree beyond Mido. |
Deku Baba
|
2 | 1/2 Heart | Inside the Deku Tree | Inside the Deku Tree | Hit it when it lunges at you, and it will stand upright. cut it quickly to get a Deku Stick | A stationary plant that will bite you if you're not careful. Unlike the withered variety, this plant has a limited reach of attack. Killing it while it is not attacking will yield a Deku Nut, whereas attacking it in its extended position will stun it. Killing it in this stunned position will yield a Deku Stick. |
Deku Scrub
|
2 | 1/2 Heart | Inside the Deku Tree | Inside the Deku Tree | It will hide in the grass if you get close to it. Bounce the nuts it spits back at it! | This creature pops up out of the ground and shoots Deku Nuts at you. Reflecting a Deku Nut back to the Deku Scrub will cause it to jump out of its hole. If left alone, it will eventually take its place again in the hole. However, if it is caught, it will often offer information. |
Skullwalltula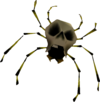
|
1 | 1/2 Heart | Inside the Deku Tree | Inside the Deku Tree | Be careful not to touch it! | This small spider-like creature resides on the walls. It will knock you off the walls as you climb if it touches you. If it's going to attack you, it'll turn purple. |
Skulltula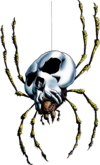
|
1 | 1/2 Heart | Inside the Deku Tree | Inside the Deku Tree | ?? | This Skulltula drops down suddenly, and makes a quick spin attack if you are too close. Attack it when its "soft belly" is exposed; hitting its hard shell only causes it to swing from side-to-side. |
Big Skulltula
|
2 | 1/2 Heart | Inside the Deku Tree | Inside the Deku Tree | Its soft belly is its weak point! | Is a bigger version of the Skulltula. |
Gold Skulltula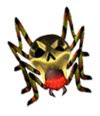
|
2 | 1 Heart | Inside the Deku Tree | Inside the Deku Tree | ?? | Gold Skulltulas are a rare breed of Skulltula. They basically are collectibles. Shoot and kill them, and you will get Gold Skulltula Tokens. There are 100 Gold Skulltulas in the game. Later on in the game, you can use these tokens to earn a series of prizes, such as the Adult's Wallet at 10 tokens, the Stone of Agony at 20, the Giant's Wallet at 30, some Bombchus at 40, a Piece of Heart at 50, and lastly, an infinite supply of Gold Rupees when you collect all 100. For more information on them, consult the Gold Skulltula Mini-Quest Section. |
Gohma Larva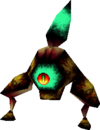 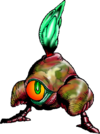
|
2 | 1/2 Heart | Inside the Deku Tree | Inside the Deku Tree | Look out when it gets ready to pounce! | This enemy tends to attack by hopping at you when its eye turns red. It usually takes two hits to kill. |
Parasitic Armored Arachnid: Queen Gohma
|
10 | 1/2 Heart | Inside the Deku Tree | Inside the Deku Tree | ?? | The boss of the Deku Tree dungeon. This large enemy attacks directly with her two upper appendages or indirectly by releasing Gohma Larva eggs. If these eggs are not destroyed, they will hatch Gohma Larva. Its weak point is its eye. Hit the eye with the slingshot or Deku nut to stun it and attack it with your sword repeatedly. Try to hit it in the eye while it is on the ceiling to prevent it from releasing larva and making it easier to slay. |
Hyrule Field
Lon Lon Ranch
Kakariko Village Graveyard
Royal Family Tomb

- Keese
This is a black bat. Although weak, it will set itself alight if a fire is nearby, becoming a Fire Keese; if Blue Fire is around, it will become an Ice Keese. Although a quick sword-swipe will kill them, they are best dispatched with the slingshot/deku seeds, or the Boomerang. They usually nest in a certain spot, and don't move unless startled, which will trigger an attack.
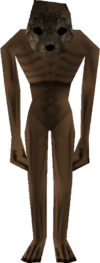
- ReDead
This is a restless undead creature. It moves slowly but has a paralyzing shriek. The Sun Song renders them inert for a moderate amount of time. These enemies are best avoided early in the game. Their attack consists of jumping onto Link's back and "vampiring" life from him, taking away 1/4 of a heart per second. Rapidly tapping a button is the only means of escape. If one of their brethren dies, they go to where the body lies, ignoring Link. Some ReDeads may crouch, and those that do can't shriek until they get up.
Death Mountain Trail
- Red Tektite
This four-legged crab-like creature can only attack or move with a small jump.
Lost Woods
- Business Scrub
Like other scrubs, this enemy fires Deku Nuts at you. If you get too close, it will hide in the ground. However, it will offer to sell items to you when it is defeated. Also, it does not run away after it has been hit.
Sacred Forest Meadow
- Wolfos
This werewolf will block your attacks unless you time them correctly. Hitting him in the back causes more damage.
- Mad Scrub
Like the Deku Scrub, but fires 3 Deku Nuts in succession. It will not sell you anything or give you any information.
Dodongo's Cavern
- Beamos
This enemy stands stationary, its head continually rotating 360 degrees. If it catches sight of you with its single eye, it will send out a beam of light to attack you. To destroy it, blow it up with a bomb.
- Baby Dodongo
A baby dodongo appears from the ground and wriggles toward you. It attacks you by jumping at you, and when defeated, it explodes like a bomb.
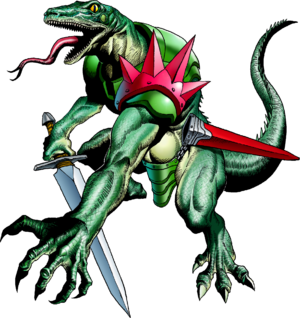
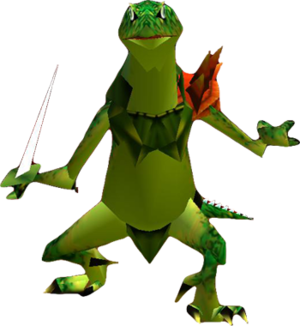
- Lizalfos
This lizard-like humanoid fights with shield and sword. Wait for the opportunity to attack. It will run away when it has been nearly defeated.
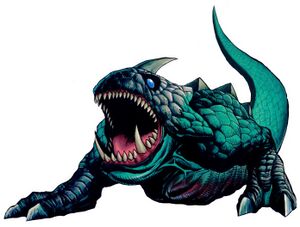
- Dodongo
This creature breathes fire. Its tail is its vulnerable point. It explodes tremendously when it is defeated.
- Armos
This statue looks like other statues, but will attack when it is attacked. They can be killed with bombs or bomb-flowers. When you encounter these as Adult Link, Biggoron's Sword will also work.
- Fire Keese
Unlike regular Keese, Fire Keese are very elusive. They will swoop down to release their flames onto you and then fly around constantly, making them hard to target. If your Deku Shield is equipped when it hits you, your Deku Shield will burn up. Fire Keese lose their burning ability after attacking and revert to normal Keese, but will re-ignite if a flame is nearby.
- Infernal Dinosaur
- King Dodongo
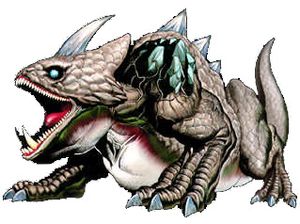
The boss of Dodongo's Cavern, this creature has a fiery breath and a devastating rolling attack. It is vulnerable when it is preparing for its fiery attack. Toss a bomb into its mouth and, when the ordnance detonates, it will be stunned. Slash it repeatedly until it curls up into a ball and rolls around. Make certain that you have the Hylian Shield equipped as it will protect from the monster's rolling attack. If you employ the Deku Stick and jump slash the creature, it will perish very quickly.
Zora's River
- Octorok
This enemy resides in the water. Its method of attack is to fire rocks at you, which can be deflected with your shield. This creature will hide from you if you get too close. It can be killed by deflecting its rocks back at it, or by using the boomerang.
- Blue Tektite
This enemy is much like the Red Tektite, but walks on water. You can kill it with your light arrows for a purple rupee.
Jabu-Jabu's Belly
- Biri
This jellyfish-like creature floats slowly through the air. It may be easy to avoid, but it shocks you with electricity if you do not use ranged attacks. The boomerang is the best weapon to use against it. The Fairy Slingshot is ineffective against it. A combination of Deku Nuts to bring them down and hits with the sword to kill them can be used. The magical sword-slash attack works, but the range and timing are of such critical importance that it's just easier to use the boomerang. It is also possible to kill biri by throwing Princess Ruto at them, but you will need to aim well.
- Bari
This enemy is the advanced version of the Biri because it is three Biri fused together. It drops from the ceiling and causes more damage when it attacks. When it is killed, it disbands into three Biri used to form it (it may still drop goodies though). The Fairy Slingshot is ineffective against it, but the Boomerang works perfectly.
- Shabom
This is a bubble that floats toward you in a somewhat random way. If it pops near you, it will send you flying backward, damaging you. Use deku nuts, which will cause all of the near by shaboms to pop, or the boomerang for individuals. The Fairy Slingshot is ineffective against it. A jump slash with a Deku Stick will provide adequate range to avoid its explosion upon its defeat. As Navi will tell you, it will only bounce off your Kokiri sword, although the magical sword-slash works ok if the boomerang has not been found yet.
- Tailpasaran
A very agitating adversary. Not only is it armored, it will shock you if you slash it. Use ![]() -targeting and throw the boomerang at it to destroy it, or use the magical sword-slash.
-targeting and throw the boomerang at it to destroy it, or use the magical sword-slash.
- Stinger
This a rather irritating enemy. It attacks in the same manner that the Guay and Keese do. A simple jump slash will dispose of it, but the boomerang will obliterate it with a single hit.
- Parasitic Tentacle
This uvula-like enemy is weak at the point where it narrows. It will retract unless it thinks it can attack you. Draw it out by moving closer, and use ![]() -targeting so you can attack with the boomerang which will halt its attack.
-targeting so you can attack with the boomerang which will halt its attack.
- Big Octo
This is a tricky mini-boss. He moves in a circle, switching directions after being hit. To defeat this enemy, you will need to chase Bigocto until you can hit him from behind with the boomerang or hit him with the boomerang to turn him around and then quickly again. This will stun him, at which time he can be struck with the Kokiri sword (again, only from behind). This cycle will need to be repeated several times.
- Bio-electric Anemone
- Barinade
The boss of the dungeon. It is a very dangerous opponent. Watch out for its electric beams it will constantly fire at you. In order to defeat it you must first target the tentacles attached to the ceiling with the boomerang. Once they have been knocked from the roof, attack it. It will begin to spin around attempting to run into you. Stun it with the boomerang and destroy the Jellyfish protecting its weak point. This will make attacking it easier. Even once its protectors have been vanquished, it will still fire electricity at you. Stun it with the boomerang and attack it repeatedly. Repeat these actions until it is slain.
Adult Link
Hyrule Field
- Angry Poe
The tougher version of Poes. This type will not go away, even if you look at it, and will constantly circle around, dropping flames from its lantern. Din's Fire is very effective if you get cornered by one.
- Big Poe
A very elusive kind of Poe that only appears when you ride Epona. They never attack, but they like to tease and scare lone travelers. Two arrows will slay one, but they won't stick around for very long. Ten Big Poes inhabit Hyrule Field, and only appear in certain locations. You can collect their spirits and sell them to the keeper of the Ghost Shop to earn Rupees. When he has all ten spirits, you'll get another Bottle.
Kokiri Forest
- Big Deku Baba
Huge stationary plants that bite anything that nears. Big Deku Baba are more powerful and more dangerous than the smaller variety. This plant still has a limited range of attack. Killing it while it is not attacking will yield three Deku Nuts, whereas attacking it in its extended position will stun it. Killing it in this stunned position will yield a Deku Stick (although they are useless as an adult).
Lost Woods
- Skull Kid
Koriki that have been lost in the forest too long become Skull Kids. They are afraid of adults. Skull Kids will shoot flying projectiles at you. If you kill a Skull Kid, it will yield an Orange Rupee.
Sacred Forest Meadow
- Moblin Guard
Large goblin-like monsters wearing chain mail armor and wielding long spears. If one sees you, it will charge at you full speed with its spear drawn. Stay out of sight until one turns around, and shoot your Hookshot on its lower back. One shot is all it will take.
- Club Moblin
A gargantuan Moblin warrior clad in spiked armor, and heaving a colossal warhammer. It will strike the ground when Link nears, creating shockwaves that will send you flying. Avoid the shockwaves, and maneuver behind the Moblin, and strike it with your sword three times to defeat the beast. However, Bombchus work to avoid the Moblin's colossal club.
Forest Temple
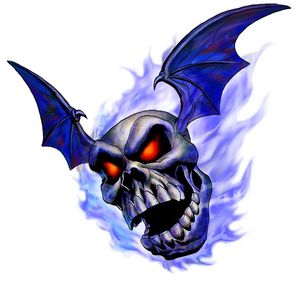
- Blue Bubble
Hovering skulls surrounded by blue fire. They attack by flying into you. To defeat them, use your Hookshot or let them bump into your shield when they are covered in fire,or shoot them with an arrow and strike the skull twice with your sword once it starts bouncing on the floor (this is easier if you Hook/Longshot it before hand, which immobilizes it).
- Stalfos
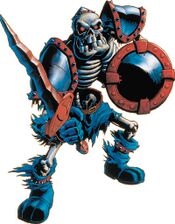

Large, armored skeletons wielding a sword and shield. It will attack you at close range with its sword, or it will attack you at a distance by using a powerful jump attack. Stalfos have excellent blocking skills, and they are only vulnerable when they are about to make an attack, or as soon as they land from a jump attack. Some Stalfos are capable of regeneration; if their bones remain in a pile once they have been defeated, move quickly to accomplish your objective in the room, or they will regenerate. You'll encounter more of these in other places throughout the game, and, even though you can't block with it, Biggoron's Sword is the best way to defeat these guys, especially if they regenerate, because it delivers such a powerful blow.
- Wallmaster
Giant decomposing hands that hang from the ceiling. Quite possibly the most agitating and annoying enemy in the game. Its shadow will encircle Link when he nears, and after a second, it will drop down, and pick up Link, sending him all the way to the beginning of the dungeon. To avoid getting assaulted by one, continue moving (it begins hovering above you when you have stopped). To kill one relatively easily (this is easier if you play with the sound on,) simply stay in place as the shadow grows around you and you begin to hear a sucking sound. As soon as the sound stops and the shadow starts growing (or just before, if you are being particularly cautious) run away, then turn around once you hear it hit the floor and rapidly attack it with your sword before it ascends to the ceiling. If you manage to defeat a Wallmaster, it will drop a lot of rupees, and it will be well worth the fight.
- Floormaster
Giant decomposing hands that crawl on the floor. Quite possibly one of the most frustrating and annoying enemies in the game. If you near it, it will turn green and fly towards you. Avoid its barrage by blocking it with your shield, or else it will pick you up and send you to the beginning of the dungeon. Attack it swiftly with your sword, and three tiny Floormasters will spawn from its remains. This is where the battle gets dangerous, as if you allow any of the hands (and it is possible for more than one to do this at the same time) to latch on to you, it will suck a large amount of life away, before regrowing into a large hand. Each of the tiny Floormasters will grow into a full-sized Floormaster, if you allow them a few seconds to do so, so quickly ambush them with your sword. Quite possibly the best weapon against the Floormaster is Din's Fire. Unleash Din's Fire, and cast it again to defeat the three tiny Floormasters that spawn.
- The Poe Sisters
- Joelle, Beth, and Amy
These three of the four Poe sisters are included together, because they have very similar fighting styles. The Poe Sisters are floating Poes holding fiery lanterns, very similar to every other Poe in the game; unlike the other Poes, however, ![]() -targeting does not cause them to permanently disappear. To defeat them,
-targeting does not cause them to permanently disappear. To defeat them, ![]() -target and wait with your shield up (they attack you by hitting you with your lantern, but your shield will readily deflect them) until they reappear; at this point, shoot them with arrows and repeat the process as necessary.
-target and wait with your shield up (they attack you by hitting you with your lantern, but your shield will readily deflect them) until they reappear; at this point, shoot them with arrows and repeat the process as necessary.
- Green Bubble
A close relative to the Blue Bubble. It is covered in a green fire that will cause damage if you get close. The gaseous corona of fire that surrounds these skulls dissipates intermittently, leaving them very vulnerable to attack. One quick sword thrust is usually all it takes to dispose of them once they are unprotected by flame.
- Meg
Meg is the fourth and final Poe sister; her lantern burns with a purple flame. She is the Mini-Boss of the Forest Temple. As you approach her, she will separate into four identical clones of herself, and the clones encircle you. Determining which Poe is the real Meg is the key to winning this battle. The real Meg will spin around occasionally, usually right after she appears, and when this happens, ![]() -Target her and shoot her with your Hookshot or arrows. If you hit the wrong ghost, it will just disappear, and you have two more chances to hit the right one, before you take an automatic hit from Meg. Don't fight this battle in First Person View, for it is much more challenging, since you cannot see all of the ghosts at once. When the fifth true shot is delivered, Meg will be defeated.
-Target her and shoot her with your Hookshot or arrows. If you hit the wrong ghost, it will just disappear, and you have two more chances to hit the right one, before you take an automatic hit from Meg. Don't fight this battle in First Person View, for it is much more challenging, since you cannot see all of the ghosts at once. When the fifth true shot is delivered, Meg will be defeated.
- Evil Spirit from Beyond
- Phantom Ganon
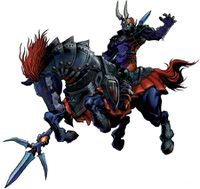
An evil creation of Ganondorf, and the boss of the Forest Temple. Phantom Ganon is a Ganondorf lookalike on an armored black steed. He wields a powerful trident that casts spells of electricity. This fight has two distinct parts. First, you must shoot Phantom Ganon three times with an arrow as he tries to exit a painting. This sounds simple, but there's a catch. To make things difficult, Phantom Ganon has his own phantom, riding through the paintings with him. Just when you think you've got a hit on one as he rides towards the edge of the painting, he'll turn and head back while the real Phantom Ganon leaps out of the painting while casting a massive electricity spell at the center Triforce. To keep from being hit by the electrical blast, do not stand in the center of the arena, or on the small Triforces that surround it. The best place to stand is right between two of the small Triforce emblems on the floor. This will ensure that you will be safe from the electricity. The easiest way to figure out which Phantom is the real one, is to look at both the paintings he's coming from, and find the phantom that looks slightly brighter. The brighter of the two is the real Phantom Ganon. So fire away with your arrows, and after three true hits, he will descend from his horse and float above the arena. Put your bow away and unsheathe your sword. The next part of the battle is rather tricky: you must return Phantom Ganon's fireball attacks with your sword. As in baseball, you must time your strokes so you bat back the ball of electricity before it hits you. Making things even more challenging, Phantom Ganon doesn't stay in one place, flying at weird angles around the room. Your best defense is to ![]() -Target him, which helps tremendously. Return a close range attack and you'll also be more likely to hit him. When you hit him with one of his own spells, run toward him and attack him with your sword. Jump attacking him will end the battle more swiftly. By about the fourth hit, he will add a new attack to his repertoire. When you see him charge up his staff with a kaleidoscopic light, prepare to move fast. Phantom Ganon will hop on his staff and ride it like a broomstick. If you wait until he targets you and starts his swoop, you can sidestep him and easily avoid taking damage. Keep reflecting his balls of electricity and move in and strike him until he is defeated.
-Target him, which helps tremendously. Return a close range attack and you'll also be more likely to hit him. When you hit him with one of his own spells, run toward him and attack him with your sword. Jump attacking him will end the battle more swiftly. By about the fourth hit, he will add a new attack to his repertoire. When you see him charge up his staff with a kaleidoscopic light, prepare to move fast. Phantom Ganon will hop on his staff and ride it like a broomstick. If you wait until he targets you and starts his swoop, you can sidestep him and easily avoid taking damage. Keep reflecting his balls of electricity and move in and strike him until he is defeated.
Another way to deafeat him is to wait until he gets close to the ground. Then hit him with your sword to stun him. After he falls to the ground hit him repetively with your sword until he gets back up.
Death Mountain Crater
- Red Bubble
Close relative of the Green and Blue Bubbles, the Red Bubble is found in fiery areas. Its attacks can even burn you. Extinguish the fire on its body to destroy it. Deku Nuts are the one thing that can stun them so you can attack them.
Fire Temple
- Torch Slug
A slug with flames all over its body. If it's hit by one of Link's weapons, the fire on its body disappears. The hookshot will also stun it. It must be destroyed before it can re-ignite.
- Like-Like
The most disgusting thing you've ever seen, kind of like a slimey loofah: A tubey, worm-like enemy that sucks up Link's tunics and shields. It can be killed with arrows (which will keep it at a distance so it can't eat your gear) or a sword. It will give back the items it ate when you kill it. Just don't leave the room or you'll lose your gear and have to re-purchase it.
- Door Mimic
A deceiving enemy that poses as a door, but falls on you if you try to open it. It is distingiushed by the fact that it sticks out from a wall. A bomb will eliminate one.
- Flare Dancer
The mini-boss of the dungeon. Only two exist. "Its flaming clothes must be extinguished before it can be damaged." Throw a bomb at it to get the middle to drop, then whack it with your sword. Another, possibly easier way is to use the hookshot on him when he still dances on the spot. This will drag him towards you and you can slash him with your sword. The Spin attack does a lot of damage. It will run away from you in a circle, but you can change direction to cut it off or use the hookshot to reel it back in. It will jump into the flames again a few more times when it gets away, and get faster each time. It also changes color for the amount of health it has. Red is around full, blue is middle, and green is when its almost dead.
- Subterranean Lava Dragon
- Volvagia

The boss of the Fire Temple. The dragon that was sealed away with the Megaton Hammer, and revived by Ganondorf. It can be defeated by hitting with the Megaton Hammer each time it pops out of a lava hole, then slashed with a sword. It eventually becomes unpredictable and will pop out randomly. It can also breathe fire and pummel you with rocks. To avoid being pelted with either attack, cling onto the edge of the platform during each attack. You can also shoot arrows at it when in air to get it to come back down faster.
Ice Cavern
- Freezard
An enemy made entirely of ice. It has the power to freeze you with its cold breath. Din's Fire is very useful against it, but your sword works as well. Freezards pop out of the ground when they attack, which is distinguished by a sudden rise of fog, allowing you to predict where they'll appear.
- Bewitched Pot / Flying Jar
Pots that easily pose as harmless ones, but they fly at you when you get near them. They break once they hit the ground, or hit your shield if you block them. They may have something inside that could be of use to you.
- Ice Keese
Keese that have come into contact with Blue Fire become these. They have the power to freeze you for awhile. Unlike Fire Keese, they don't lose their power after attacking. A long-range weapon like the Fairy Bow is good to use on them.
- White Wolfos
A large Wolfos with white fur and red eyes that has double the strength of a normal Wolfos. Its back is its weak point like a regular Wolfos. It will die quickly if you jump-slash it in its back enough times when you get the chance.
Water Temple
- Spike
A metal ball with sharp spikes that rolls toward you. When hit with the Hookshot or your shield, it becomes a vulnerable rock you can attack from a distance.
- Shell Blade
A clam with teeth on its back. When you get near it, it will open its vulnerable mouth. Use the Hookshot or Fairy Bow on its mouth to kill it. Use your shield to avoid its teeth.
- Dark Link
A very formidable foe. This is a doppleganger version of Link. He blocks almost every sword attack, jumps onto Link at times to attack, and shifts his position whenever he gets hit. Because of this, the best weapon against him is the Megaton Hammer, since you (and therefore he) cannot block with this, and he cannot imitate it. You could also use Din's Fire, when Dark Link gets near you, but you'll want to bring at least 1 green potion. He takes many hits to defeat and can cause a lot of damage, so you'll probably want to have at least 1 fairy. The Hookshot also has a great usefulness on this mini-boss.
- Giant Aquatic Amoeba
- Morpha
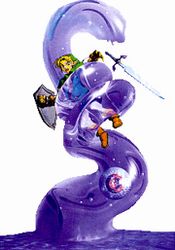
The boss of the Water Temple. It is a pink nucleus that swims through the waters of Lake Hylia it stole. It can manipulate water and form it into a tentacle. It can cause damage to Link if a tentacle hits him, but the damage is much more lethal if it is actually able to grab Link and thrash him around. If you latch onto Morpha with the now-upgraded Longshot, you can pull it out of the water and to you to hit it. After a while, Morpha creates two tentacles at once to avoid.
Bottom of the Well
- Giant Green Bubble
A larger than normal Green Bubble that stalks the corridors of the well. It does not remain stationary like its normal kind and is harder to avoid. It is the only one you'll face.

- Gibdo
Gibdos are very similar to ReDead, since they shriek if they make eye contact with you and go to any Gibdos with them that die, but are wrapped in bandages and do not crouch like ReDead. Gibdos attack anyone who bothers them, and are a lot more unforgiving than ReDeads when they drain the life out of Link, taking away 1/2 of a heart per second. They freeze when you play the Sun's Song.
- Dead Hand
A twisted mini-boss that has several hands sticking out of the ground. If you get too close to one, it will grab you and hold on. If that happens, Dead Hand will reveal his body and close in to attack. You can get out of a hand's grip by moving the Control Stick, but killing a hand is pointless because another one soon takes its place. The only way to defeat Dead Hand is to wait for his head to bend down to attack and slash it quickly. Dead Hand can also burrow back into the ground and churn up dirt that can injure you if it hits you.
Shadow Temple
- Big Beamos
A slightly bigger Beamos that needs to be bombed twice in order to defeat. It can resist bomb explosions with its stronger armor.
- Fake Eye Switch
An eye switch that shoots fireballs at you when you approach it. One hit to its eye with an arrow will defeat it, but only when the eye is open.
- Phantom Shadow Beast
- Bongo Bongo
- An evil shadow spirit that hides his body in the shadows and attacks with his hands. You must first stun his hands, then use the Lens of Truth to see his body and quickly shoot him in the eye before he is vulnerable to sword attacks. You can also use Ice Arrow on hand to get it to smash his frozen hand free which will automatically get to where you can stun eye without him running into you.
Gerudo's Fortress
- Gerudo Guards
Spear-wielding Gerudo that will capture you if they see you. You can pick them off with arrows or stun them with the Longshot, but you can in fact also use close-combat weapons on them, such as the Biggoron's Sword. Once you get the Gerudo's Membership Card, they are no longer your enemies.
- Gerudo Prisoner Guards
Only four are encountered in the game. They are much more skilled than the other Gerudo Guards because they have one purpose: to make sure prisoners don't escape. They wield two scimitars and are trained to block several sword attacks. The deadliest move in their arsenal is their spin attack, which is used to knock out the toughest enemies and capture them. The easiest and quickest way to defeat them is to use Biggoron's Sword.
Gerudo Training Ground
- Dinolfos
These beasts are Lizalfos that have evolved for battle. They take more hits to kill and cause more damage with their swords, and can be very elusive. An easy way to beat them is: Deku Nut, Jump Attack, Deku Nut, Jump Attack, repeat until dead. This works on Majora's Mask, as well.
Haunted Wasteland
- Leevers
Small creatures that burrow out of the ground and attack in one direction. Most of the time, you'll be attacked by a group of Leevers, which makes it hard to escape them all. It's simple to just run past them, but if you want to make it to safety without getting hurt, use Nayru's Love.
- Purple Leever
If enough Leevers are killed, this bigger and more dangerous Leever comes out of the ground. Unlike other Leevers, it can change its direction to attack you. However, its body is slower and much more sluggish than normal Leevers because of its bigger size.
Spirit Temple (Young Link)
- Anubis
A dog-like mummy that hovers around narrow space and shoots fire at you if you approach it. They move just as you do (if you move to the left, he will move to his left.) The only way to defeat it is to engulf it in flames. There is a puzzle in the room based on this, but Din's Fire or Fire Arrows will also work.
- Iron Knuckle (Silver)

A dangerous, armored behemoth mini-boss that wields a deadly axe. If you get clobbered by one, you'll take a lot of damage, so you might keep a Fairy or Red Potion with you. The best way to defeat it is with hit-and-run sword tactics to dodge its axe. Biggoron's sword is best because it's so powerful, which means you can take him out much more quickly. After several hits, the chest plate it wears will tumble off, and the Iron Knuckle will become more agile, but vulnerable to Deku Seeds or arrows. If you hide behind a pillar and let him smash it, hearts will fall out (Rupees if you have full health).
Spirit Temple (Adult Link)
- White Bubble
This is the fourth and final type of Bubble you'll encounter. It drags a small white flame with it as it moves, then stops to spin. As it spins, hit it with an arrow or the Longshot to make it vulnerable to your sword.
- Iron Knuckle (Nabooru)
This Iron Knuckle is the strongest one you'll face. It has a lot more health than normal and stronger armor than the rest. The axe it holds also proves more powerful. The only way to defeat it is with your sword, or bombs.
- Sorceress Sisters
- Kotake and Koume
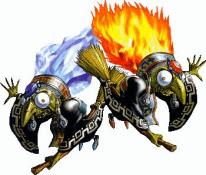
These two witches are the bosses of the Spirit Temple. Kotake attacks you with ice, and Koume with fire. To defeat them, you must deflect the attack of one sister with your Mirror Shield and aim it at the other sister. ![]() -Targeting is very helpful here. Use it to target the sister who's firing first, and then quickly target the other when she flies by to hit her. After a few hits, they will combine into Twinrova.
-Targeting is very helpful here. Use it to target the sister who's firing first, and then quickly target the other when she flies by to hit her. After a few hits, they will combine into Twinrova.
- Sorceress Sisters
- Twinrova
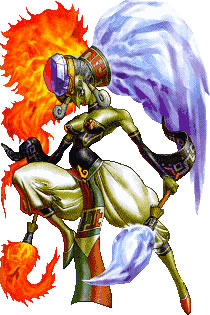
This is the form Kotake and Koume take when they combine into one. Twinrova holds two wands of fire and ice that you must avoid. To defeat her, you need to block three attacks of the same kind with the Mirror Shield, which will then be released as one big attack. Get close to Twinrova when this happens and aim the shield at her so she gets hit with her own attack. Then, you'll be able to use your sword on her.
Ganon's Castle
- Iron Knuckle (White)
There is only one you face, and it is part of the final defense of Ganon's Castle. It has a little more punch to its axe, and is paired up with the stronger Black Iron Knuckle.
- Iron Knuckle (Black)
This Iron Knuckle takes the place of the White Iron Knuckle in case it falls in battle. It has even more power to its axe, and is the only one you ever encounter as well.
- Great King of Evil
- Ganondorf
Ganondorf is the final boss of the game, and the most dangerous. To defeat the evil king, you must send back the magic attacks he sends at you which can destroy the non-metal platforms by swinging your sword until he is hit, then strike him with a Light Arrow. After that, you can strike him down with your sword. When Ganondorf is low on health, he'll use his ultimate magic attack on you, which you can stop with a Super Spin Attack, or just avoid it by using a Light Arrow on him before he fires the attack. The Biggoron's Sword is best for this, because it has a longer range when deflecting the magic attack and is more powerful than the Master Sword. If you're running low on health or magic, just drop down (rolling will stop you from getting hurt) and break some pots.
- Ganon
The final form of the final boss, Ganon, is a giant monster wielding two large swords. At the start of the battle, you lose the Master Sword, and you must use the Biggoron's Sword or Megaton Hammer instead. You can strike his head with a Light Arrow or Deku nut to stun him or run under him to reach his tail. You have to strike Ganon's tail until you have a chance to get the Master Sword. When you do, Ganon will move faster than before, but the strategy is the same. Even when you get the Master Sword back, though, it's faster (and uses fewer Light Arrows, and therefore conserves magic) to use the Biggoron's Sword; however, once Zelda has him held down, the final blow must be delivered by the Master Sword. If you run out of magic, lead Ganon to a pillar and go behind it to make him smash it to reveal bombs, hearts, arrows, magic jars, or faries. When Ganon is defeated, you'll be treated to the ending.


