The Legend of Zelda: Oracle of Ages/Crescent Island and Moonlit Grotto
As soon as you exit from the previous dungeon, the Maku Tree contacts you again. She says that you should go south to the Crescent Island to find the Echoing Howl.
| Plot items: | Optional items: | Dungeon items: |
Before the next quest[edit]
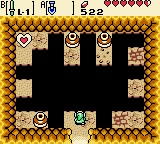
After coming out of the Wing Dungeon, leave the woods and go back towards Lynna Village. Take a detour: north from the forest and west of the village, jump over the hole using the Roc's Feather and head north. You can find a Soft Soil and a Heart Container.
Follow the path as north as possible. Lift the four stones with your Power Bracelet. Take out your Shovel and dig in the middle spot of the cross to reveal the level 4 Soft Soil. If you want, you can plant your Gasha Seed here.
Go down in on the left side and left. Enter the cave. Use your Roc's Feather and Power Bracelet to get the fifth ![]() Piece of Heart. Beware: both darker floor tiles may collapse. Take the way on the left side back and out. Continue to Lynna Village.
Piece of Heart. Beware: both darker floor tiles may collapse. Take the way on the left side back and out. Continue to Lynna Village.
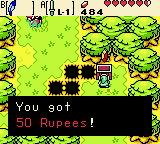
Travel in time to Zelda's age. Explore the eastern portion of the Fairies' Woods with the Roc's Feather: you can now reach a chest with 50 ![]() Rupees.
Rupees.
Crescent Island[edit]
Cheval's quest for a rope[edit]
From Lynna Village, go south to the coast. Two men live there: Rafton to the south-west and Cheval to the north-east. After you talk to the latter and leave, Ralph will pop in and direct you to Cheval's tomb in the future.
Go back to Lynna Village and to Zelda's age.
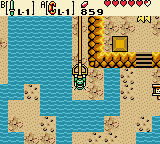
Back to Zelda's age, go to Yoll Graveyard. Destroy the Ghinis, so then talk to Moosh. Get to the north-west corner of the graveyard. Use Moosh to get to the end of the path and push the tombstone there. Inside the grave, use the feather to jump over the water and the power bracelet to pull out the lever as far as possible. Jump back and go up the stairs to the ![]() Zora's Flippers quickly (you can stand between the stones there to see a funny way to lose a heart). Since you use the Zora's Flippers automatically, you just can jump into the water. Swim north and along the northern side of the cave. Eventually you'll get to stairs and the
Zora's Flippers quickly (you can stand between the stones there to see a funny way to lose a heart). Since you use the Zora's Flippers automatically, you just can jump into the water. Swim north and along the northern side of the cave. Eventually you'll get to stairs and the ![]() Cheval Rope. Swim back and leave from the entrance. Lift the stone, jump over the hole and go south.
Cheval Rope. Swim back and leave from the entrance. Lift the stone, jump over the hole and go south.
With the Zora's Flippers you can now visit Syrup Potion Shop in the Yoll Graveyard and buy Gasha Seed and Magic Potion for 300 Rupees each.
Now you can go back to the Lynna City and back to Ambi's age.
Rafton's quest for a map[edit]
Go to the south shore Explore the area west from Rafton's home (south of the tower). Thanks to the new Zora's Flippers, you can cross the water. Use the shovel on the westernmost point after clearing the stones. You'll find another hidden Gasha soil, but it's a low level spot.
Visit Rafton and give him the rope from (his) future. He starts working to build a raft, and he asks you to find a map in the meantime. When you leave, you meet Ralph again, who gives a hint about maps.
Return to the to the time warp. Use the Harp of Ages to go back to Zelda's age.
Here, go to the entrance to the Yoll Graveyard again. Talk to the kangaroo there. He says that his name is Ricky and that he has lost his boxing gloves near the tree on the shore. Go all the way south to the seaside tree. Dig up ![]() Ricky's Gloves there and bring it to him, he will thank you and let you ride in his pouch. Use his jumping ability to jump to the top of the mountain structure to the southwest, then get out of his pouch. Use the Roc's feather and the sword together and pop the man's balloon. He will introduce himself as Tingle and ask if you want to be his friend. Accept his request, and you will receive the
Ricky's Gloves there and bring it to him, he will thank you and let you ride in his pouch. Use his jumping ability to jump to the top of the mountain structure to the southwest, then get out of his pouch. Use the Roc's feather and the sword together and pop the man's balloon. He will introduce himself as Tingle and ask if you want to be his friend. Accept his request, and you will receive the ![]() Island Chart.
Island Chart.
After getting the chart, go to Ambi's age and talk to Rafton. He will tell you the raft is ready and instruct you on how to use it. Get on it, and follow the coast to the east. After a seastorm, you will land on Crescent Island.
Quest for your own belongings[edit]
After reaching Crescent Island, you will find that all of your items have been stolen by the island's inhabitants, the Tokay. In order to continue, you must get all of your items back, as they are necessary to reach the Moonlit Grotto. Without your items, you can't get far. The only thing you can do is to head south to find the Tokay (Rosa in a Linked Game) with your Shovel. While not much, it lets you get past the first obstacles.
Head north to the cave, and dig through the earth obstructions. In this cave, you will have to approach from the north. This Tokay will give you your Wooden Sword back, allowing you to reach the eastern part of the island.
Exit the cave and go west. Push the Vine Sprout east twice, then go back to your landing spot and continue east. The Business Scrub sell the Wooden Shield for 50 Rupees, but ignore it as you can get it from a Tokay for 10 Scent Seeds later. Move the Vine Sprout in the next screen below the ledge. Continue south, then follow the coast north. Enter the hut: an annoying hypocrite thief bully Tokay refuses to return your items. You are forced to trade the Shovel for the Power Bracelet.
Walk back south along the eastern beach. Move the rock with the Power Bracelet, and head down the stairs. The second staircase brings you to the back of the Cucco Hut and get the Bombs back. Once you retrieve your Bombs, you can use them on the cracked block under the Cucco Hut to get a ![]() Gasha Seed.
Gasha Seed.
Back to the hypocrite bully thief, swap the Power Bracelet with the Roc's Feather and go south again, then west jumping over the holes and go north. Bomb the entrance to a cave and go in. Jump over the patches of water, using Bombs on the cracked blocks, and reach the Tokay with the Zora's Flippers. This allows you to swim in the water again.
Switch to the Power Bracelet and re-enter the same cave. Move the rocks at the north-west corner, and dive into the water. This will eventually lead to the stairs that reach the central plateau, and where you can retrieve your Seed Satchel. The Seed Satchel should have 20 Mystery Seeds (which may be harvested if necessary) that can be used to permanently purchase the Roc's Feather; if not, you can harvest them digging the ground.
Obtain both the Roc's Feather (using 10 Mystery Seeds) and Power Bracelet. This lets you move through the south cave (which is one screen down and west from the other cave), and speak with the Tokay carrying your Harp of Ages. As you return to the Cucco Hut, make sure that all three Vine Sprouts are near the associated strange wall.
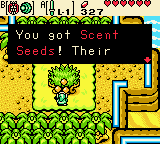
Head to the area between the Cucco Hut and Trading Hut. One wall on the left may be bombed. This leads to the Wild Tokay Minigame, where you need to throw food at each Tokay on the left and right. Completing the game rewards you with a ![]() Scent Seedling. This Scent Seedling should be given to the Tokay found at the North of the island.
Scent Seedling. This Scent Seedling should be given to the Tokay found at the North of the island.
Now return to the Cucco Hut and warp to the Zelda's age. Go down and enter the Hut. Trade the Stink Bag for the ![]() Tasty Meat. With the vines in place, you can reach the Scent Tree. So make your way to it and get
Tasty Meat. With the vines in place, you can reach the Scent Tree. So make your way to it and get ![]() 18 Scent Seeds from it. The Scent Seeds allow you to purchase the Power Bracelet and let you have all necessary items.
18 Scent Seeds from it. The Scent Seeds allow you to purchase the Power Bracelet and let you have all necessary items.
Return to the Past and buy the Power Bracelet for 10 Scent Seeds from the hypocrite bully thief. Exit and reenter and you can buy back the Wooden Shield for another 10 Scent Seeds.
Towards the next dungeon[edit]
With the Roc's Feather, Shovel and Power Bracelet, you have everything you need to reach the Moonlit Grotto. Return to where you retrieved your Harp of Ages, and enter the time portal at the end of the path to reach Zelda's age. Go north to a crossing that has two paths (north and east). Go east and you will get to a cave where a Great Fairy heals you completely. The north path (full of Sand Crabs) leads to the Moonlit Grotto, where you can find the next Essence.
Moonlit Cave[edit]
First part[edit]

Use a Bomb on the broken block to go west. Play the Harp of Ages to kill the Pols Voice and make a chest appear. Inside is the ![]() Dungeon Map.
Dungeon Map.
Go back and continue north. Kill the Mini-Moldorm here to open the east door. In the next room there are two Iron Masks which can only be defeated from behind, due to the Mask protecting them from front. You can ignore them and destroy the first Crystal of four.
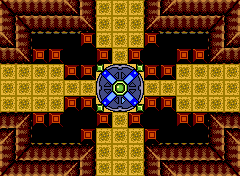
Go north and enter the rotating platform, which points you to the east. Destroy the block near the four statues with a bomb, destroy another block west throwing another Bomb over the fence. Go north and push a block south. Throw another Bomb over that fence. Now push a south block to the north to reach the second Crystal. Destroy it and move the right block north. Move the statue east twice, north twice, west and south to let a ![]() Small Key appear.
Small Key appear.
Take the Small Key, backtrack three rooms and open the north door. In the next room, fall down the pit to the basement. Defeat the enemies here or ignore them and go south. Kill the Mini-Moldorm to open a door south. Play the Harp of Ages to destroy the Pol Voices, which open another door north. Go north through the other exit and up the stairs, then destroy the third Crystal.
Return to the basement and kill the Mini-Moldorm throwing a Bomb over the fences. Exit the room through the newly opened door south. In the end room, throw a Bomb over the fence to turn the switch to red, which awaken an Armos. So kill it with a Bomb (which is easier said than done) or using Mystery Seeds (that have random effects); the reward for killing it is the ![]() Compass. Now take the stairs up to the ground floor.
Compass. Now take the stairs up to the ground floor.
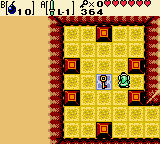
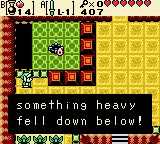
Go west and move the northmost block north and the two other blocks left and right. Another ![]() Small Key will appear. Take it and go back; jump off the ledge and go back to the Wheel Room from the west. Enter the rotating platform which points you to the south. Return to the Wheel Room from the west again and this time the platform will point you to the north. Watch out for the Like Likes, which like to eat your shield. Go east and step on the button to fight four Armos. Kill them all with Bombs or Mystery seeds, which may take some time. When they are all defeated, take the
Small Key will appear. Take it and go back; jump off the ledge and go back to the Wheel Room from the west. Enter the rotating platform which points you to the south. Return to the Wheel Room from the west again and this time the platform will point you to the north. Watch out for the Like Likes, which like to eat your shield. Go east and step on the button to fight four Armos. Kill them all with Bombs or Mystery seeds, which may take some time. When they are all defeated, take the ![]() Small Key and go back west. Open up the door with the Small Key.
Small Key and go back west. Open up the door with the Small Key.
Shield yourself from the Flying Tiles until all Tiles are wasted, then all doors will open so follow the passage to a chest with ![]() 30 Rupees inside. Now go back north and open the door. Continue to the north-east room. Kill all enemies there to receive the
30 Rupees inside. Now go back north and open the door. Continue to the north-east room. Kill all enemies there to receive the ![]() Seed Shooter. Go back and fire a Ember Seed with the Seed Shooter on the torch in the middle of room to open the south door.
Seed Shooter. Go back and fire a Ember Seed with the Seed Shooter on the torch in the middle of room to open the south door.
Now you have to return to the Wheel Room again and take a tour to get to the northern path. Use the Seed Shooter to destroy the fourth and last Crystal. Go back south and you'll see that the rotation platform has disappeared and now a chest is there. Take the ![]() Gasha Seed out of it.
Gasha Seed out of it.
Go fall down to the basement again, then east. The Rotation platform fell down to this room, so now you can access new rooms. Go south; push three block on the east side into the pit, use the Seed Shooter to light up two torches to let another ![]() Gasha Seed appear. Take it and go west, then get back to the rotating room. Continue all the way north to meet the Mini-Boss Subterror.
Gasha Seed appear. Take it and go west, then get back to the rotating room. Continue all the way north to meet the Mini-Boss Subterror.
Miniboss: Subterror[edit]
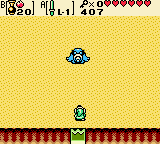
Equip the Shovel and the Sword. When Subterror comes at you, then dig him up and slash at him until he digs back under sand. Repeat this a few times and he will be defeated, but beware: the more you hit him, the faster he will become.
Second part[edit]
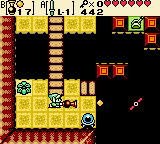
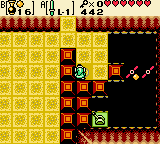
After defeating the mini-boss, exit from the west door and follow the passage north. Kill two Mini-Moldorm and then push the block so to align it with the three other blocks in the room to let a ![]() Small Key appear. Take it and return to the Wheel Room.
Small Key appear. Take it and return to the Wheel Room.
Go west, north and hit the Crystal Ball. Use the Seed Shooter to hit the switch and make a bridge appear. Cross the bridge, hit the second crystal sphere so to rotate the barrier accordingly. Shoot the switch again to open the way to a chest with ![]() 20 Rupees inside. Open the door and go north.
20 Rupees inside. Open the door and go north.
Hit the Crystal Ball once with Seed Shooter and hit the switch. Pass the bridge and hit the switch again. Go north and move the lone block away. Return to the Wheel Room and take the east path. Step on the button once then get off; move on the button again and shoot the switch diagonally with the Seed Shooter: the door will open. Go north and take the ![]() Boss Key from the chest. Jump off the ledge and go all the way north-west. Open the Boss door to meet Shadow Hag.
Boss Key from the chest. Jump off the ledge and go all the way north-west. Open the Boss door to meet Shadow Hag.
Boss: Shadow Hag[edit]
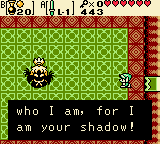
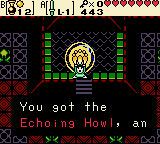
Equip the Seed Shooter and the Sword. The Boss will split up in four shadows which you must avoid. After a while the shadows will merge, but you can't attack while facing her, so you need to turn your back on her (while she spews some Moths) and shot the Seed Shooter at the opposite wall. The seed will bounce back and hit the Shadow Hag behind you. She will then split up again in four shadows. Repeat it a few times (perhaps you need figure out the timing to how to shoot her from behind) and she will be history.
Collect the ![]() Heart Container and go to the next room. Take the
Heart Container and go to the next room. Take the ![]() Echoing Howl:
Echoing Howl:
- "It echoes far across the plains to speak to insolent hearts."

