The Legend of Zelda: Oracle of Ages/Yoll Graveyard and Spirit's Grave
Items:
 Graveyard Key
 Power Ring L-1
 Gasha Seed
 Power Bracelet
 Discovery Ring
 Heart Container
 Eternal Spirit
Yoll Graveyard[edit]
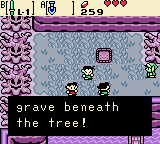
From the Maku Tree first go south and burn the tree to get to the east and find 30 ![]() Rupees in a chest. Afterwards go back to the Maku Tree again. Your first destination is Yoll Graveyard. To get there from the Maku Tree, head east, south, south, east, south, then use the Ember Seeds to burn down the bush in the way. Head east and burn the next Bush too.
Rupees in a chest. Afterwards go back to the Maku Tree again. Your first destination is Yoll Graveyard. To get there from the Maku Tree, head east, south, south, east, south, then use the Ember Seeds to burn down the bush in the way. Head east and burn the next Bush too.
Head east, south, then west. Pay attention to what the boys say about a grave beneath a tree. There's a patch of Soft Soil here for later. Anyway, head south, east, east, and burn the bottom tree. Go on in.
Drop an Ember Seed in the lamp above you, then head east for a second. The ![]() Graveyard Key drops from the ceiling. Head back outside and to the stairs you went down to see the boys. Notice the Gasha Seed spot there. This time head north and push against the gate to open it. Head east, south three screens, and then head into Spirit's Grave, but beware of the Crows which lives here.
Graveyard Key drops from the ceiling. Head back outside and to the stairs you went down to see the boys. Notice the Gasha Seed spot there. This time head north and push against the gate to open it. Head east, south three screens, and then head into Spirit's Grave, but beware of the Crows which lives here.
Spirit's Grave[edit]
Dungeon, part 1[edit]

This is your first real dungeon. From the entrance, head east. Kill the Zols (which split up in smaller Gels upon an attack) and push the bottom block aside. Head up.
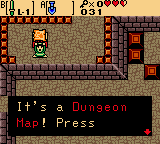
In this room you are introduced to your first puzzle object, the Color Cube. For this puzzle simply push it upwards until it is between the torches. Now go up the stairs to the left, head down, and open the chest for the ![]() Dungeon Map. The map (viewable by pressing
Dungeon Map. The map (viewable by pressing ![]() ) will now show all the rooms in this dungeon. Darkened rooms haven't been visited yet. Anyway, drop off the edge and solve the color block puzzle again. Head north this time.
) will now show all the rooms in this dungeon. Darkened rooms haven't been visited yet. Anyway, drop off the edge and solve the color block puzzle again. Head north this time.
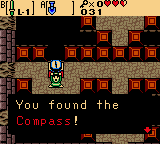
Push the block up and open the chest to the left for the ![]() Compass. Note it tells you to listen for a noise to know if an object is hidden in the room. You'll get to hear this sound soon. See the vine things on the wall to the left? Burn 'em. Head through the opening. Kill the Ropes and push the button. Open the chest for the
Compass. Note it tells you to listen for a noise to know if an object is hidden in the room. You'll get to hear this sound soon. See the vine things on the wall to the left? Burn 'em. Head through the opening. Kill the Ropes and push the button. Open the chest for the ![]() Power Ring L-1. Remember you have to get it appraised before you can use it. Anyway, return to the color cube room.
Power Ring L-1. Remember you have to get it appraised before you can use it. Anyway, return to the color cube room.
Solve the puzzle again and go east. Kill the enemies and head north. Do you hear that noise? That indicates a hidden object. Kill the Ghini (the ghost) and a ![]() Small Key will drop onto the marked square. Grab it and head west. Push the block and open the north door.
Small Key will drop onto the marked square. Grab it and head west. Push the block and open the north door.
Push either block away and open the chest for another ![]() Small Key. Head west. Move the inner block down and the center block right. Walk around the barrier and head east, then north.
Small Key. Head west. Move the inner block down and the center block right. Walk around the barrier and head east, then north.
Push the center block up, the outer blocks out, and finally the other two up. Go to either side and press the button, then do the same with the other side. The left button spawns a chest while the right makes a platform appear. Ride the platform for a ![]() Small Key. Head back south, then west, then north.
Small Key. Head back south, then west, then north.
Step on the platform and get off at the top right. Push the button to the top right and claim your ![]() Gasha Seed. Now get back on the platform and head west. Unlock the door and head south.
Gasha Seed. Now get back on the platform and head west. Unlock the door and head south.
Miniboss: Giant Ghini[edit]
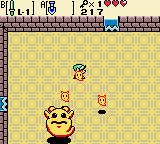
Giant Ghini is simple. Hit the mini-ghosts he shoots out and then hit him. After about six hits he goes down. A warp and a fairy appears. The fairy will heal you while the warp will return you to the dungeon entrance. Anyway, head west and unlock the southern door (Watch out for the 2 Moblins).
Dungeon, part 2[edit]
Push the outer blocks in and the center block aside, then head south. Make your way around while fighting several Stalfos then head north. Light the torches with the Ember Seeds (there's some in the bushes to the south if you've run out) and go down the stairs that appear.
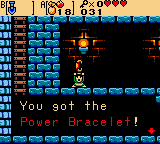
Go down the ladder and up the other for the ![]() Power Bracelet. With this you can lift pots and rocks, simply hold the button it's equipped to and then pull back on the d-pad to pick it up. Now go back upstairs, head south, and open the chest for the
Power Bracelet. With this you can lift pots and rocks, simply hold the button it's equipped to and then pull back on the d-pad to pick it up. Now go back upstairs, head south, and open the chest for the ![]() Discovery Ring (this ring lets you detect hidden Soft Soil patches). Head south.
Discovery Ring (this ring lets you detect hidden Soft Soil patches). Head south.
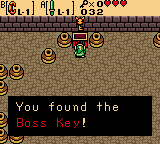
Push the pot onto the button and continue east. Open the chest for the ![]() Boss Key. Continue east and step on the warp. Head north and north again. Watch out for the Wallmasters in this room as they carry you back to the entrance. Go through the east door. Be ready for the monster ahead...
Boss Key. Continue east and step on the warp. Head north and north again. Watch out for the Wallmasters in this room as they carry you back to the entrance. Go through the east door. Be ready for the monster ahead...
Boss: Pumpkin Head[edit]
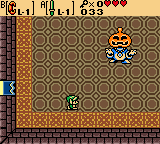
You'll enter the lair of Pumpkin Head, a vengeful spirit. This boss has two stages that repeat. In the first, hack at his body until it vanishes. When his body vanishes, pick up the head and throw it as far away as you can, then slash at the fiery ghost left behind before he can reform his body.
Repeat this a few times and the ghost will finally move on to the afterlife. Collect the ![]() Heart Container. You'll get all your health back, plus one more heart in you Health Meter.
Heart Container. You'll get all your health back, plus one more heart in you Health Meter.
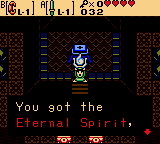
Now head north. Walk up to the pedestal to collect the ![]() Eternal Spirit, an Essence of Time.
Eternal Spirit, an Essence of Time.
- "Even after life ends, it speaks across time to the heart."
