Task 1: Getting the Double Clawshots
Smart Shopping
Start out by heading to a large pool of water and beware of the gusts of wind! They come and go periodically and can blow you off the edge, so use your iron boots whenever it starts getting breezy. On the bottom of the pool are some water bombs and a red rupee, so pick those up if you wish, then head west into a shop. There you'll hook up with Ooccoo again and be able to buy whatever supplies you need without having to return to the surface. A word of warning: you can use Ooccoo to get out of the dungeon at any point to return to the shop, but if you quit the game or head to the pool of water, you won't be able to go back to where you warped out.
After you finish with your shopping trip, head back to the pool of water and go north to the dungeon proper. Hit the blue crystal above the door with either the clawshot or arrows (the wind may blow arrows off course) to open it and proceed.
The Falling Floor
The blue blocks in the next room will fall when you walk on them. If you must step on them, run across. Use your clawshot on the ivy-covered columns to right higher areas, and use the Oocca to glide across gaps. Once you reach the top, go into the next room.
You will then need to head east, but there is no path to get to the door! However, there is a window south of the eastern door, so grapple onto the grate there, go through the hole, and drop to the ledge below . You'll find a gear slot there, so use your Spinner on it to extend the bridge (press ![]() repeatedly). After it is extended, use your Clawshot to grapple to the ivy, then cross the bridge.
repeatedly). After it is extended, use your Clawshot to grapple to the ivy, then cross the bridge.
A Map of the City
Once inside again, jump across the gaps on the north side of the room, then grapple the red target on the ceiling to the southeast. Drop to the platform and retrieve the key from the chest, then use the Clawshot on the grate to get back across the gap. As you head back across the bridge to the central room, a fierce dragon will appear and destroy the bridge. Once you are inside the central chamber grapple the ivy on the pillars to return to the center area.
Run across the blue blocks and enter the west door. Once you are outside, head left and turn another set of gears with the Spinner to activate another bridge. Equip your Iron Boots (or face against the wind diagonally to quickly cross) and march across the bridge, using your new-found Small Key to open the door.
Keep the boots equipped to get past the first wind barrier on the north side of the room, then use the Clawshot on the ivy-covered column to bypass the second. If you have trouble clearing the rushing armored monsters, use the iron boots and lead them onto the first falling blue blocks.
Enter the western door and head left to acquire the dungeon map, then return to the previous room.
Wind Waker
Grapple back across the blue blocks, then drop and make your way to the southeast corner of the room. Walk to the edge of the platform to find a crystal switch behind a pillar. Hit the switch with your Clawshot to deactivate the wind barrier in the southwest corner. Then, make your way to the west side of the room. Remove your Iron Boots and run across the blue blocks to reach the southern door.
In the next room, use the claw shot to break the two pots and collect the hearts. Time your jumps carefully so that you don't get blown away by the periodic wind funnels. Also, use the Gale Boomerang to clear up any tileworms that will throw you into the abyss before you leap over. Exit to the south.
In the south room, defeat the two Lizalfos (knock them off for a cheap victory) there to open a gate above you on the second floor. Grapple up to the opening, then use your Clawshot on the golden ornament on the ceiling to activate the wind funnel in the room's center. Once the fan starts blowing, grab an Oocca and use it to glide toward the funnel, then to the door to the north. Time your jump so you can catch the fan's air and get an upwards boost.
In the next room, grapple the ornament on the ceiling to expose a chest worth 20 rupees if you are low on cash, then grab an Oocca and head east to another chest, this one containing 50 rupees. Then, use the Oocca to get through the hole in the north wall. Use the Clawshot on another golden ornament to create another funnel of wind, then grab an Oocca and fly through the hole in the west wall. Head north through the door.
Descent
Now, you need to go to the bottom of the tower. Start by grappling to the gold ornament above the platform that's to the right of the door, doing so opens a door that you'll need later. Then, use an Oocca to hover to the platform below and to the west. From there, float to the platform directly below. Hover to the platform in the southeast that has a grapple point next to it, then grapple from ledge to ledge to reach the door. On your way down, watch out for horizontal gusts of wind that'll blow you outside, jump past only when the wind is stopped. In the next room, put on the Iron Boots and grapple to the bronze ceiling fixture. The fan will shut down, allowing you to descend to the room below.
The Aeralfos

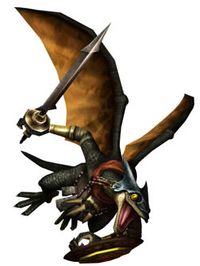
As you land in the room below, a monster will appear to cause you trouble- the mini-boss of the dungeon: Aeralfos. Draw your Clawshot and aim at it as it hovers around. When it puts its shield in front of itself, pull it towards you with the Clawshot, then attack the monster with your sword. After you hit it several times, it changes attack patterns and begins to fly out of the holes in the walls. Scan the room and wait for it to appear, then pull it towards you and finish it with a few more sword strikes. If you are having trouble grappling onto the shield, you can also attack it as it swoops down. Just block the attack and slash. However, if it damages you, it will likely knock you to the blue blocks at the edge of the room, so get off of them before they fall down. Eventually, the flying beast will be defeated.
Double Clawshots

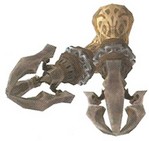
Your reward for defeating the Aeralfos is another Clawshot, which makes two. Now that you've got a handy pair, you can try some new tricks.
Use your new-found item to grapple to the spot on the ceiling, then lower yourself enough so that you can grapple to the ivy by the hole and leave the room.
Task 2: To the Top
Claw to the Compass
When you get back to the west tower, use the Double Clawshots to grapple your way up, going clockwise around the room. Partway up you'll see another golden ornament. Grapple it to open a large door, lower yourself with ![]() , then grapple the red target on the wall on the other side of the gate to get through just before it shuts. In the next room, grapple quickly from pillar to pillar in a zigzag fashion (it helps to hold down
, then grapple the red target on the wall on the other side of the gate to get through just before it shuts. In the next room, grapple quickly from pillar to pillar in a zigzag fashion (it helps to hold down ![]() so you automatically target the next pillar). A nearby chest contains the compass.
so you automatically target the next pillar). A nearby chest contains the compass.
When you continue onwards, you'll find yourself underneath the west bridge. Grapple to the mesh on the bridge's underside, then lower yourself and target the Baba Serpent hanging from the next mesh. After you hit it twice to send it down a long way, then work your way to the end of the bridge. Once there, grapple the ivy and climb up, then enter the central chamber.
Return to the East (West in GameCube)
Once in the central chamber, grapple to the point on the ceiling between the eastern pillars, then grapple to the target above the door. Since the bridge is out, grapple from plant to plant to get across the gap. Head to the east end of the next room, latch onto the grapple point on the ceiling, and lower yourself down to the next level. Grapple across another series of crumbling pillars then drop to the floor. Walk to the north edge of the platform and grapple the target on the far wall. While hanging from the north wall, grapple the target on your right then zip over to the mesh on the wall to receive a treasure chest. Face south and grapple the target to your left then grapple to another mesh screen. Go through the hole in the wall.
Jump or grappel down to the next level. Knock down the Deku Serpents, then grapple to where the plant was hanging. Descend and hit the crystal, then grapple your way through the newly opened gate. Use the mesh and the grapples points to climb up two levels and reach the door. You can grab another two chests in the area, but watch out for Tile Worms.
The Power of Plants
In the next room, a large plant similar to the one you fought in the Forest Temple blocks the way. Stun it with the Clawshot, slice it with your sword, and throw a bomb into the center once it's exposed. With the plant gone, grapple to a falling pillar, then to the nearby vines. Climb around the vine-covered pillar and drop onto the platform. Head counterclockwise and carefully walk along the narrow pathway to reach a treasure chest. Continue onward and grab onto the ledge to your right. Shimmy across the gap to get a Piece of Heart.
Shimmy back across the gap and grapple up to a crumbling pillar. From there, grapple to another pillar, then to an ivy-covered column. Grab onto the target hanging from the ceiling, then descend to the platform below. Defeat the Armored Lizalfos (using Back Slice helps), then go into the next room.
In the next room, grapple onto the plant to the east to get over the first wall, then grab onto the western plant to clear the second wall. Snag the flying plant that's travelling toward the island to the south, then grapple to the pant that floats above the island (you'll probably have to lower yourself a bit), then drop to find a Poe and a chest with an orange rupee. After getting the Poe and the chest, head north via flying plant. Shorten or lengthen the Clawshot's chain to get through the gap in the wall, then transfer to the westernmost flying plant. Ride it to the ledge where the door is.
To the Tower
In the next area, shoot the flying enemies with arrows, then grapple from plant to plant to reach the balcony to the south. Go through the door to find another Piece of Heart. After getting it, use the flying plants to grapple to the central structure. Go through the door and take out the enemies, then grapple up the vines in the northeast. Enlist Midna's aid to transform into a wolf and head across the ropes. When you get to the central column, turn left. Turn back into your human form to kill the spiders and cross the vines, then turn into a wolf again and cross some more ropes. You'll find a Poe near the farthest chest. Engage your senses to locate and destroy it, but be careful about your footing, as the platform is small.
After taking out the Poe head back across the ropes and the ivy, and proceed clockwise through the area. Go through the door, then grapple onto the mesh on the ceiling to your right. Put on the Iron Boots and grapple to the ceiling ornament to shut off the fan, then descend to get the Big Key. Drop down the hole in the floor to reach the third level. Open the chest, then grapple the mesh on the ceiling and descend, but don't let go. While you're hanging, grapple to the bronze ceiling ornament, then equip the Iron Boots to start the fan. Drop to the floor and enter the north door.
Final Climb
When you enter the far north tower, you are greeted with a battle against two Aeralfos, so defeat them in the same manner as you defeated the one earlier to get the Double Clawshots. After they're defeated, grapple up to the grating on the wall, then to the mesh-covered panel. Use the Clawshot to hit the crystal and start the panels turning. Grapple from panel to panel to climb the tower. When you near the top, you'll need to hit another crystal switch to get the last panel rotating. Once it's spinning, grapple to the target above the door then drop to the ledge and enter the boss's lair.
Before you can fight the boss, however, you have to climb up a bit. Grapple onto the grate that's on the pillar near the door, and from there grapple to the vines. Climb the vines to the top of the building, where the dragon will reveal itself.
Twilit Dragon: Argorok

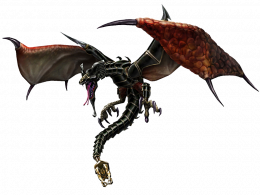
At the top of the fortress, the weather will kick up. Now, high up in the City in the Sky, ARGOROK awaits to do battle.
Stage 1
Argorok has two main ways to attack you in this stage. When it hovers over the battlefield and starts to flap its wings, it'll create a large gust of wind that will push you over the edge if you don't equip your Iron Boots. The second attack involves it swooping across the battlefield in an attempt to ram you with its claws or pull you off the edge with its jetstream, simply dodge the ramming attack and use the Iron Boots to counter the effects of the gusts.
To defeat Argorok, you need to pull off its armor. When the dragon swoops down, use the Clawshot to grab onto the end of its tail, then equip the Iron Boots to ground the boss and destroy part of its armor. The easiest way to accomplish this is by grappling to one of the pillars around the battlefield, then grapple the monster's tail when it gets close. While you can't attack the boss after you pull it to the ground, pulling it down a few times causes it to lose its armor entirely.
Stage 2
Once Argorok has lost its armor and the jewel on its back is exposed, rain begins to fall, causing flying plants to emerge from the ground and hover over the battlefield. Use the Double Clawshots to climb back and forth between the pillars and reach the circle of hovering plants. Wait until the dragon rears its head, then hold ![]() and grapple from plant to plant to avoid Argorok's flames. When the fire dies down, grapple onto Argorok's back and attack the jewel repeatedly. The dragon will fall to the ground, so climb back up to the plants and repeat the process.
and grapple from plant to plant to avoid Argorok's flames. When the fire dies down, grapple onto Argorok's back and attack the jewel repeatedly. The dragon will fall to the ground, so climb back up to the plants and repeat the process.
After Argorok sustains enough damage, it will start breathing fire twice in a row. Turn around and grapple in the other direction to avoid the second flame attack, then grapple to its back and strike the jewel. After about three times of doing this, Argorok will fly into the air and explode before hitting the ground, giving you a Heart Container and the final Mirror Shard.
