Mission Briefing[edit]
Narration: The Core had reached Empyrrean at last. The lush hillsides and tranquil forests of the Arm homeworld were interrupted only by massive gun emplacements, Kbot factories, and laser towers. Success or failure here would determine the final outcome of millenia of war. The morning was unusually calm.
Intell-tap You must move swiftly - before Arm can prepare. Destroy any guards at the Gate. There is a Bertha Cannon active to the south. You have been provided all necessary units for this mission.
Capture the Bertha Cannon
DO SO NOW
Details[edit]

Starting units: Commander, 2 Pyros, Construction KBot
This is another mission in which there won't be a lot of building. The Commander and 2 Pyros will be the assault team, and the Construction KBot will be useful for repairs. The only structures to build are Solar Collectors to power the Commander's D-Gun and the nanolathes for repairs. Reclaiming scrap from enemies may be useful, too, but it's unlikely the mission will last that long.
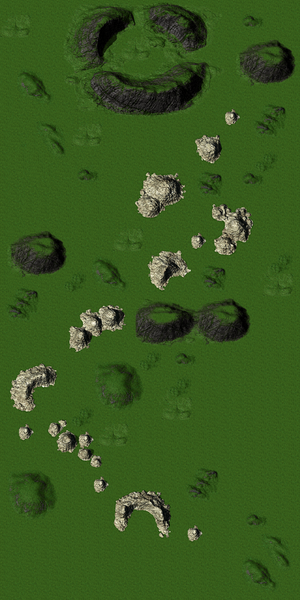
The mission starts in the crater in the center of the northern edge of the map. Immediately the group is attacked by three Zippers, take them down fast and leave the crater to head for the northeastern corner of the map. Nothing can survive long in the crater, despite the shelter it gives from the Bertha. Every roaming Zipper on the map will eventually get into the crater. This also means building here will leave the Commander without the structures or the resources required to build them.
Build the Solar Collectors in the corner, where they'll be out of range of the Bertha. The Zippers seem to keep to patrolling either the eastern or western half of the map, so moving south along one half of the map should bring you into contact with every Zipper that would eventually try to take out the Collectors. Make sure they don't get the chance to do that. They usually stick to groups of three, so be prepared.
The Bertha is in the southern-most crater, near the center of the southern edge of the map. If you walk in a zig-zag pattern down the half of the map you've chosen to attempt, there will be a smaller chance of taking a shell, since the Bertha will have to adjust its aim as you go. If the Commander is hit, repair and move as quickly as possible (certainly don't stand still, especially long enough for another shell to hit). The gun only tracks the Commander, so there's no chance of sending a unit off to save the mission. Either the group gets to the crater and captures the Bertha, or the mission ends when the Commander takes one too many hits (two from the Bertha if repairs don't keep ahead of the damage).
Don't let enemies stop the progression of the units heading south. Take a few shots with the whole group and move on, leaving a Pyro to finish up, then bring the Pyro back to the group to get repaired. Remember the Pyro can run straight to the group, because the Bertha's targeting the Commander. When the gun is in sight, watch it aiming and keep out of the firing line.
Once the distance to the gun has been closed, move the Commander in behind the gun and start capturing (so that the gun has to swing around 180 degrees to shoot the Commander). Set up the Pyros to defend (enemies will almost definitely show up), and repair with the Construction KBot. If the gun swings around, stop capturing and move around behind it again, starting the process over. Eventually the gun will be captured and the mission will end.