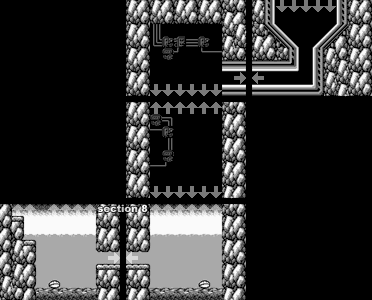
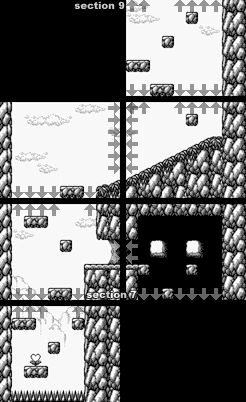
World 3 is on of the more varied Worlds of Trip World, taking place underwater, inside a partially mechanised cave and eventually on top of a mountain. Unlike the previous two Worlds, it lacks clearly defined horizontal sections at some parts, instead possessing larger, connected areas and being not quite as linear.
Section 1

In this first section, either drop into the water right away and dive or change into your flight form and fly as far right as possible; the latter allows you to skip most of this section's underwater part. Once you enter the water, change into your fish form. The enemies here cannot harm you and a single bubble will defeat them, so you should be able to safely continue towards the right. As soon as you reach a hole in the ceiling, swim through it to access the next section.
Section 2

Swim towards the left until you find another hole in the ceiling. In the leftmost part, what appears to be seaweed will reveal itself to be an enemy when you approach it; it is harmless, however, and once it has assumed its true form, a single bubble will defeat it. Swim upwards here.
Section 3

At the beginning of this section is another enemy disguised as seaweed. The screen is open towards the top at this point and theoretically leads to section 4, but Yacopu cannot fly upwards due to the water, so do not bother trying. Continue to the left instead and climb up; don't forget to revert to your normal form when you leave the water.
Section 4

Continuing towards the top here will lead you to the next section, but before you go there, consider walking right to find a tail form power-up; this form may come in handy in section 6. There is a clam-like enemy here, which cannot harm you and closes itself when you approach it, rendering it invincible. If you want to defeat it, using the tail form's attack from a distance is the best way to do so. You may continue further to the right, but doing so would be unwise; if you fall into the hole here, you return to the rightmost part of section 3 and will have to make your way back up, unable to change into your fish form, while your tail form's duration slowly expires.
Section 5

The two enemies here regularly switch between walking on the ground and clinging to the ceiling, temporarily stretching themselves vertically as they do so. They are harmful to touch, so be careful! Two attacks will defeat them, but hitting them can be difficult and dangerous (especially without the tail form), so you should not waste your time with them and risk losing any health.
Section 6

Progress to the left here to encounter a clam-like mini-boss. Defeating this foe is mandatory to move on and can be very difficult. It will try to keep at a short distance from you whenever possible; this means that approaching it makes it back off, whereas walking away from it causes it to follow you. It continuously spews harmful projectiles at you, which are fired more rapidly the lower its health sinks and are hard to avoid; the best way to do so is to stay as close as possible to your opponent. Whenever you attack it, the clam closes and becomes invincible until you back off again, no matter whether you actually cause damage or not, so you will want to make sure that every attack executed against it actually hits it.
The most practical way to defeat this adversary is by using the tail form's special attack, if you still have it; if the form has worn off, you can only beat the clam by advancing on it until it cannot back off any further, then walking as close as possible before kicking (standing at a too great distance will prevent you from harming it, but still cause the clam to close), then backing off again until it opens once more. After four hits, the mini-boss loses its shell and jumps around the room; it is perfectly harmless in this form, however, and only takes one more attack to defeat. Emerging victorious awards you 2000 points and causes the floor to disappear, enabling you to proceed to section 7.
Section 7

Drop through the funnel to automatically be taken to the water-filled part at the bottom; you may need to help Yacopu a little in properly sliding through, however. You can use the time Yacopu spends falling to transform him into his fish form. The clams at the bottom reveal themselves to be creatures when you approach them, which are invulnerable to Yacopu's kicks, but can be defeated in one hit by the fish form's bubbles once they have shown their true face. They cannot harm you and do not get in your way, however, so there is no need to fight them at all. Climb out of the water on the left side, but don't forget to change forms again if you turned into a fish.
Section 8

Leaving section 7 takes you directly to the exit of the cave you have been in. After leaving it (be careful not to fall down into the previous section again), you need to proceed upwards to eventually reach the next section; before doing so, however, you can drop down in the outside area to locate a big heart flower! Collect it if you lost any health during the mini-boss fight (but watch out for the spikes below!), as it will be the last chance to restore life before the World's Boss. Afterwards, jump from block to block to climb upwards until you reach a slope, then ascend it (do not stop or you will slide down again) and continue climbing. There are no enemies in this section.
Section 9

You may pick up the power-up at the start of this section to assume your flower form, which can be helpful. Once you leave the screen towards the right, you enter a long, windy section; the gale will constantly blow you towards the left, so if possible, immediately start and do not stop moving towards the right. Be careful not to change forms in this part, as both your fish and especially flight form will be pushed to the left by the wind with no way of resisting it. Two creatures appear in this section, which are harmless, but may get in your way: a squirrel-like animal and a cow. The former walks against the wind if Yacopu does so, but runs towards the left soon after he stops and may shove him away; jump over it if you can, as having it follow Yacopu closely can prevent him from being blown away by the wind as quickly. The latter will charge at you the moment it appears, which does not cause damage, but can push you back quite a bit if you do not jump over it before it can hit you. Both enemies take four kicks to defeat. Paralysing them with the flower form can be difficult, as the seed are affected by the wind, and succeeding to do so causes the creatures to be blown away as well, so get ready to jump over them if they are in front of you.
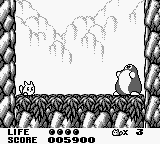
At the bottom of the hole in the rightmost part is the third Boss; in order to gain a small advantage in the fight, a good trick is to change into your flight form before dropping down (make sure no animals are following you, or they will push you over the edge) and fly as far right as possible, then revert back to your normal form while falling; when you reach the boss, you will land directly next to it and be able to attack it right away.
Boss

The Boss does not wait for you to approach it to start attacking it, so be prepared to fight the moment you enter the Boss area; if you still have the flower form, however, you can use it to temporarily stun your opponent, but will not be able to harm it while a flower is growing on its head. If you performed the flight form trick described above at the end of section 9, attack the Boss right away to skip this first phase. Otherwise, it will attack you by sending black projectiles at you, which home in on you; it usually fires two of these in short succession, followed by a pause, so a good way to dodge them is to jump over the first one so that the second projectile starts homing when you are still in the air, causing it to fly right over your head when you fall down again; this may require some practice to time right. Dodge the projectiles if in any way possible while approaching the Boss itself and kick it when you get the chance; note that it may still fire a projectile even while you are attacking.
After being kicked, the Boss will start jumping around; moving too far away from it makes it resume launching projectiles at you, but as long as you stay close, it cannot harm you in this state, so you can score a free hit! It will return to its initial attack form after the second hit, however, so get ready for more dodging. The Boss will continue to alternate between these patterns every time you hit it, but it only takes five kicks to defeat it. Although it can be very difficult to pull off, a helpful trick is to kick the Boss in its harmless state while jumping on top of it at the same time - when it changes patterns, you will be able to stand on top of it safely, but it will not be able to attack you. While you will have to drop off it and turn around in order to attack it, doing so quickly enough prevents it from launching anything at you in time. Once you are victorious, you are sent to World 4.
