The west fountain refreshes all health, the east one is poisonous. There are two rooms and three doors.
D2
In the first room, a trigger under a chest makes the bridge collapse; in order to restore it, all you have to do is to walk on the remaining west portion of the bridge itself.
D3
This is the cross-shaped portion of the floor. Take the south stairs first, in order to reach the Stone on the 5th floor.
In the circular portion of the floor there are 4 chests (6 in the Master System).
D4
This is the larger portion of the floor. There are secret passages in the central room; in order to reveal them, the triggers are in the side "alcoves", along the walls. Both fountains cure poison. The first magic orb is on this floor: it raises Dexterity by 5, but deals 200 damages. The stairs lead to two "dead-end areas" full of chests.
D5
It is easy to miss this floor. Coming from the larger area of the 4th floor, there is a secret passage on the north side of the single-tile stair room: the Yellow Stone of Compassion is hidden there. In the central room, defeat all enemies, then seek carefully for triggers in the walls: one trigger activates the next one, until a northwards bridge appears.
D6
The fountain fully refreshes health. There are 20 chests (42 in the Master System).
D7
Climb back to floor 3, and take any of the other stairs. Short passages lead to this floor. A secret passage allows to bypass the long corridor.
D8
Three Magic Orbs are found on this floor. There is a way to get through all rooms without backtracking (except from the Magic Balls). First, from the stairs, start by going east. In the first room, go north for the first Ball, then continue east. At the second room, exit to the north. In the third room, the obvious exit leads to the second orb, but you have to step on a series of four wall triggers in order to open the secret passage westwards (note that sleep cures poison). In the fourth room, the chest under the reaper activates a ring of fire fields. In the fifth room leave to the south. In the sixth and last room, go south for the last magic orb, then use several "Dispel" spells to leave westwards. After that, the Companions will eventually reach the Altar Room.
BUG ALERT: in the Master System, the last Magic Ball is unreachable.
A
The Companions enter the Altar Room of Love from Despise from the north. Covetous is to the west. The enemies are always randomly generated. You lack one stone to use this altar.
C8
The Companions should come from the Altar Room of Love, that is to the north.
C7-b
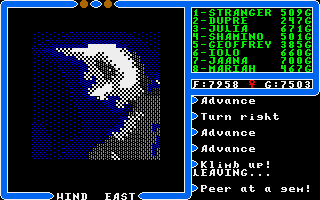
Peer at a gem to locate the secret passage that leads to the Orange Stone of Sacrifice.
A
After getting the 7th stone, go back to the two altar rooms of Love and of Courage and collect the last two thirds of the Three-Parts Key. The enemies are always randomly generated.
C7-a
In the central room to the east, step in the center-left tile to open a secret passage that goes upstairs
BUG ALERT: in some versions (Amiga, Atari ST) the secret passage is bugged, the second stairs up are missing, and the only way up is by casting a "Y-up" spell.
C6
There are three magic orbs on this floor. Each of them raises Strength and Dexterity by 5, but deals 400 damages. The single ladder up leads to corridors with 14 chests (28 in the Master System port), and also one of the two double-ladders leads to a corridor with 15 chests (30 in the Master System).
C5
Only the single-tile room allows to reach up to the 4th floor. There aare 29 chests on this floor (61 in the Master System).
C4
Coming from below, the way "up" in the two rooms is in plain view. If you want to go back down, prepare four or more "Dispel" spells and search for the triggers that open the secret passages. There are just two rooms on the floor, the rest are doors. Eight chests in most ports, but sixteen in the Master System.
C3
The fourth Magic Orb is on this floor. In order to get there, a trigger is in the north-east corner of the room next to it.
C2
A floor without obstacles.
C1
One fountain is harmful, the other one cures poison. If you want to go back down through the room, the trigger is between the wall and the two bodies (under the ghosts) in the north-east.
The area surrounding the entrance to Dungeon Covetous.
When you emerge from the entrance of dungeon Shame, [P]eer at a gem. If you cast a "Blink" spell to the east, the party will teleport close to Vesper and its cheap inn.