Ultima VII: The Black Gate/Dungeon Despise (Shame)
According to the Time Lord, the Guardian disrupted Moon Gates and Orbs using a sphere generator, located in a dungeon in the Serpent Spine mountains. Said mountains surround the city of Britain to the north and west, and indeed two dungeons can be found there.
North: dungeon Shame (optional)[edit]

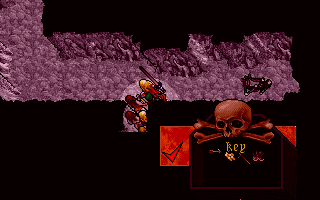
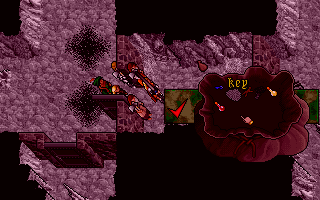
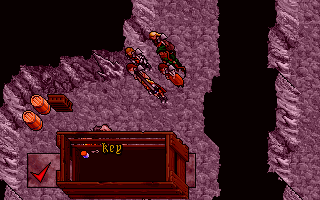
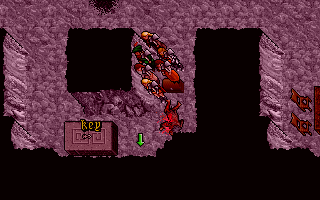
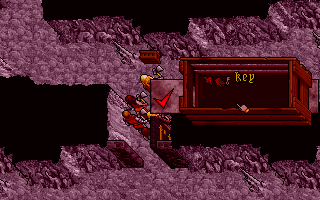
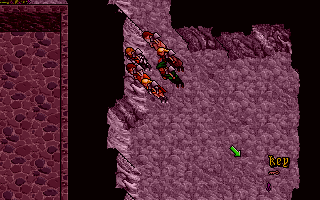
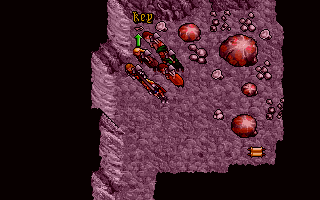
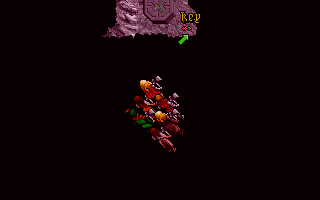
If you played a previous title in the series (Ultima 4, Ultima 5, or Ultima 6), you probably remember that Dungeon Despise was north of Britain, with an access from the north side of the mountains. Now, in Ultima 7 they decided to change that: Dungeon Despise and Shame got swapped.
- As soon as you enter, take the key (n.1) from the nearby corpse. Operate the switch (the grate nearby can be opened by a key on the other side). Use the key n.1 to unlock the door.
- Beware! A fire-spitting trap is in the corridor to the north. In order to deactivate it, ask all your companions to leave and wait here, then prepare the "disarm trap" spell. As soon as you deactivate the trap, you can operate the switch, but the effect is unknown.
- Cast "unlock magic" on the east door, take the key (n.2) in the bag, then use it on the door to the south. The next door is unlocked by the key n.1.
- A bag with some food is in the middle of the corridor. The doors to the north host a few trolls with their stuff. Cast "magic unlock" on one door to the south. Stick to the east wall to avoid a fire field trap. Cast "magic unlock" on the next door, then use the key n.1 to unlock the chest. Operate the switch: it opens a gate that grants access to the teleporters.
- Back in the corridor, us key n.2 to open the next door. Loot the crates and barrels, and make sure you take key n.3. Back in the corridor, cast "magic unlock" on the west door and explore the north-south corridor for some loot. Open the south unlocked door, then pick the lock inside to access a bag.
- Two more doors are to the north. Ignore the locked one, operate the switch to open the next one. A secret passage to the south leads you to the other side of the previous door, but it is protected by fire field traps. Another locked door beyond the first blocks you, therefore go back north of the secret passage and continue west. Cast "unlock magic" on the door. Be prepared to fight a hostile mage. Use the key n.4 on the south altar and open the north-west semi-invisible chest. Ignore the flames to the north-east and backtrack.
One major branch of the dungeon has been explored. It is time for the east branch.
- Go back to the location with the bag (key n.2). After the second magically locked door, a locked chest can be found to the north. The door to the east is unlocked, but it is just a dead end. Going south, beware of the invisible caltrops! Also, there is a teleporter that sends you back north; find a secret passage in the west wall and walk around it.
- Ignore the first door and focus on your left-hand side. Cast "magic unlock" on the next north door and get the key (n.5). Key n.3 opens the door at the end of the corridor.
- You will see three locked chests. Twe keys (n.6 and n.7) are at the end of the south-east corridor. The purple key opens two of the three chests.
- After the three chests you will get at at fork. The west tunnel leads to a green teleporter receiver. Continue east. Walk through the fake wall near the spring and cross the bridge.
- One plaque reads: "Do not enter". Indeed, red dragons dwell beyond the door. Apart from the visible hoard, a semi-invisible chest is to the south. Key n.1 opens it. Stay away from the east corrior: it is a dead-end whose sole purpose it make dragons respawn on your way back.
- The next branch east opens to a series of cells. A green dragon can be met at the end.
- More to the south, key n.2 unlocks a door. The fountain makes invisible anybody who drinks from it. A teleporter sends you back north of the bridge.
- Retrace your steps. Key n.1 opens the two connected doors on the south side. The chest lock must be picked. The next door south gives access to a long corridor. Beware of invisible caltrops! At the end of the corridor, you will meet Garok al-Mat. If you agree to help him, he will reward you with 6 black pearls, 8 garlic, and 4 bloodmoss, then he will teleport away. The door next to the mage is locked, but you have been already on the other side. Backtrack.
- Time for the last door of this section. Key n.5 opens it. If you operated the switch near the trolls, the last metal gate should be open.
You are now in the teleporters room, close to the end of this dungeon.
- The green teleporter is a receiver. Of the two purple teleporters, the northern one simply leads to an area that you visited already. Thus, step on the southern one.
- You will arrive on top of key n.8, and probably some gazers will attack you. The key opens the first locked gate that you saw near the entrance. You can exit and rest, if you want. The scroll hints at a secret passage, that is actually in the north-east corner of this room.
- Go north in the secret passage, pick up key n.9, and step on the green teleporter.
- The party is now in a narrow room. In order to get on the stairs, walk north and around them. On top of Garok's tower, use key n.1 on the locked chest. When you are done, go downstairs and step on the southern teleporter.
- This room is actually in #Dungeon Despise. The door can only be open with key n.1 from Dungeon Shame.
Probably by now you want to exit from this dungeon. Go south, at the first fork turn east. When you step on the teleporter, go south and keep doing so after the second teleporter.
Loot list[edit]
Apart from the keys, there are several items of interest in Dungeon Shame.
- Loot, south branch:
- Corpse near entrance: key n.1, 15 Gold Coins, swamp boots
- Bag between magically locked doors: key n.2, yellow healing potion, red curing potion, 5 spidersilk, 2 mandrakes, 5 nightshades.
- Trolls loot: 13 food, magic shield, flaming oil, 10 gold coins, black pearl, shield.
- Locked chest n.1: purple protection potion, gold nugget, fire wand.
- Bell room loot: 3 gold bars, 8 burst arrows, 3 food, sleeping powder, key n.3.
- North-south corridor, bag: 6 love arrows, swamp boots.
- North-south corridor, corpses: magic axe, 23 magic bolts, non-magic weapons and armour parts.
- Skeletons dining room: 5 spidersilk, 3 ginseng.
- Corpse and backpack: magic axe, 3 yellow healing potions.
- Bag beyond three switch doors: 8 different reagents.
- Semi-invisible chest: yellow healing potion, orange awaken potion, lightning whip, armour.
- Loot, east branch:
- Locked chest in north dead-end: 72 gold coins, 20 magic arrows.
- Crate: 5 bloodmoss, 5 ginseng, key n.5.
- Chest beyond two doors:
- Chest near SE dead-end: magic axe, golden bar.
- Chest after switch doors: magic gloves, poison dagger.
- Bag near spring: gold nugget, 11 lockpicks.
- Dragons hoard: 787 gold coins, 3 gems, 3 ginseng, magic bow, invisibility dust.
- Dragons chest: 10 spidersilk, 10 mandrakes, 10 nightshades, magic sword, 250 gold coins.
- Backpack in cell: magic boomerang
- Chest beyond two doors: ring of protection.
- Bag near garbage: 4 food.
- Loot, teleporters area:
- Garok's tower and chest: Magebane sword, 2 yellow healing potions.
- Dungeon Despise room: 2 food, 15 garlic, 10 mandrake, 111 gold coins.
West: dungeon Despise[edit]

(monk of Empath Abbey)
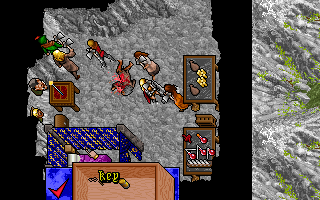
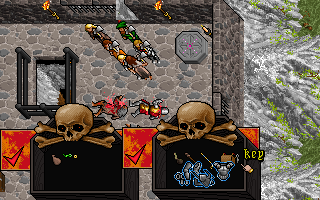
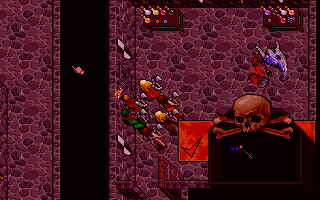
Your goal in Dungeon Deceit is to find the Sphere Generator.
While Dungeon Shame had a thing with keys, actual Dungeon Deceit plays using teleport traps.
Right at the start, the path branches in three directions. East and west are shorter, therefore you can explore them first.
- East: follow the tunnel that bends south, operate the switch to open the door, and loot the corpses. Backtrack to the entrance.
- West: the monolith is enchanted with four fire-throwing traps, one per side, therefore you should cst "disarm trap" several times. West of the monolith you can meet Wayne, the true third monk of Empath Abbey. He says nothing important, though. You can backtrack again.
- Actually, follow the wall to your left, but beware of poison and fire field traps! You will eventually reach a locked door to the north. It can only be opened with a key from Dungeon Shame.
- Keep following your left wall to the east, and a teleporter will send you one further crossroad eastwards. To the north is a dead end full of spiders and poison traps, to the south another teleporter that sends you near the entrance. Thus, keep going east. At the end of a dead end is a teleport "trap" that actually sends you to the next portion of the dungeon.
- Follow the tunnel south. At the crossroads, west is a dead end, north-east is the way out, therefore keep going south. Ignore the magically locked door for the time being and keep following the tunnel.
- At the fork, north is yet another dead end. Beware of the invisible caltrops to the west! They are actually three sets, so hug tightly the north wall.
- Three large sets of fire fields, sleep fiels, and poison fields announce the approaching of your destination. A red moongate prevents you from accessing the generator, as the Time Lord expected. Follow his advice and cast "mark" on a colored stone, then backtrack to the exit, or complete the exploration of this dungeon.
Remember the magically locked door? It is a side area, known as "Selwyn's hideout".
- Cast "unlock magic" on the three consecutive doors, and you will reach a furnished bedroom. Dispatch the hostile mage and loot everything. The key for the chest is in the bedstand.
- The north-west corner of the room has an invisible staircase. Defeat the enemies; in particular, the paladin is the hardest foe, as he is wearing a full set of magic armor. The mage (Selwyn?) and the paladin carry one key each, that open the two chests in the room.
- There are three teleporters out of this room. Two are quite obvious, the third one is the mirror. The north-west teleporter sends the party to the apple orchard next to Castle Britannia (they probably meant to use it to murder Lord British). The second teleporter sends you to a sub-dungeon where two more teleporters can be found. The teleporting mirror sends you to a hall near to two more teleporting mirrors (plus a broken one).
- Sub-dungeon: The party starts in a small room, but the north wall is a secret passage. When you emerge from it, stick to the south wall and avoid the sleep fields. Ignore the chests for now, as they are separated by an invisible wall. Follow the corridor and cast "magic unlock" on the door. Inside, operate the swith and take the blue key from the mage's corpse. You can now go and loot al the chests, through another secret passage. When you are done, go back to the mage's room. The west/left teleporter sends you back to the bedroom in Dungeon Despise, the east/right one to the coast south-west of Yew. Right now, you want to go back and try the teleporting mirror.
- Hall of mirrors: The northern mirror sends you to Selwyn's fortress (in the forest south-west of Yew), the south one to a pirate camp north-east of the Shrine of Sacrifice.
- Selwyn's tower: The lever that opens the exit is on the upper floor, partially hidden by the south window. There are plenty of magical items to loot in this tower. When you are done, you can go back again to the dungeon and try out the last teleporter.
- Pirate cove: Fight the pirates and get some loot. The party is now very far away from Dungeon Despise, but you explored all of it.
Loot[edit]
- East branch corpses: 15+4 gold coins, 4 magic bolts, 3 gems, 1 vial of silver serpent venom, some non-magical weapons and armour parts (plus: 1 black pearl in the nearby room).
Most loot is in Slewyn's hideout and annexed areas.
- Underground bedroom: 34+47 gold coins, red curing potion, 6 ginseng, fire wand.
- Bags: 8 food
- Nightstand: key, magician's wand, invisibility dust
- Chest: plenty of reagents
- Upper floor:
- Mage's chest: defence sword, lightning wand, fire wand
- Paladin's chest: 92 gold coins, great dagger, lightning whip
- Sub-dungeon:
- Dead mage's room: 2 red curing potions, 2 orange awaken potions, 1 yellow healing potion, 2 white light potions, 1 purple protection potion, 2 black invisibility potions, 2 protection rings, 1 plain ring, 1 lightning wand, 1 key
- Eight locked chests: 6 magic armor parts (gauntlets, legs, body, shield, gorget, boots), 5 gold coins, 25 magic bolts, 3 vials of silver serpent venom, 1 glass sword, 15 starburst.
- Hall of mirrors: lightning whip, defence sword.
- Selwyn's tower, ground floor: 7 food, 2 yellow healing potions, 1 black invisibility potion, 1 white light potion, 18 ginseng.
- Selwyn's tower, first floor: firedoom staff, 3 invisibility rings, 3 protection rings, 3 regenration rings, 25 black pearls, fire wand, 15 bloodmoss, 5 nightshades, 5 mandrakes, 11 garlics, 9 ginsengs, 12 spidersilks, 13 sulfur ashes.
- Pirate cove: 6 food, magician's wand, sleep dust, invisibility powder, many torches, many powder kegs, many flaming oils
Next step[edit]
Once you are out of Dungeon Despise, use the Orb of the Moon and talk with the Time Lord. He will explain that you need Nicodemus' enchanted hourglass. We are off to Empath Abbey again.
Also, remember to pick up the magic carpet that was left at the entrance of Despise.
When you ask Nicodemus, he reveals that he gave the hourglass away, because it lost its enchantment.
Your next quest is to retrieve the hourglass and restore the ether, so that magic will work again and Nicodemus will be able to enchant the hourglass again.