Josh[edit]
Walk forward, toward the back wall that Josh fell from. This will trigger a trippy scene. Walk back there afterward to trigger another scene, and then again to trigger the strangest scene of them all. Punch the enormous pig head with ![]() to conclude the game's first playable segment as Josh.
to conclude the game's first playable segment as Josh.
Sam[edit]
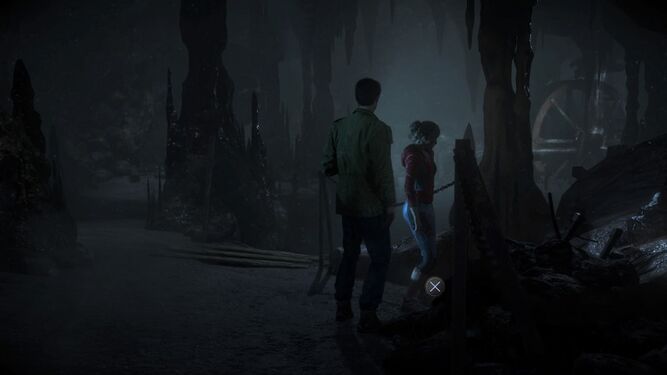
The perspective switches back to Mike and Sam, who are still on the hunt for Josh. Approach a dead end that you can interact with to drop into the water, but don't drop in just yet; hidden off to the right of this area is Fortune Totem #5. Continue to refrain from dropping in and head off to the left instead; a path here will lead you to Twins Clue #19, Beth's watch.
-
Directly to the right of the drop-off into the water is a totem.
-
At the end of a winding path to the left of the drop-off point is a clue.


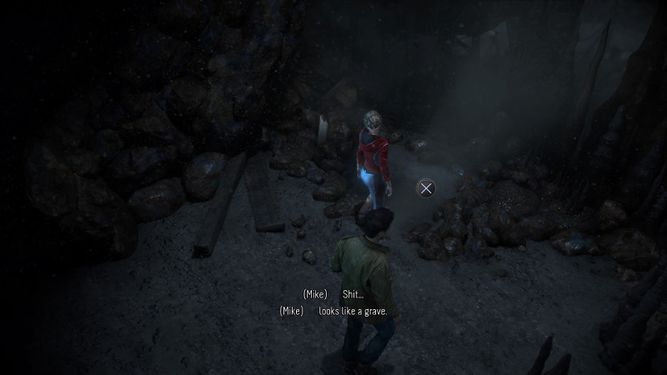
Now return to the drop-off point to finally take it into the water. Once inside, keep left. Climb up the first ledge you see to find the final clue of the game, Twins Clue #20. Just make sure to flip through all pages of the makeshift journal to collect the clue. This is also a butterfly effect; if you've found all twins clues up until this point, concluding the search with the journal, Sam will inform Josh of the fate suffered by Hannah once they find him. While this may seem unnecessary now, it is a matter of some form of life and death for Josh. You should also obtain the gold trophy for having obtained all twins clues.
Now that all clues have been collected, only a few totems remain. Drop back into the water and take the path forward this time, toward the right. Climb up out of the water at the next ledge and open the door to trigger a scene. The way this scene goes is dependent on how many people have died throughout your playthrough. Regardless, the duo will come across Josh immediately afterward. Sam leaves the boys behind to climb her way out of the mines, and the perspective then switches back to Josh.
Josh[edit]

Follow Mike for a bit, but before continuing to do so, take a left at the first fork. At the very end of this area is Fortune Totem #6. Return to the fork and follow Mike to the right this time. This path leads back to the water. Drop down and walk a bit to trigger a scene. If Sam showed Josh the journal, he will recognize the Wendigo that attacks as Hannah, and the Wendigo, presumably recognizing him as well, drags him off. If Josh wasn't made aware of Hannah's fate, he will not recognize the Wendigo as Hannah, and she will kill him on the spot. Regardless, Mike will escape on his own, and the perspective switches yet again. If Matt and/or Jessica are still alive, the story will move back to them.
Matt/Jessica[edit]

If both characters are alive or if only Matt is alive, you'll be playing as Matt. If Matt is dead, you'll be playing as Jessica. This guide assumes you've saved both characters, and so will be from the perspective of Matt. After lighting the lantern, press ![]() to block a scared Jessica's attack. You can then warn her of the monster in the mines, since Matt caught a glimpse of it when he was himself attacked, or question her to hear her interpretation of the night's events. Either way, you'll have to lead her out of the mines. Follow the narrow left path to progress the story, or examine the area to the right beforehand to have Matt and Jess trade stories. The left path leads to some mine cart tracks; look for the cart, then behind it for Loss Totem #6. Keep walking and Matt will notice that a Wendigo is on its way toward them. To save both characters, choose to hide. Don't move, but be prepared to press
to block a scared Jessica's attack. You can then warn her of the monster in the mines, since Matt caught a glimpse of it when he was himself attacked, or question her to hear her interpretation of the night's events. Either way, you'll have to lead her out of the mines. Follow the narrow left path to progress the story, or examine the area to the right beforehand to have Matt and Jess trade stories. The left path leads to some mine cart tracks; look for the cart, then behind it for Loss Totem #6. Keep walking and Matt will notice that a Wendigo is on its way toward them. To save both characters, choose to hide. Don't move, but be prepared to press ![]() to catch Jess once the prompt leaves the screen. Then choose to hide together and don't move again to conclude this portion of the chapter.
to catch Jess once the prompt leaves the screen. Then choose to hide together and don't move again to conclude this portion of the chapter.
Sam[edit]

For the quickest path, choose to jump (![]() ,
, ![]() ,
, ![]() ), then grab the overhang (
), then grab the overhang (![]() ,
, ![]() ,
, ![]() ). For the final totem (and final collectible) in the game, take the right path at the fork, but hang to the left. Danger Totem #6 is sitting by a tree. Now that all collectibles are out of the way, all that's left to do is finish the story. Progress down the hill, then drop down into the water. Climb up the ledge at the end of this straightforward path, then walk up the hill to come across a cliff. Drop down to trigger a scene followed by a QTE. Press
). For the final totem (and final collectible) in the game, take the right path at the fork, but hang to the left. Danger Totem #6 is sitting by a tree. Now that all collectibles are out of the way, all that's left to do is finish the story. Progress down the hill, then drop down into the water. Climb up the ledge at the end of this straightforward path, then walk up the hill to come across a cliff. Drop down to trigger a scene followed by a QTE. Press ![]() and
and ![]() to execute it successfully and escape the Wendigo, then smash your way into the house. Follow Mike down into the basement to trigger the final action sequence of the game. Do the following to save Sam and all her friends:
to execute it successfully and escape the Wendigo, then smash your way into the house. Follow Mike down into the basement to trigger the final action sequence of the game. Do the following to save Sam and all her friends:
- Don't move.
- As Mike moves toward the bulb, again, don't move.
- Choose to save Mike, then don't move.
- Choose to hide, then don't move.
- Choose to hide again, then don't move again. Sam will then run for the switch on her own, concluding the final showdown.
Congratulations on making it through the night! The credits and some immediate aftermath follows.