Matt[edit]

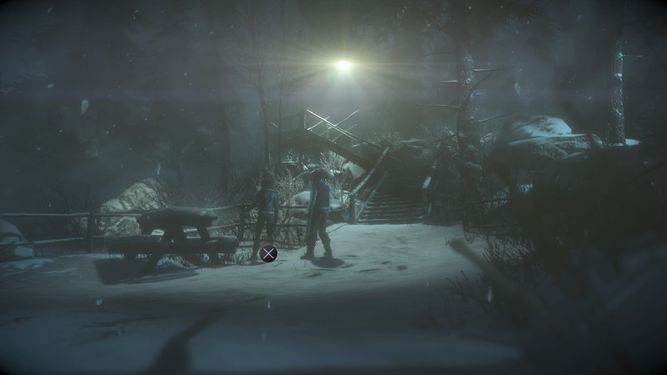
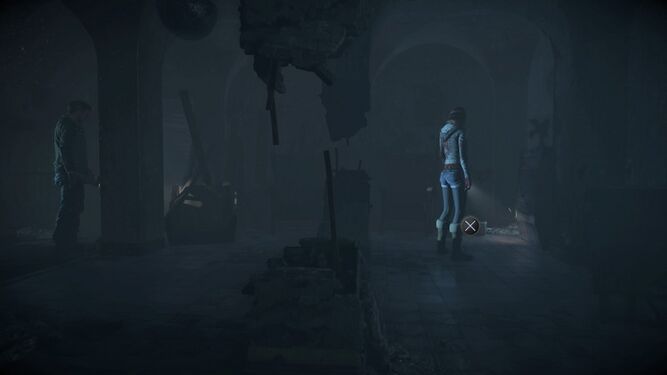
Matt and Emily have found themselves surrounded by elk on the edge of a cliff. How you choose to handle this situation is a butterfly effect. Begin to walk through them slowly and Emily will follow. Eventually, a prompt will pop up which will allow you to attack one of the elk with Matt's axe. If you do choose to attack, the herd will become violent; fail the following QTE and Matt will be killed. With this in mind, it's best to just ignore the prompt and keep walking. Shortly afterward, the pair will clear the herd. You will now play as Emily.
Emily[edit]
Follow the path up to finally reach the tower. A light will shine on the duo, which is your cue to pick up Guidance Totem #6 by the fence to the left. Now climb some stairs and some ladders to reach the top of the tower. Open a lone locker to the left for Twins Clue #11, a missing poster for Hannah. You can attempt to interact with the radio, but it's no use; you'll need to turn on the power first. A door in the top-right corner of the room leads to the outside of the tower, so as there appears to be no switch indoors, open it and head out.
-
This Guidance Totem is at the base of the tower.
-
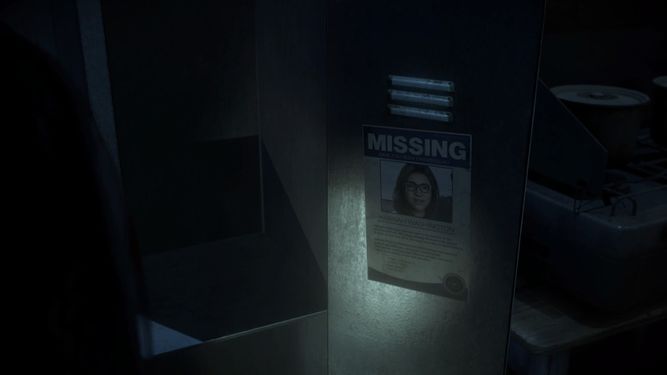
The first clue in the tower is a missing poster inside a locker.


Head around the right of the tower to find a box containing an emergency flare. Opening it leads into a butterfly effect: will you keep the flare gun for yourself or hand it over to Matt? While both characters can use the gun to help themselves in the future, Matt can use it to save himself from death. If you've been following this guide, giving the gun to Matt is recommended. However, if you chose to agree with Emily as Matt earlier, don't hand it over to him, as he will fire it off on the spot and waste it. In this case, it is still possible for Matt to save himself as long as you choose not to help Emily later on.

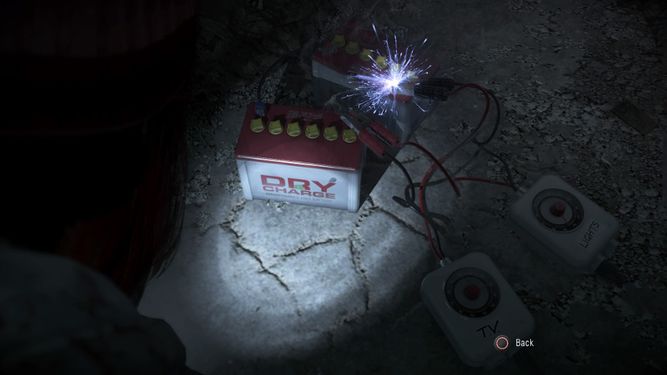
Once that decision's made, return to the door and interact with the fuse box right next to it. Now that the power's on, you can head back inside and use the radio, but first, turn on the printer for Twins Clue #12, a missing poster for Beth. Now, finally, use the radio to contact help. You will have some choices on how to speak with the park ranger on the other end, but whatever you say, Emily's message will make it across. A dramatic scene and a QTE will follow. Simply press ![]() to dodge a falling desk and Emily will hang on. As the tower makes its descent, you will gain control of Matt, who is presented with a butterfly effect decision right off the bat.
to dodge a falling desk and Emily will hang on. As the tower makes its descent, you will gain control of Matt, who is presented with a butterfly effect decision right off the bat.
Matt[edit]

If Emily gave Matt the flare gun earlier and he hasn't used it yet, choose to save Emily both times. This will improve your relationship with her and Matt will still have the chance to use the flare gun to save himself. This is the ideal scenario, but if Matt doesn't have any flares, choose to save yourself, as this is now the only chance he has at survival.
If you've made the right decisions, Matt should have attempted to save Emily and still have a flare. You can now defend yourself in the ensuing attack: aim and shoot at the creature with ![]() to escape its clutches, and Matt will be safe for a good while.
to escape its clutches, and Matt will be safe for a good while.
Ashley[edit]

Back at the mansion, Chris and Ashley are on the search for Sam. Follow Chris down the stairs and into the theater, and he'll stop as the two discuss what happened to Josh. Take the lead and head through the only door here, which will abruptly shut behind them. Ignore it and continue on your way. You can attempt to open another door here, but it won't allow you entry, so continue around the corner to the only other door. A "ghost" will then pass by, presenting a choice in conversation: insisting you saw a ghost despite Chris' arguments will hurt your relationship, while choosing to concede will improve it. After the conversation, follow Chris down the stairs. In the big open room, head left to find a dollhouse. Open a tiny door at the top to discover that you need a key to open it.
Return to the center of the room and approach Chris for another spooky encounter. Approach the wall at the end of the narrow hallway that the painting flies off of to find the key. Return to the dollhouse and open it. After the scene, grab the diary and flip back a page to find a hidden entry, then flip forward. Once that's done, follow Chris down the hall and head into the next room to find some clues. On the workbench to the right is a book. Pick it up and turn the page for Mystery Man Clue #19. Beneath the book is a pair of scissors which double as a butterfly effect. Choosing to grab them will allow Ashley the opportunity to defend herself later on as well as unlock a silver trophy. Turn right at the workbench to find Mystery Man Clue #17, a hidden camera.
-
Find this clue, a lighting catalogue, on a workbench to the right of the room that has fog spilling out of it.
-
To the right of the workbench is another clue: a hidden camera.


Continue to follow Chris down the path and into the dilapidated building. He will eventually come to a stop, at which point you can talk to him about Hannah. Choose to be sympathetic rather than dismissive in order to gain some points with him, then go back to following him. Before descending down some stairs, make a right turn to find a box with some mysterious contents in the top corner of the room. Peel the label back to obtain Mystery Man Clue #18. Approach the stairs to trigger another conversation, at which point you can act courageous to impress Chris. Follow him down a couple of sets of stairs for another opportunity to speak with him, this time about the clues you've obtained. Head down the hall and turn a corner to find some sparks close to the camera. Approach them for Mystery Man Clue #20.
-
To the right of some stairs you can descend is a clue.
-
This clue will be a little out of focus due to its proximity to the camera, but the sparks should make its presence clear.


After walking down a long hallway, turn a corner and walk towards the camera to enter the psycho's lair, where you'll be able to pick up some more clues. Mystery Man Clue #23 is directly to the left of where you enter, some meat hooks hanging above a sink. Mystery Man Clue #21 is directly across from the hooks, to the right of the room.
-
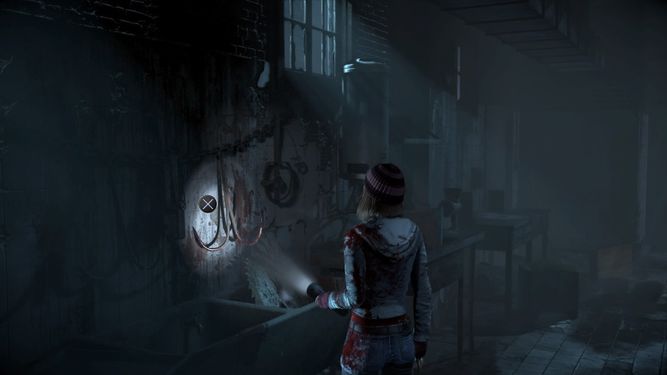
To the left of the entrance is your first clue, some bloody hooks.
-

Across from the hooks is your second clue, the corpse of a pig.


Return to the left side of the room and walk forward. At the back wall is a corkboard where pictures of all the game's characters are hanging. Examine it for Mystery Man Clue #22. Depending on who you chose as your least favored character in one of your sessions with Dr. Hill, their eyes will be scratched out. Now that all clues have been collected, you can follow Chris out of the lair. What follows is a butterfly effect, though it's not an important one.
If you choose to investigate rather than follow Chris, you'll spot the psycho in his workshop as a bonus and be reunited with Chris shortly afterward. Either way, head through the double doors to encounter Sam or, if she escaped the psycho in the previous chapter, a dummy dressed as Sam. What follows is an attack by the psycho. He knocks Chris out, so now is your opportunity to retaliate with the scissors for that silver trophy. Aim and press ![]() to attack, but be warned; this doesn't aid Ashley in escaping the psycho, and actually only results in giving her a black eye. A scene and another butterfly effect follows.
to attack, but be warned; this doesn't aid Ashley in escaping the psycho, and actually only results in giving her a black eye. A scene and another butterfly effect follows.
Chris[edit]
Chris and Ashley are now trapped, and once again, Chris is presented with a deadly decision: shoot Ashley, shoot himself, or wait for the blades to drop down and kill the both of them. While this butterfly effect appears deadly no matter which decision you make on the surface, it's actually only deadly if you choose to shoot Ashley. Either wait it out or shoot Chris and not only will their relationship be maxed, but both characters will make it out alive.
Another choice-free segment with Dr. Hill follows, so just sit back as he yells at you.