Sam[edit]

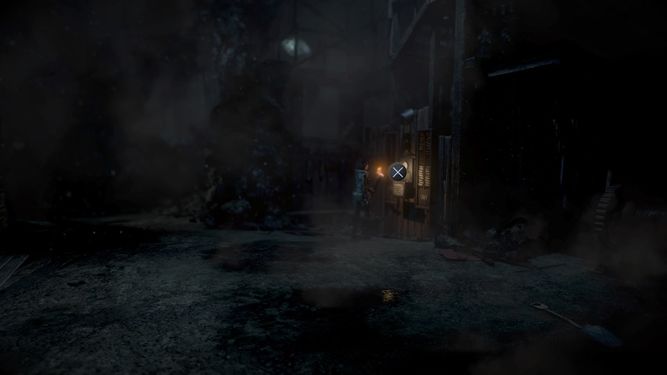
If Sam escaped the psycho in the fifth chapter, she'll be able to explore the psycho's lair by kicking down the grate in her path. This area is chock-full of collectibles, so make sure to scan every corner if you want the gold trophy for collecting all clues pertaining to the mystery man. As soon as you enter, begin by heading directly to the right; here is a cork board that you can interact with for Mystery Man Clue #26. In a desk drawer to the left is a folder that you can look through for Mystery Man Clue #30. To the left of the desk is a shelf holding a smartphone which you can unlock and scroll through for Mystery Man Clue #27. Continue forward and make a left turn. Hiding behind some boxes on a desk is a smaller cork board on the wall, which you can examine for Mystery Man Clue #28.

Now head right and through the exit. Around a corner, enter the next room and head down the short set of steps. Across from them is a door with a peephole, which you can look through to catch a glimpse of the psycho. Walk past another set of stairs to find a table holding a tape recorder. Activate it for Mystery Man Clue #29. Now head up the stairs and make a right turn to find some blue double doors. Open them to enter another room, where you'll find the final set of clues. If Sam was caught by the psycho, this is where the chapter will begin for her. Examine the mannequin in Sam's clothes for Mystery Man Clue #24 and Mystery Man Clue #25 to earn the trophy and conclude your clue hunt. Approach the door to the left of the dummy to trigger a scene. Grab Sam's backpack and head down the stairs. Open the door to the left for another scene. Help push the door open for one final scene before a perspective switch.
Emily[edit]

Swing back and forth (![]() ) until the wire Emily is hanging from gets cut, at which point you must press
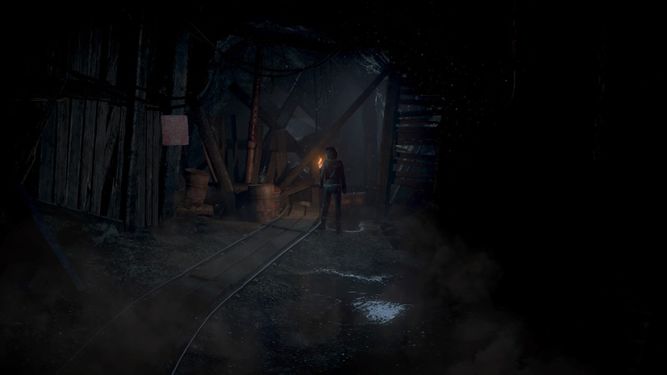
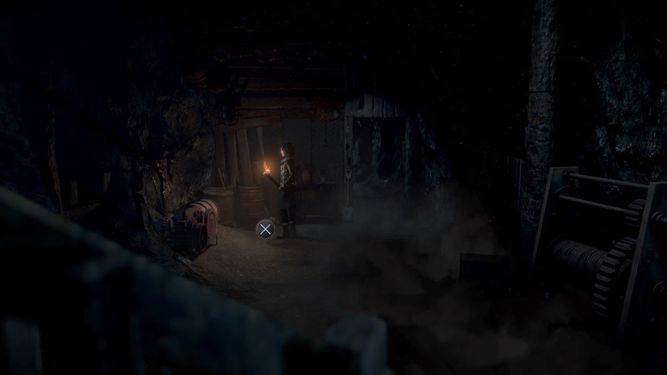
) until the wire Emily is hanging from gets cut, at which point you must press ![]() to hang on. With nowhere else to go, head into the tunnel. Emily will light a torch which should help with visibility. Just follow the path, continuing on down some stairs, until you reach a large, impassible wooden door. Follow the tracks left to find a mine cart and, to the left of the cart, a chest. Open it up to find 1952 Clue #15, a photograph. Interact with the cart to send it down the hill and through the door, opening up a path. There's an elevator here, but you can't use it just yet. Look across from the elevator to the right to find a clocking-in machine that you can examine for 1952 Clue #14. From here, head right until you find a ladder. A short walk behind the ladder, along some blocked-off mine cart tracks, is Death Totem #5.
to hang on. With nowhere else to go, head into the tunnel. Emily will light a torch which should help with visibility. Just follow the path, continuing on down some stairs, until you reach a large, impassible wooden door. Follow the tracks left to find a mine cart and, to the left of the cart, a chest. Open it up to find 1952 Clue #15, a photograph. Interact with the cart to send it down the hill and through the door, opening up a path. There's an elevator here, but you can't use it just yet. Look across from the elevator to the right to find a clocking-in machine that you can examine for 1952 Clue #14. From here, head right until you find a ladder. A short walk behind the ladder, along some blocked-off mine cart tracks, is Death Totem #5.
-
To the right of the elevator is a clocking-in machine.
-
Behind a ladder that Emily can climb is an easily missable totem.


Return to the ladder and climb up. After a scene in which Emily's bad luck continues to be relentless, unlock her phone (![]() ) for an alternative source of light. Follow the path forward, pushing through some wooden boards, to come across an open area. In a nook to the right is a toolbox on a barrel. Open it up to find another photograph, which you can then turn over for 1952 Clue #16. Examine the back wall to begin a QTE with some options: choose to climb (
) for an alternative source of light. Follow the path forward, pushing through some wooden boards, to come across an open area. In a nook to the right is a toolbox on a barrel. Open it up to find another photograph, which you can then turn over for 1952 Clue #16. Examine the back wall to begin a QTE with some options: choose to climb (![]() ,
, ![]() ) or leap (
) or leap (![]() ,
, ![]() ). If you chose to climb, you'll have an extra option: reach (
). If you chose to climb, you'll have an extra option: reach (![]() ,
, ![]() ,
, ![]() ), which will take you straight to the ladder, or make a leap (
), which will take you straight to the ladder, or make a leap (![]() ). Finally, choose to climb to the ladder (
). Finally, choose to climb to the ladder (![]() ,
, ![]() ,
, ![]() ) or jump to the ladder (
) or jump to the ladder (![]() ,
, ![]() ). Climb up the ladder and follow the path back to the elevator area. Emily's phone will die along the way but the torch that she left behind is only a short walk past that. Pick up the torch, then flip on the power to get the elevator working.
). Climb up the ladder and follow the path back to the elevator area. Emily's phone will die along the way but the torch that she left behind is only a short walk past that. Pick up the torch, then flip on the power to get the elevator working.
Head down the stairs. At the end of the path, by some barrels, is Danger Totem #3. Head through the makeshift doorway to the right of the barrels and follow the path into an open area. Following a scene, pick up all twins clues in this area; if you've picked up all previous twins clues, you'll earn yourself another gold trophy. Start by heading toward the screen, where you should see some barrels. Atop one of these barrels is Twins Clue #17, a photo of Hannah. Across from these barrels, away from the camera, is a wooden deck where you can pick up Twins Clue #13, Hannah's glasses. To the left of this deck area are some wooden boards leaning against the rock wall; push them aside for Twins Clue #15. Past this, in an alcove to the right, is Twins Clue #16, a broken wooden cross. Now follow the path left, past the crooked gate, to find a locket on a barrel. Turn it over to get it to pop open, revealing Twins Clue #14. Return to the crooked gate and move past it. Head toward the camera and examine the horrific display for the final clue, Twins Clue #18.
-
At the bottom of the long staircase from the torch and power is a totem.
-
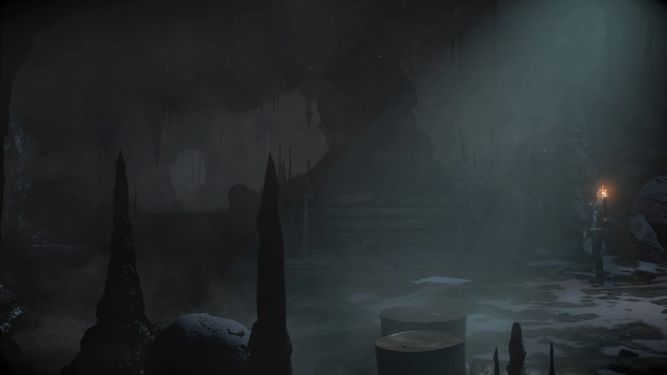
This open area is where you'll find some of the game's remaining twins clues; on the foreground is a photo and on the background is a pair of glasses.


Follow the only path forward and unlock the door to make it back to the elevator area. You can now use the elevator to head up, though be warned: this triggers an action sequence. To successfully clear this encounter and gain access to a missable 1952 clue, do the following:
- Don't move.
- Press
 and again to leap over some gaps in the scaffolding.
 - Aim with
 and drop the torch with
  onto the pool of oil.
 - Choose to hide.
The story will then move back to the mansion, where the psychopath reveals himself.
Chris[edit]
After the scene, you'll be presented with some conversation choices. Choose to scold rather than dismiss to improve your relationship with both Mike and Josh. Choose to be skeptical to improve your relationship with Josh. For the following choice, while being defensive has no effect, choosing to be aggressive will worsen your relationship with Josh. Finally, choose to disarm Mike in order to improve your relationship with Josh; choosing to knock Josh out instead will worsen your relationship with both Mike and Josh.
Now that you know the identity of the psychopath, there will be no more sessions with Dr. Hill, so the story will continue straight into the next chapter.