Emily[edit]
This chapter starts differently depending on whether you chose to hide from the stranger or turn back toward him in the previous chapter. If you chose to hide, as was recommended, you'll be able to obtain a missable clue after Emily slides down a slope in an effort to avoid the stranger. Set off the flare, then walk forward. You should spot a man-made room to the right; enter to find a postcard that you can pick up and turn over for 1952 Clue #17. Now continue forward, along the path to the left. Drop down further into the mines' depths, then walk along the path. Fortune Totem #4 lays inside the wooden deck to the right.
-
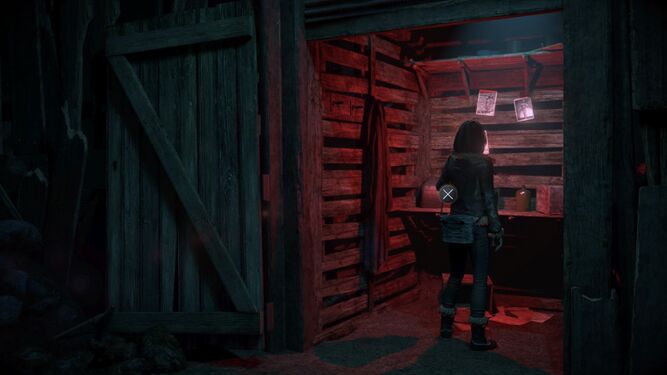
After the opening scene, you'll be able to pick up a postcard off to the side.
-
This totem can be spotted in a nook directly to the right of the main path.


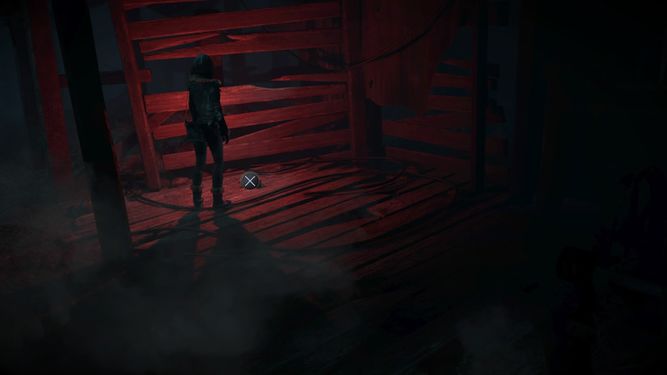
Continue forward until you come across a dead end, save for a narrow crevice. Enter the gap and shimmy through to trigger a QTE sequence. Do the following in order to stay alive:
- Press
 to dodge a hand, to jump over a gap in the scaffolding, and
  to pick up the dropped flare.
 - Choose to go left. Choosing to go right will lead to the same outcome, so despite the choice, the left is the only option here.
- Press
 and
and  to activate the elevator.
 - Press ,
 , and to escape the creature.
 - Choose to stay on the conveyor belt. When you get to the end, press to leap over the gap.
With the chase sequence over, the following scene is dependent on whether or not you gave Matt the flare gun in the sixth chapter. Start by pressing ![]() to lock the door. If Emily does have the flare gun, she'll be able to defend herself against the creature, but if she doesn't, she'll be bitten by the creature. Still, she'll survive, so her fate is dependent on an upcoming butterfly effect. Either way, press
to lock the door. If Emily does have the flare gun, she'll be able to defend herself against the creature, but if she doesn't, she'll be bitten by the creature. Still, she'll survive, so her fate is dependent on an upcoming butterfly effect. Either way, press ![]() ,
, ![]() , and
, and ![]() to hop onto the zipline and conclude the QTE segment.
to hop onto the zipline and conclude the QTE segment.
Chris[edit]

The conversation choices here have no effect, so choose to say whatever you want in order to reach the same conclusion. If Emily found all of the twins clues, she'll inform the group about them. After the scene, choose to cover the door or demand Mike give you his pistol; either way, open the door for some exposition. Following this long scene, Chris decides to follow the man outside in order to save Josh. There aren't any clues or totems here, so just follow him along the path until the Wendigos arrive. Just this once, failing or succeeding the "don't move" prompt leads to the same outcome; shoot the Wendigo to begin another chase sequence.
- Press to duck under a branch, then shoot the Wendigo again.
- Shoot another Wendigo that lunges at you, then either the Wendigo or the gas tank to blow it away with an explosion.
If you chose not to shoot Ashley in the sixth chapter, she'll let Chris in. If not, this is where he meets his end. Either way, the group retreats to the basement.
Mike[edit]
If Emily's been bitten by the Wendigo, you'll be presented with a butterfly effect decision: shoot Emily in order to protect the group or wait the target out if you'd rather not kill an ally. In a short while, the group discovers that a bite from a Wendigo isn't actually dangerous, so to avoid regret, choosing not to shoot Emily is probably the best way to go. If you're on a trophy hunt, keep in mind that choosing to shoot Emily will earn you a bronze trophy as well as choosing not to; to earn both trophies, you'll have to go both routes eventually.
Ashley[edit]
After the scene, Ashley will end up with an informative book in her hands. Before you flip any pages forward, use ![]() to flip back a page. This earns you 1952 Clue #18, the journal's introduction. Now flip through the subsequent pages for 1952 Clue #19, 1952 Clue #20, 1952 Clue #21, and 1952 Clue #22. Choosing to reveal the truth about the bites to the group will earn you some relationship points with Sam and a slap from Emily.
to flip back a page. This earns you 1952 Clue #18, the journal's introduction. Now flip through the subsequent pages for 1952 Clue #19, 1952 Clue #20, 1952 Clue #21, and 1952 Clue #22. Choosing to reveal the truth about the bites to the group will earn you some relationship points with Sam and a slap from Emily.
You can now move on to the penultimate chapter. Only a couple of hours until dawn!