Warcraft III: Reign of Chaos/The Defense of Strahnbrad
Chapter Introduction[edit]
Recent orc uprisings in southern Lordaeron have forced the Alliance to take decisive measures. To contain the Orcish threat, King Terenas has sent two of the realm's greatest paladins – his son, Prince Arthas, and the legendary Uther the Lightbringer – to deal with the orcs once and for all.
Mission Objectives[edit]
- Main Quest - Defend Strahnbrad
- Travel to Strahnbrad
- Arthas must survive
- Main Quest - Kill Slavemaster
- Defeat the Slavemaster
- Optional Quest - Save Timmy
- Slay the Gnoll kidnappers
- Reward
- Ring of Protection +1
- Optional Quest - Bandit Lord
- Slay Menag, the Bandit Lord
- Return Ledger to Gerard
- Reward
- Tome of Strength (Strength +1)
Strategy[edit]
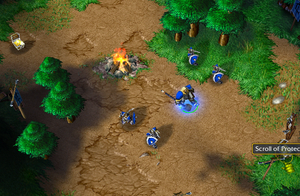
You start in the northwest corner of the map, with Prince Arthas and four Footmen. Group them into a party. Click A and target the crates to destroy them. Your efforts here will yield two easy items - a Potion of Healing and a Scroll of Protection.
The Potion will prove useful in the event Arthas takes significant damage, as only Arthas' natural hit point regeneration will play a factor in this mission.
Keep heading south. When the main path turns to the east, keep moving south over the grass and through the farm area. Head south about as far as you can, and to the west, standing to the south of two houses, are two villagers who will fight for you. They turn into Footmen, and you can add them to your party.
Continue south until you reach the map's southern border. Here you'll obtain the first of two Optional Quests in this mission.
Rescue Timmy[edit]
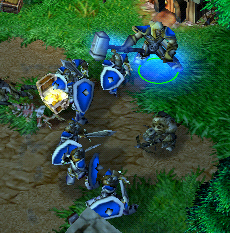
Head east, and you'll run into Alicia, a schoolteacher in charge of some children. She'll enlist your help in rescuing Timmy, who was kidnapped by some Gnolls. From the schoolhouse, head northeast and follow the path to the southeast, and the path will end at a Gnoll camp, populated by a pair of Gnolls and a Gnoll Poacher. None of these targets is a significant threat - especially if you recruited the two villagers earlier to increase your firepower.
Expect the Gnolls to target one of your Footmen at a time. The trick here is to select all your units and watch their health bars - when one starts to get low, click on Arthas' Holy Light spell and click on the injured Footman's portrait to heal him.
Try also to focus your damage on one Gnoll at a time - since a heavily damaged Gnoll causes the same amount of damage as a completely healthy one, it is better to have a single full-health Gnoll than two at half health. Focused attacks in tandem with judicious use of Holy Light will easily win this battle.
One of the Gnolls will drop a Potion of Healing (which can be handy, since Arthas can't heal himself with Holy Light). When all of the Gnolls fall, Timmy will be freed and you'll have accomplished the first Optional Quest. Better yet, you'll receive a Ring of Protection +1 from Alicia as a thank-you.
It's a Trap![edit]
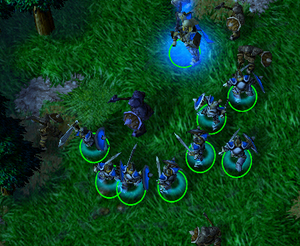
Return to the main path, where you veered off originally. A little further to the east is a forest path to the north. A villager, Benedict, is here and seems to want your attention. However, when you approach him, you are ambushed by four Bandits. Benedict himself turns out to be their leader. This group is tougher than the Gnolls due to increased enemy numbers and Benedict, but the experience Arthas gains here will benefit him later. Use Holy Light to keep your troops alive as mentioned previously.
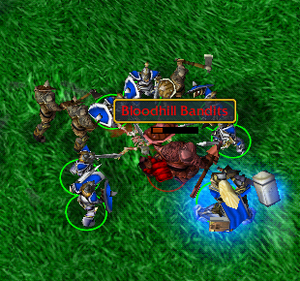
Whether you take on the ambush or not, head east along the main path and you'll find Gerard being mugged by four Bandits as well as Menag, the Bandit Lord. They may fight you for a short time, but will soon retreat to their hideout to the southeast. Gerard implores you to return his Ledger to him. You should, because you'll gain a nice reward.
Follow the trail of Menag and the Bandits to the southeast, and you cross a stream. In this area are three Bandits, guarding the passage to Menag's camp. They will be relatively easy to take out, just use the focus attack and Holy Light approach and you'll be fine. On hard difficulty, there's also a Brigand here.
You should've leveled up by now, and you can choose Divine Shield or Devotion Aura. Divine Shield is really useful, especially when at Level 3, so it is recommended that you choose Divine Shield.
Continue along southeast, and you'll arrive at the camp. Menag is here, along with the four Bandits that were mugging Gerard. On hard difficulty, there's also two Brigands here. Gang up on Menag, keeping an eye on your troops' health. Menag can take a beating but you shouldn't have lost any men yet so you'll eventually overpower the Bandits. Menag will drop the Ledger, which you need to pick up to return to Gerard. One of the Bandits will drop a Potion of Mana.
Once the Bandits are cleared out, you can return northwest to Gerard, who will replace the Ledger with a Tome of Strength. The Tome is automatically used.
Strahnbrad[edit]
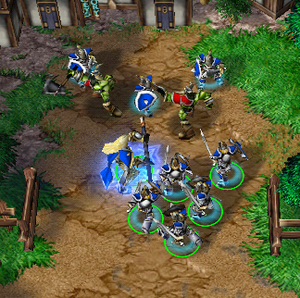
Cross the bridge to the northeast, and you'll be at the gates of Strahnbrad. You'll find the entire city is already under attack, and a pair of Grunts are at the gates attacking a villager. Grunts have a lot of health and can hit rather hard, but your numbers and Holy Light will allow you to prevail against them.

Proceed north to find the Slave Master trampling some villagers. You could chase him down and kill him to end the level, but those looking for the secrets should avoid the objective for now and look elsewhere. For now, eliminate the Grunt and the Raider that attack you.
Head west, and there will be three Footmen waiting to join you, but under attack from two Grunts. One will be taking the worst of the attack, so make sure you can Holy Light him as you come to their aid.
Once they are added to your party, head east, and travel north on the east side of the fountain square, and keep heading north. There will be two more Grunts here. Once these are slain, crack open the crates in the area; one of them will contain a Potion of Mana.
The last battle of the level is in the northwest corner of the town. You have the toughest Orcs to take on, but with the same tactics you'll be able to defeat them with minimum casualties. There are two Grunts and the Slave Master, who is a formidable foe. Fortunately, they are outnumbered and the same old tactic of focusing on one at a time will bring them down with little to no casualties on your side. Aim for the Slave Master first; he does the most damage and once he's out of the way the remaining Grunts are just pests. Defeat all of these Orcs and the level is won.
Treasures[edit]
- There is a Potion of Healing hidden in one of the crates at the starting position. It is next to the Tents on the south-west.
- There is a Scroll of Protection hidden in another crate near the starting position, near the Tent to the south. It is next to a wooden stand.
- One of the Gnolls that has kidnapped Timmy carries a Potion of Healing.
- Freeing Timmy yields a Ring of Protection +1.
- The Bandit ambush north of the main path will yield a Scroll of Healing.
- One of Menag's Bandits will drop a Potion of Mana.
- Returning Gerard's Ledger will grant you a Tome of Strength. This is automatically used.
- There is a Potion of Mana hidden in some crates in the northeast corner of Strahnbrad.
Points of Interest[edit]
- There's a cemetery south-east of Strahnbrad. At night you'll see apparitions of the recently departed.